Chenonetta Creations

Find Me On...

  • deviantArt
  • Twitter
  • Mastodon
  • Instagram
  • Facebook
  • Bluesky
  • Home
  • About
  • Selected Works
  • Shop

Crafts

Template – Box with tearaway strip

Posted on August 31, 2025 Leave a Comment

If you enjoy these box templates, please considering leaving me a tip! I have set up a tip jar on my Patreon which you can access here.

Today’s post is a sort of follow up to the previous double-walled box template. I wanted to design a box to replace the packaging for the bags that I’d previously sold at events.

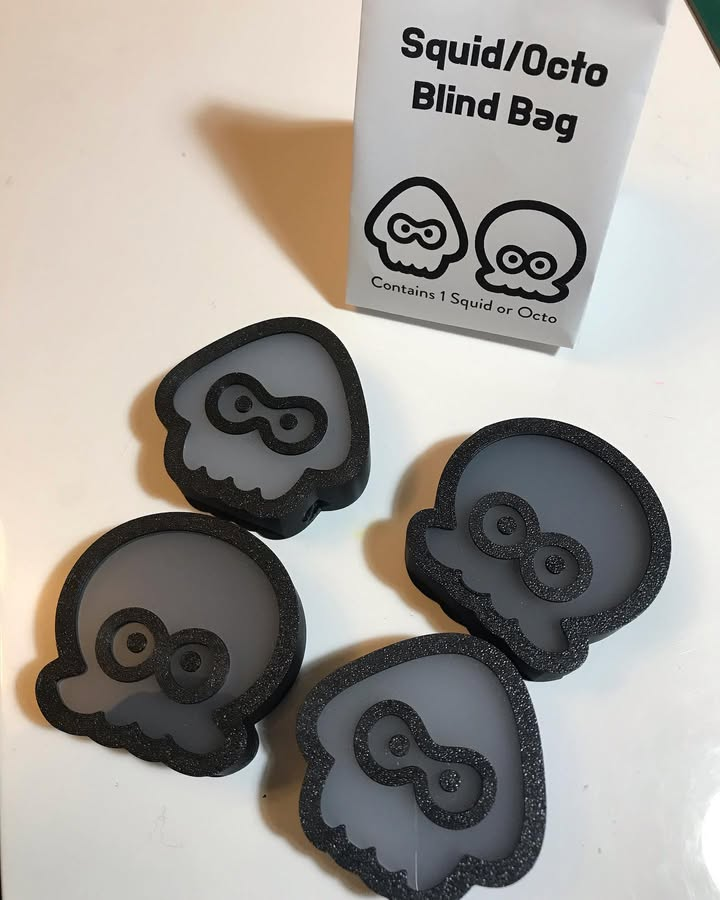
These were really great as a last-minute packaging – they can be quickly and easily folded from an A4 piece of paper and fit my little squids and octos perfectly. However, for series 2 of the blind boxes I wanted to create packaging that could be stacked for transit and have a bit less of (the perfectly truthful) “last-minute” appearance.

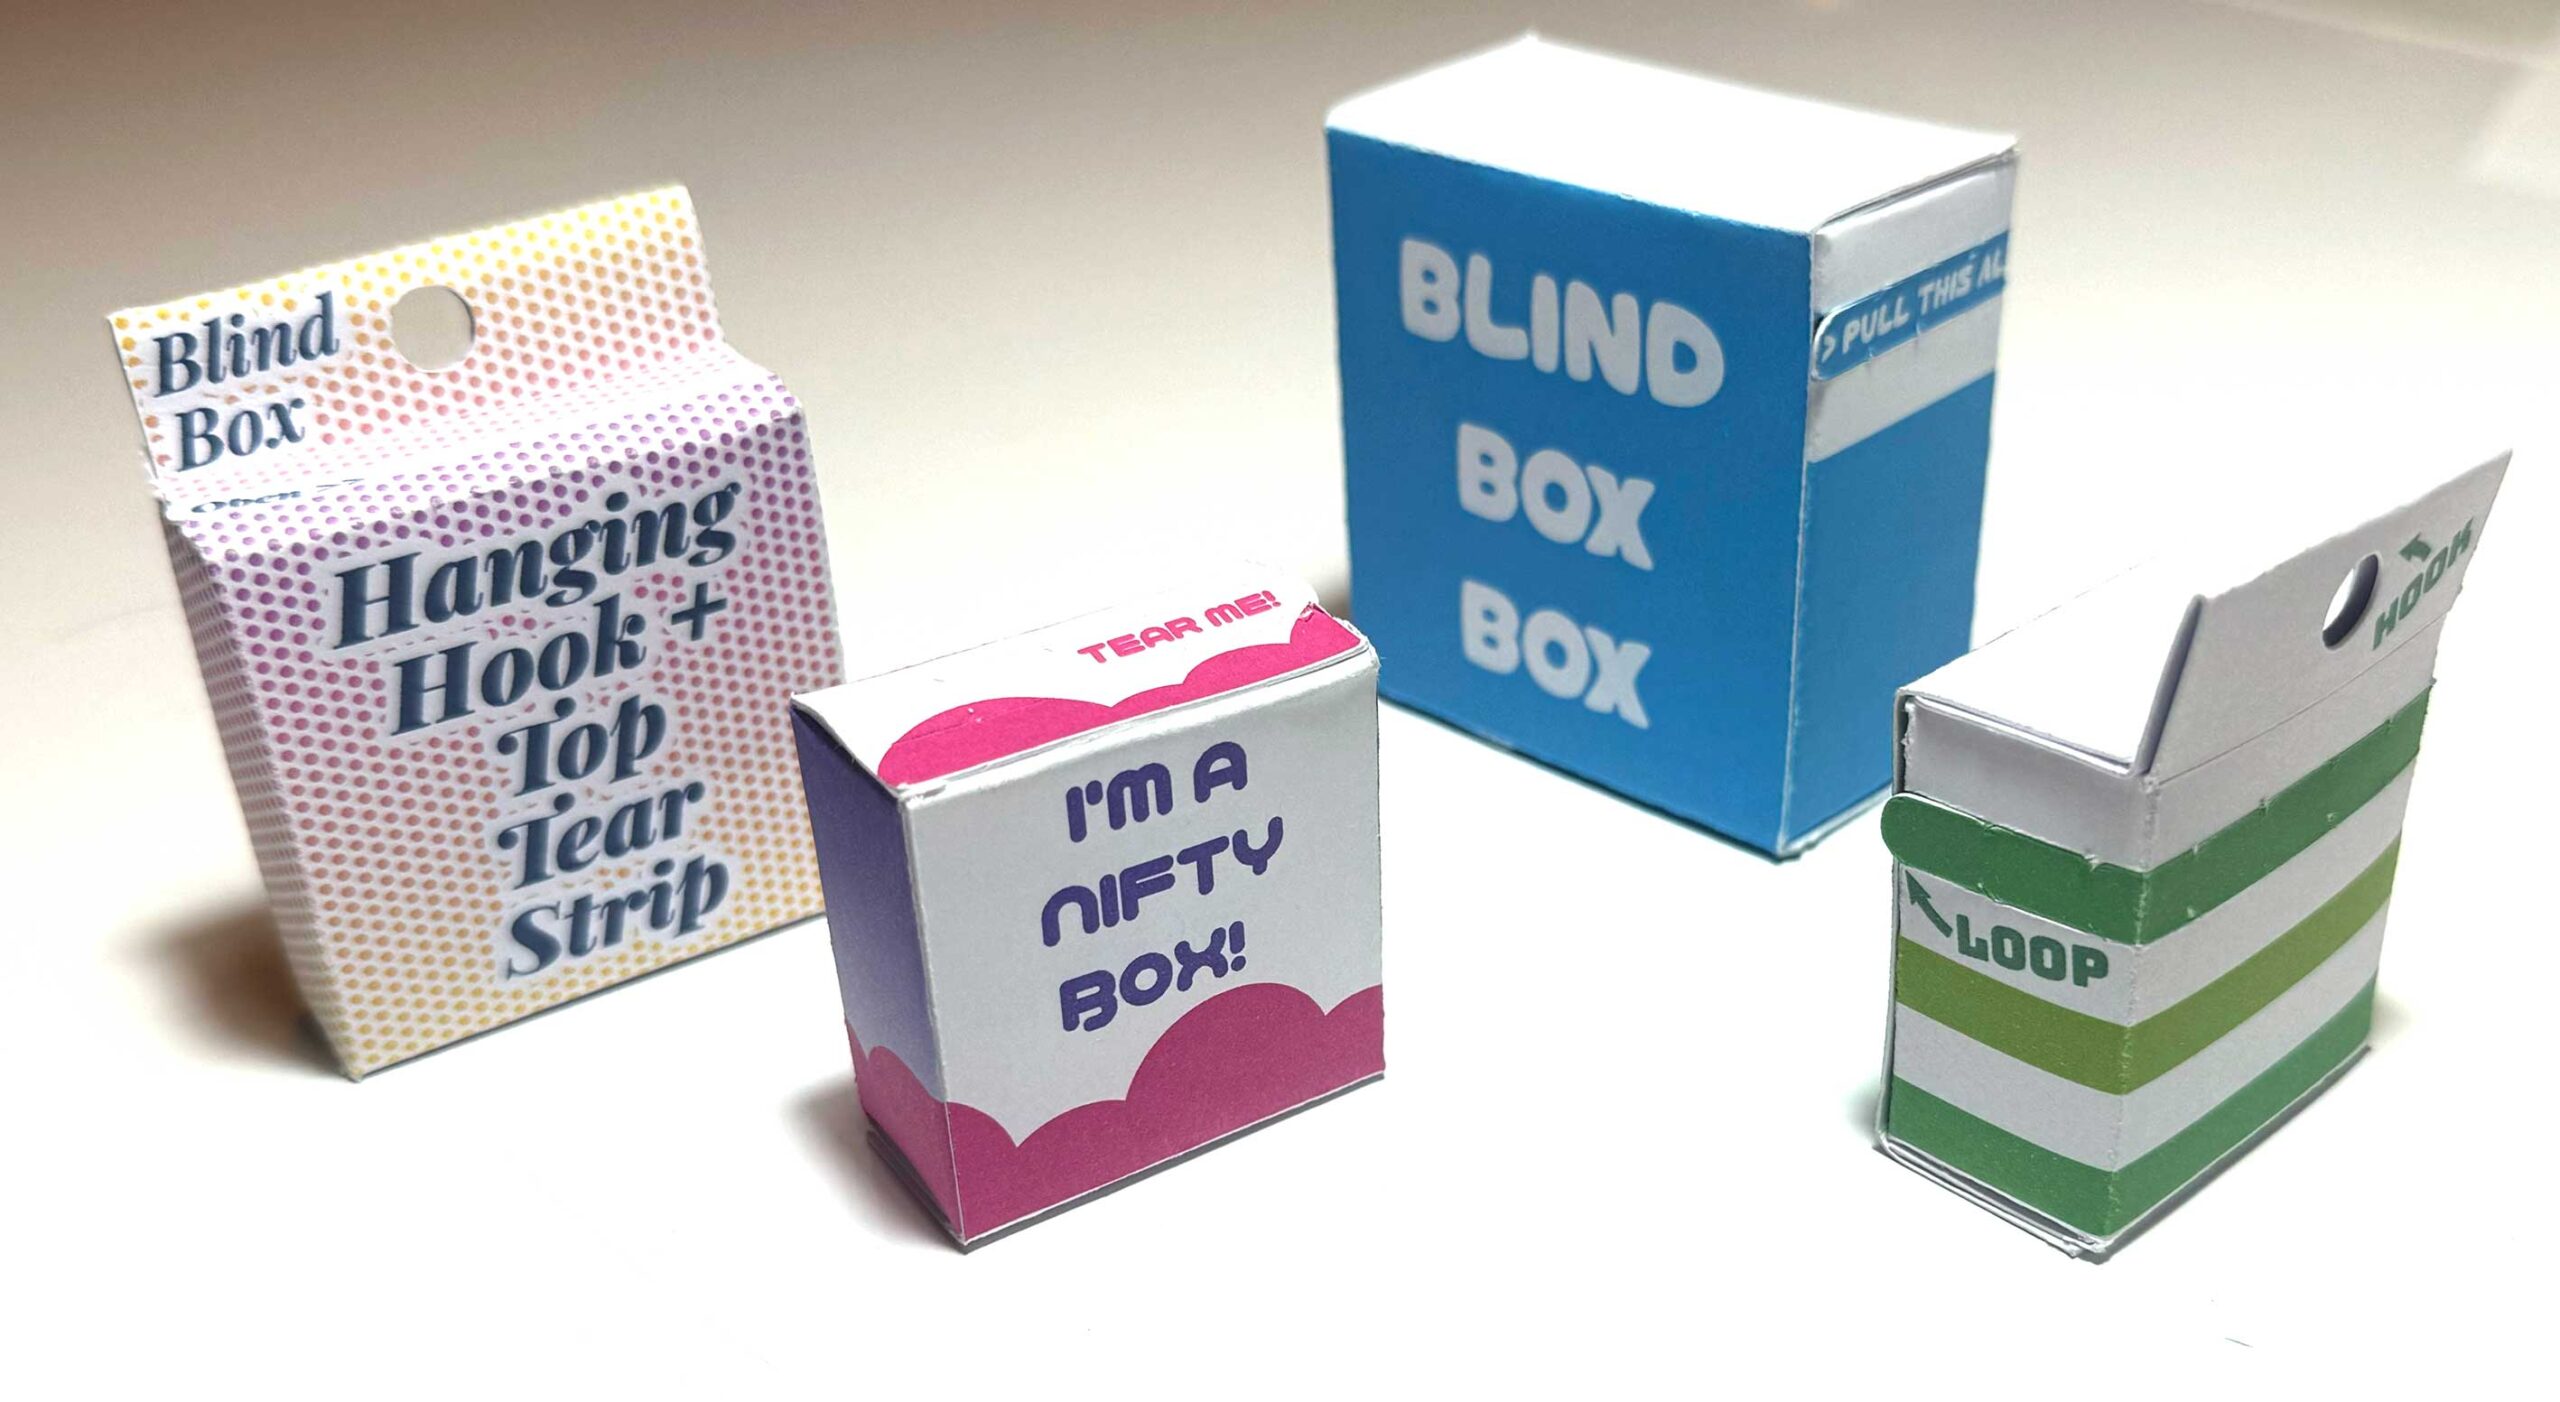
I settled on the idea of a box with a fun tear strip!

Template File

The templates are available via OnShape – you don’t need an OnShape account to view or export the files, but creating an account will allow you to modify my files and update the parameters to your liking.

OnShape is a parametric design tool, and the files are designed so that almost all of the features can be controlled via “variables”.

If you don’t want to use OnShape, you can support me with a one-off purchase on Patreon to get pre-prepared template files. I’ll continue adding files to that page as I receive requests for various sizes.
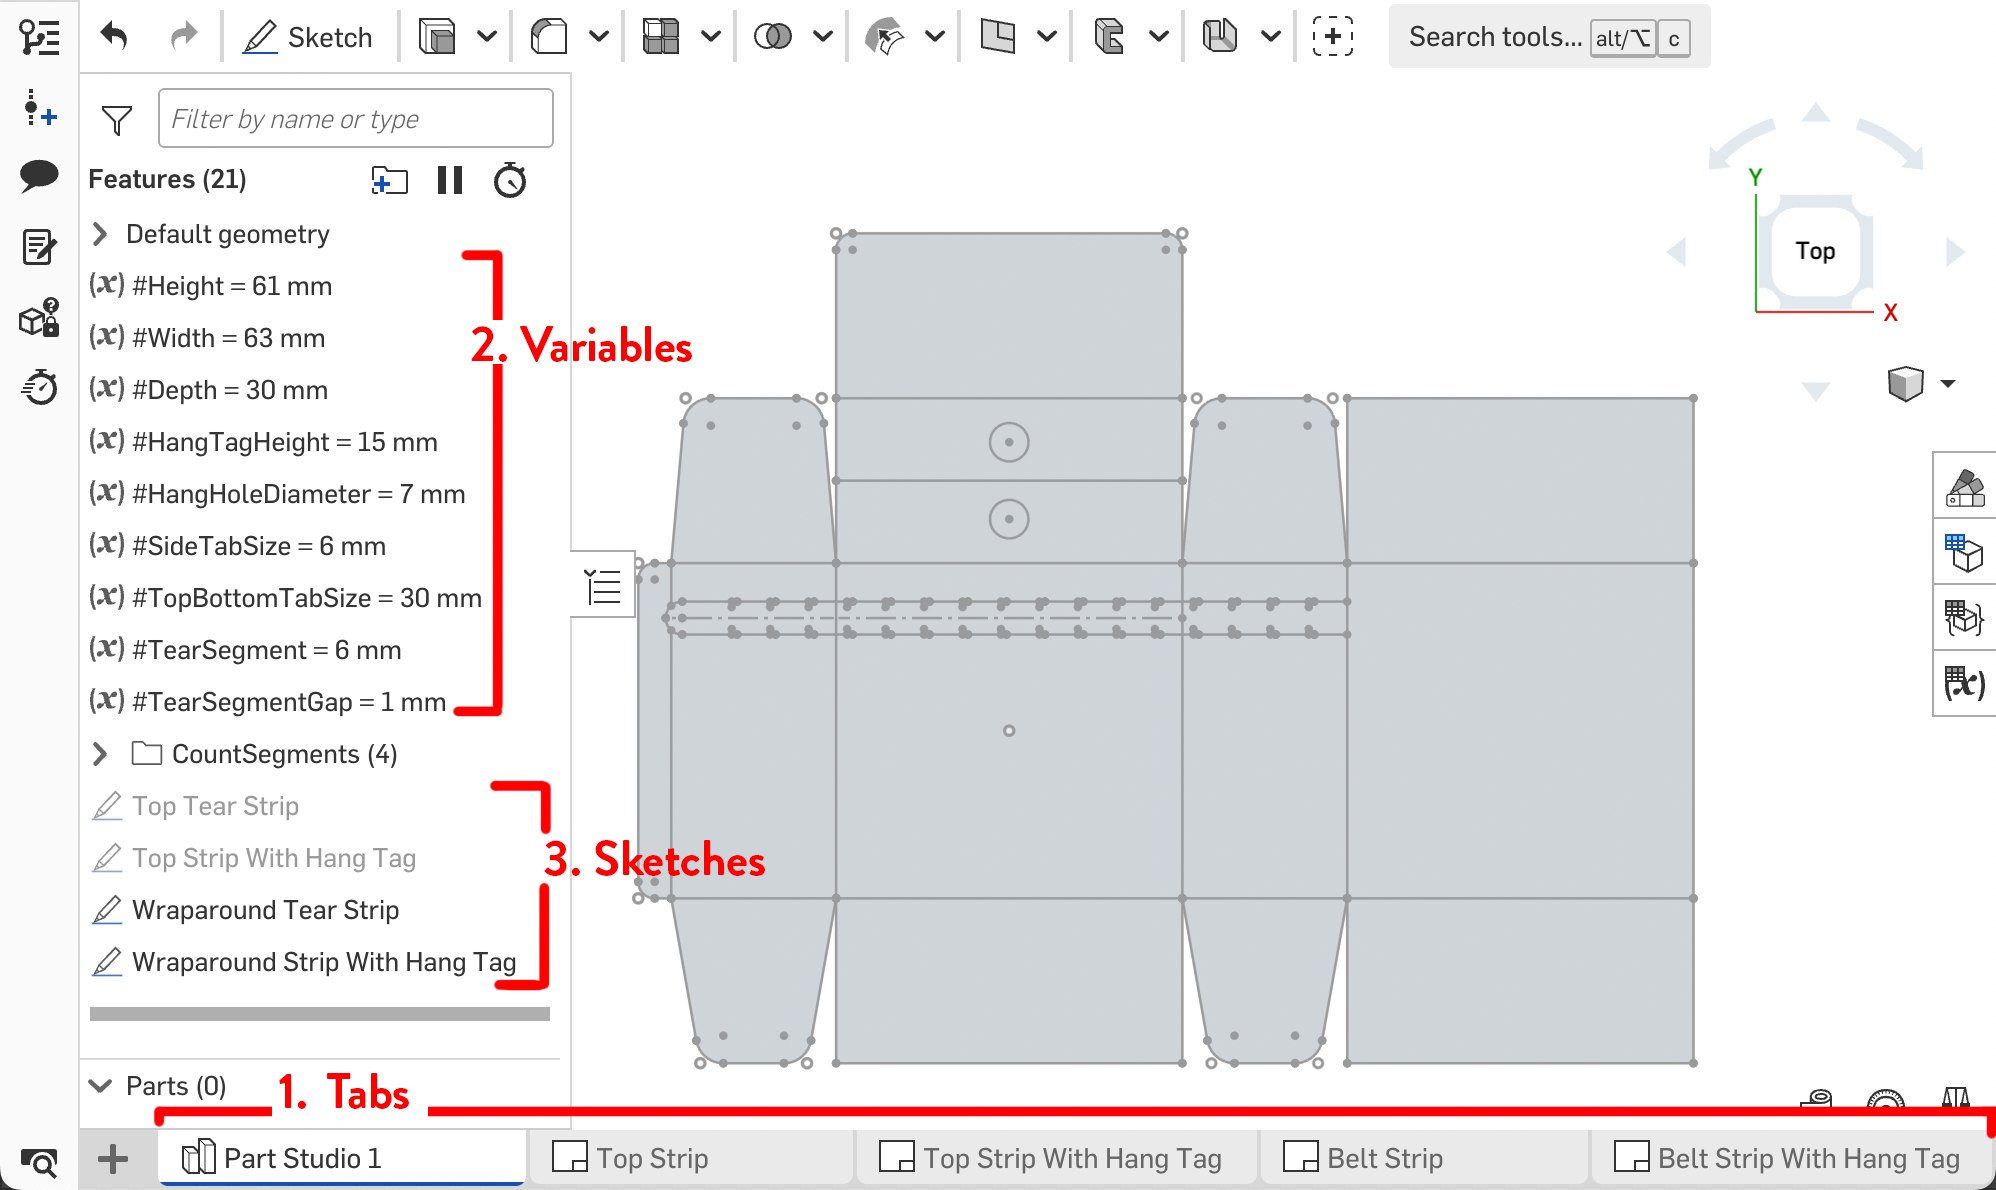
Navigating OnShape

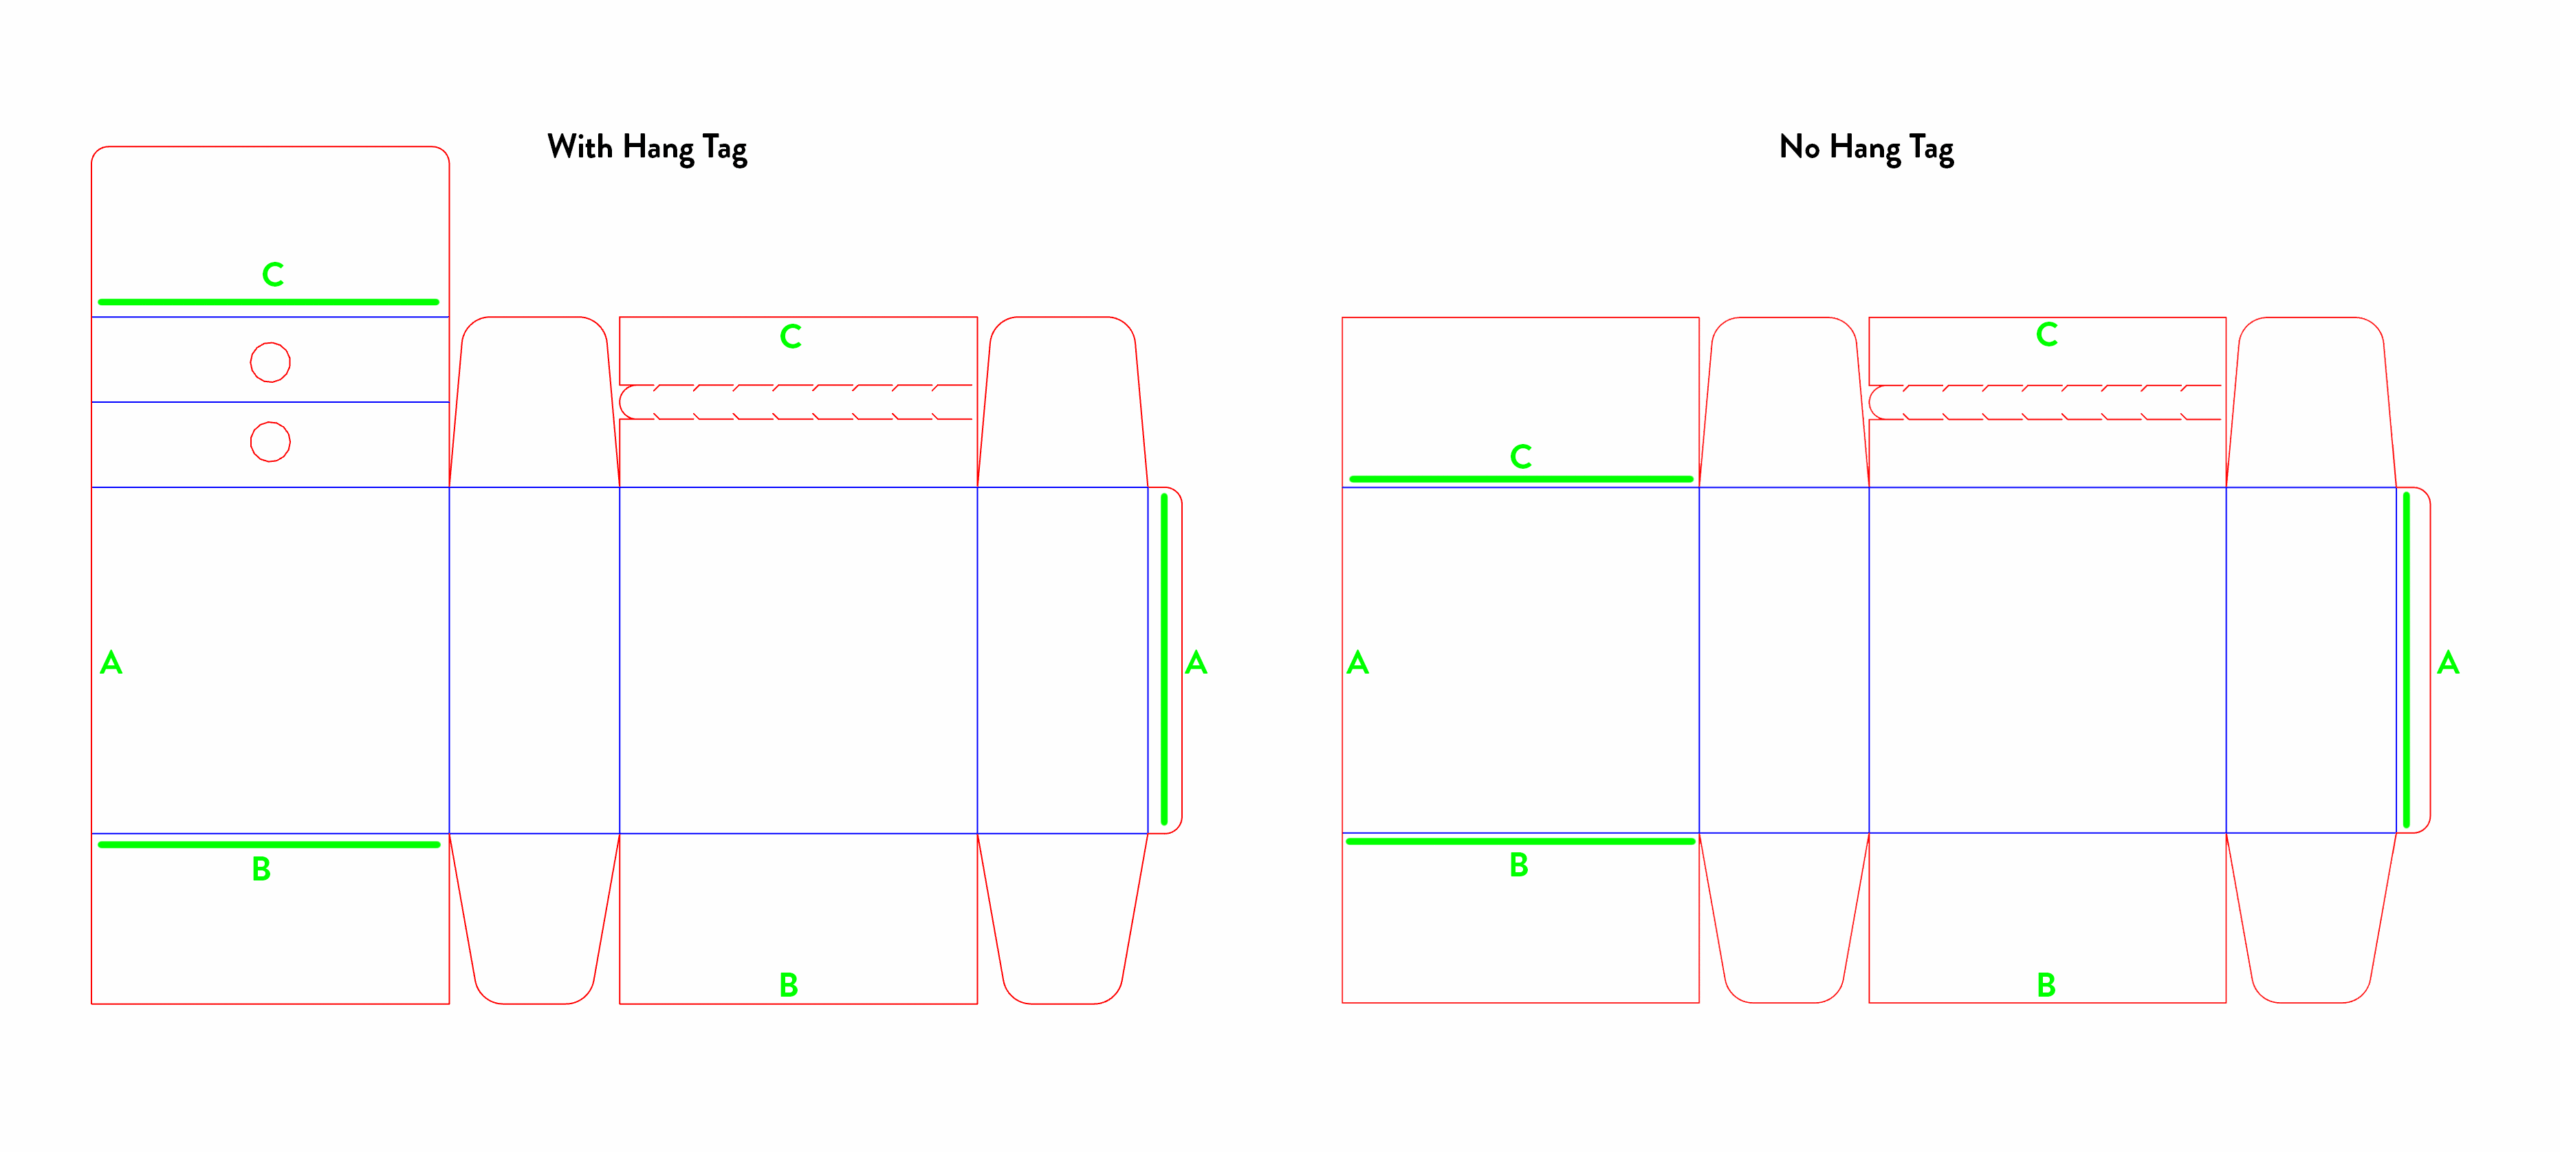
  1. Tabs – these allow you to change views between the design area and the exportable drawings. There are four drawings with variations of the tear strip location and whether or not the box includes an extra flap that can be used for hanging from a display hook.
  2. Variables – visible in the “Part Studio” tab. These control the dimensions of the box and its features.
  3. Sketches – these are the “working” versions of the drawings.

How to Export

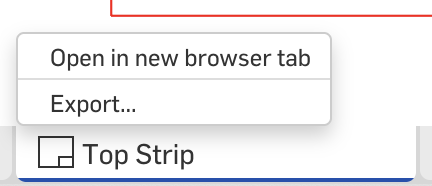
To export a template, select the tab corresponding to the box that you want to make. Right click on the tab and select “Export…”

An option dialog will pop up. Select the file type you want. I’ve tested SVG exports for use with my Cricut. This export option preserves the line colours that I’ve denoted – red for cuts and blue for scoring.

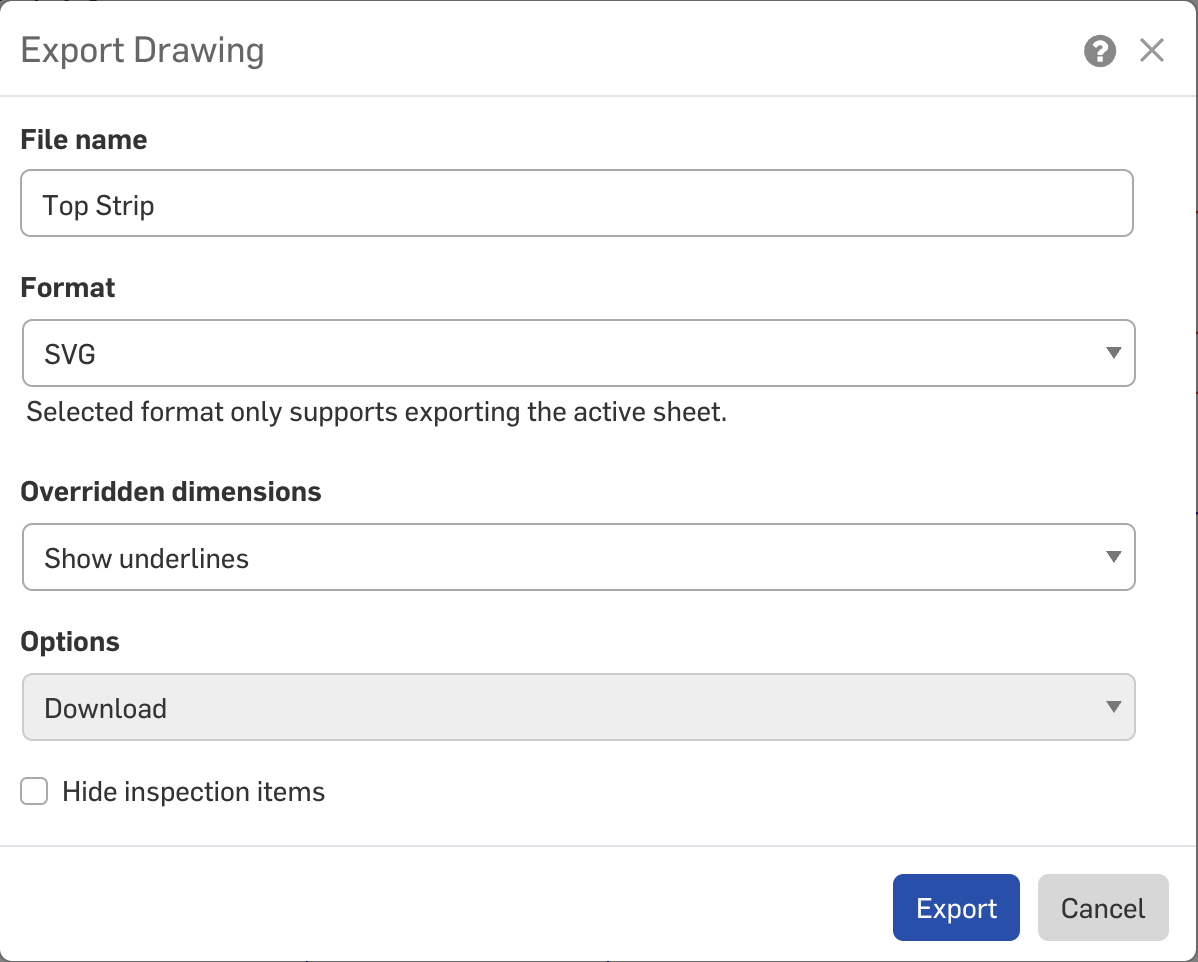
Clicking the Export option will trigger a download – it may take a little while for the file to be ready so be a bit patient if it doesn’t appear in your download folder immediately.

Post-Export Tips

I like to do some minor modifications to the SVG after it’s exported to better adapt it for cutting. These steps are optional but you may find the notes here useful.

Firstly, I like to join the red cutlines. OnShape exports every edge as a separate path, and for many of the paths it’s desirable to connect them.

I start by selecting all the red lines and running the very useful “Join Reasonably” script by Hiroyuki Sato.

You may prefer to do some strategic cuts to the lines again at the sharpest angles – these are areas where the dragging of the cutting machine blade could tear the paper. Breaking the cutline will allow the machine to lift the blade between cuts.

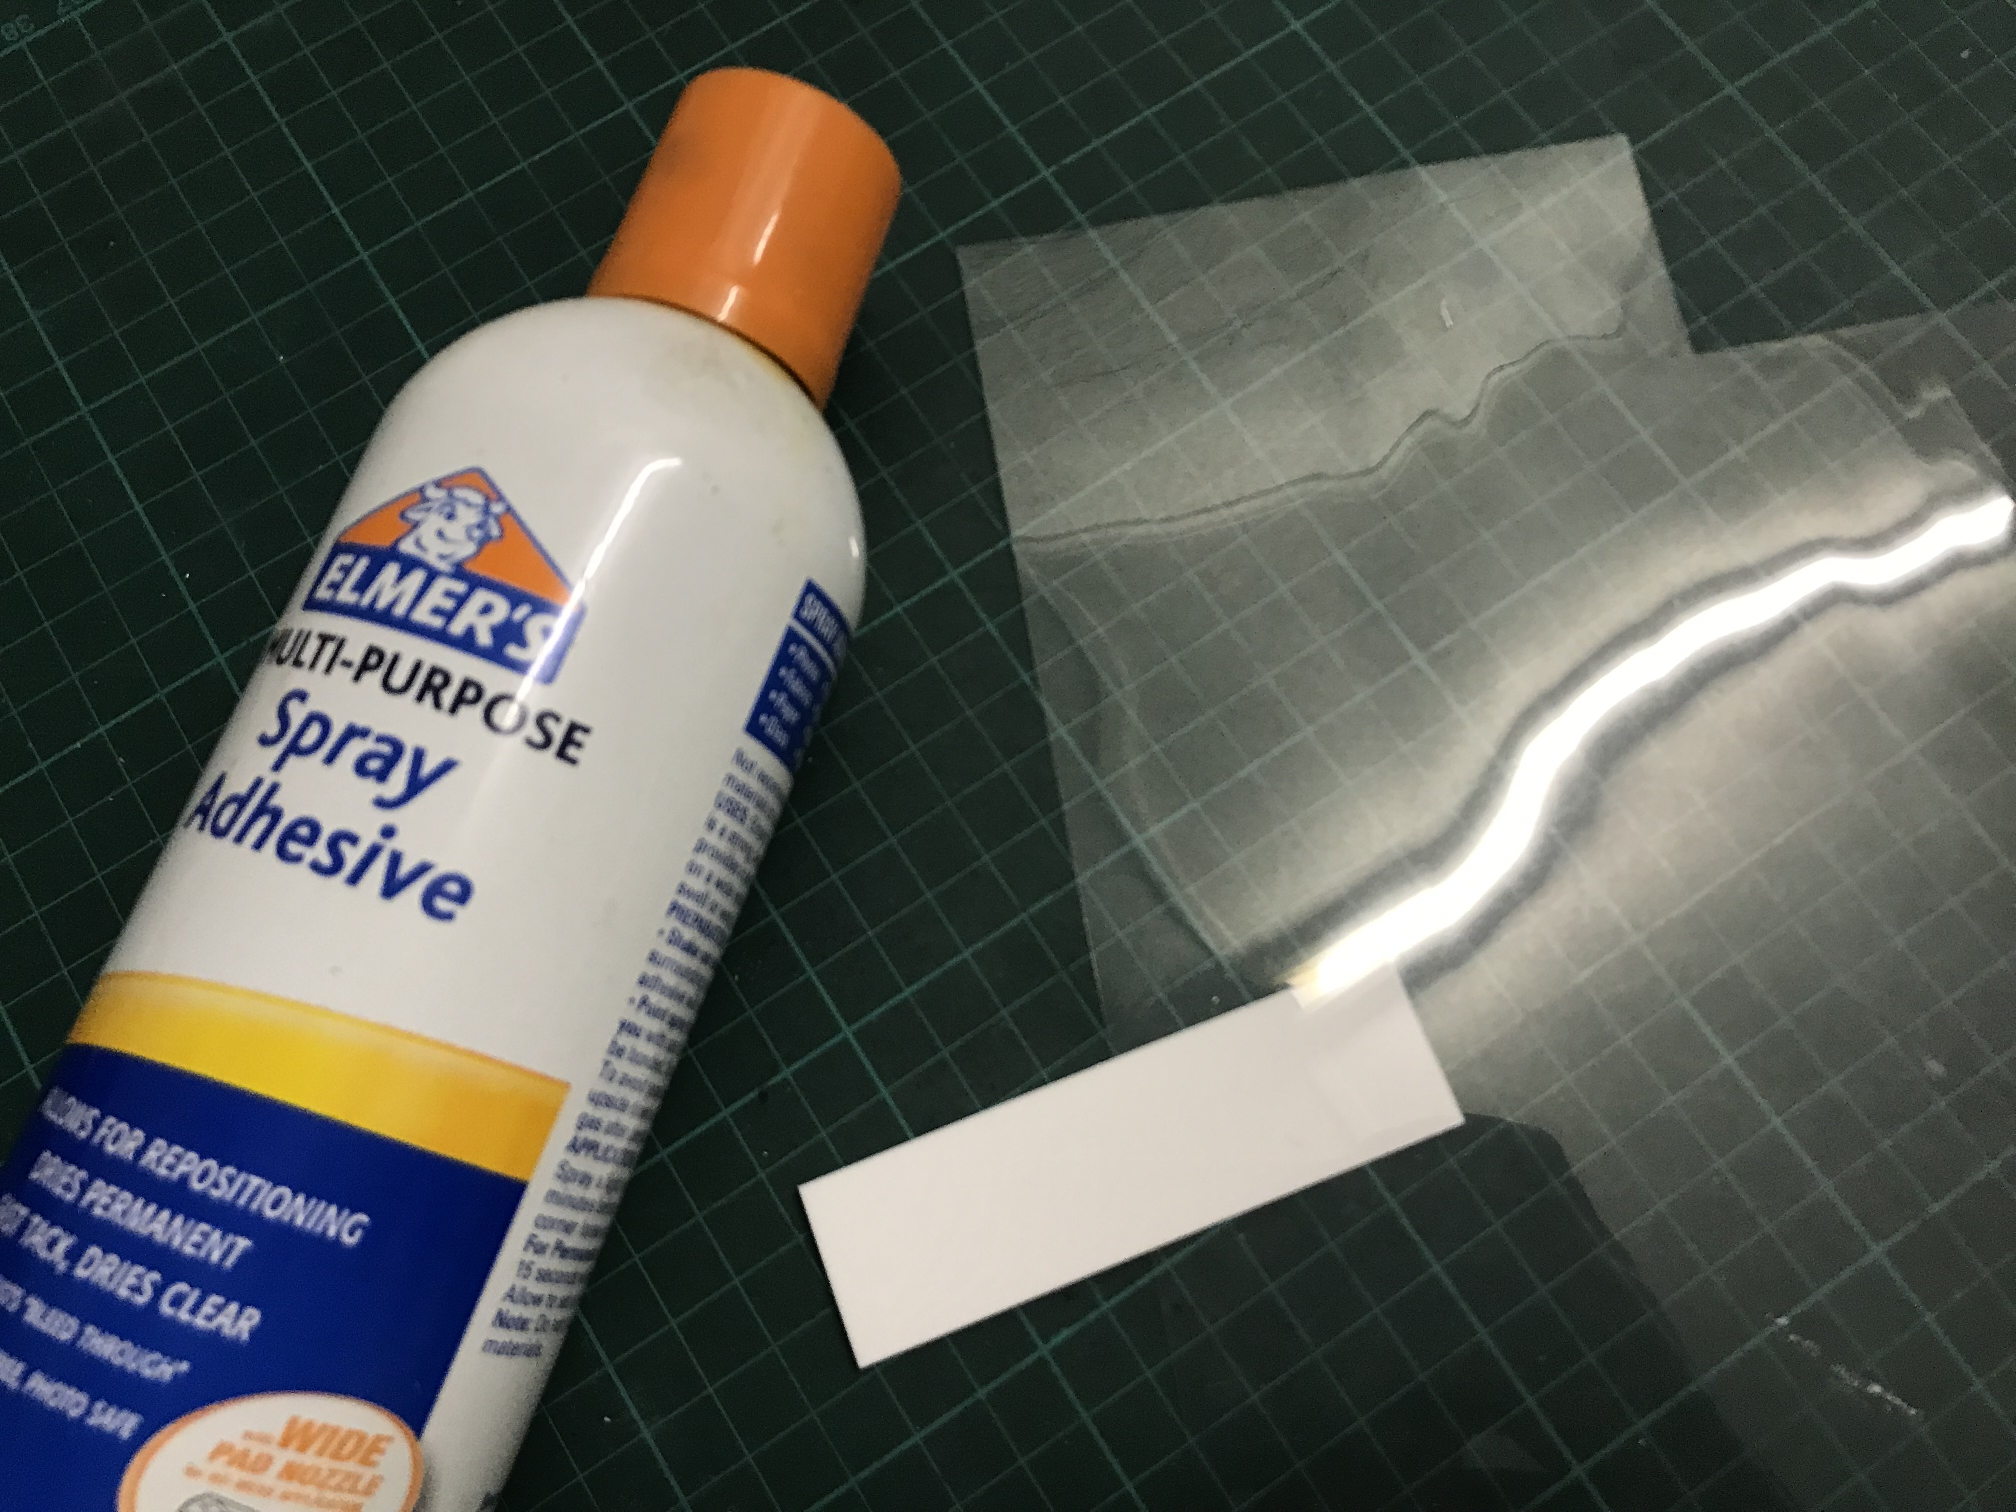
Additionally, I find that the file may need to be grouped to make handling easier. I select all the red lines and add them to a group and all the blue lines and put them in their own group. Then I group the groups together so that the relative positions are maintained; without this step Design Space sometimes misaligns the elements.

When imported into Cricut Design Space, I can then easily select the group for the score lines and mark the machine operation as Score.

Assembly

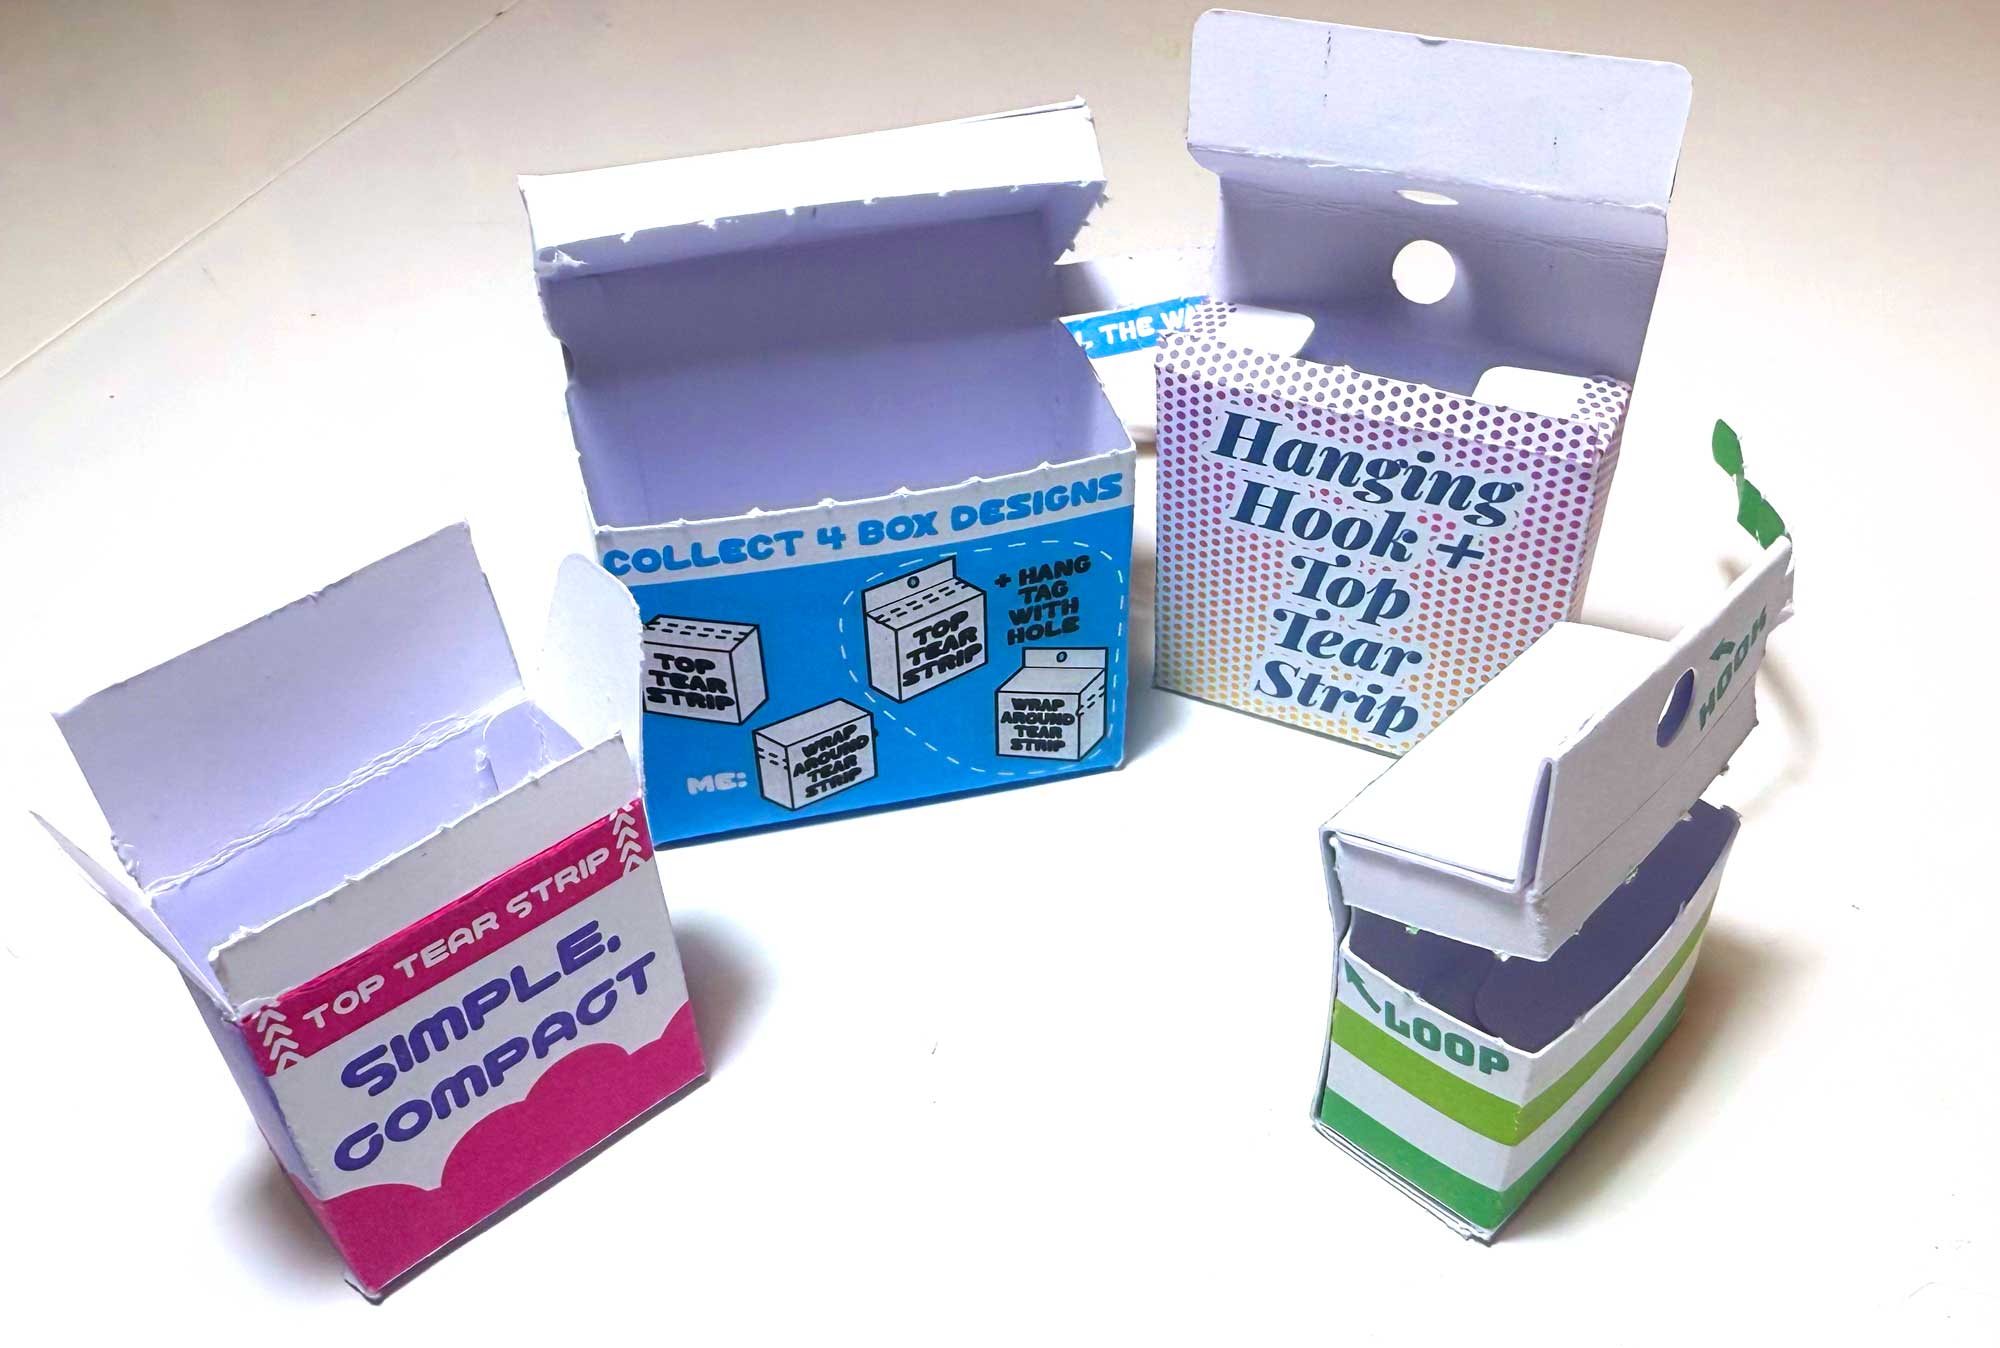
All of the fold marks are marked in blue. All of the folds are done in the same direction except for the C line on the “With Hang Tag” template.

You will need to use glue or double sided tape in three spots to hold the box together. I like to start with gluing on the side tab before the top and bottom.

Customising the template

You will need an OnShape account to copy the file and make your own modifications

Once you have done so, you can modify the variable values to automatically update the box.

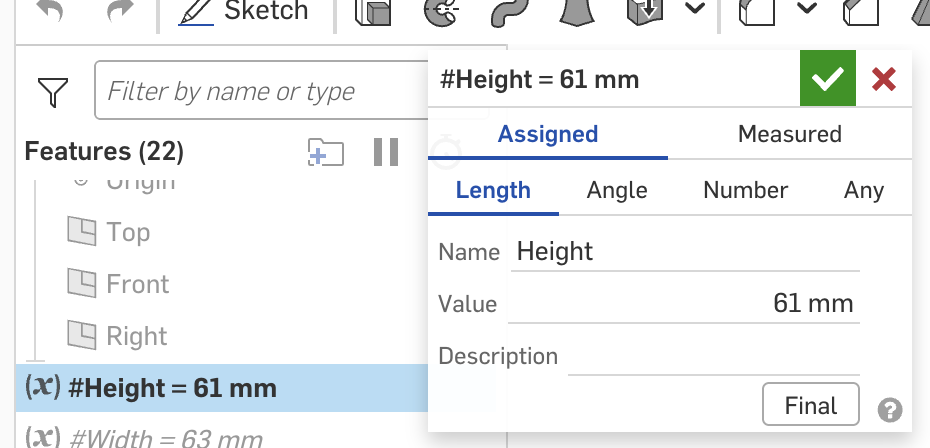
Double click the variable to open a dialog. Change the “value” to your desired value and then the green tick button. All the sketches will automatically update.

Although the sketches have updated, the drawings do not update immediately.

You need to open the tab for the template that you want to use and click the yellow update button. Then you can export the file and your updated template.

Variables

Box dimensions:

  • Height
  • Width
  • Depth

Flaps (the side flaps are the “wings” at the top and bottom of the box):

  • FlapSize – by default this automatically calculates to be about half of the box width, plus a little gap
  • FlapAngle

Hang tag: (optional, used only for the “With Hang Tag” templates)

  • HangTagHeight
  • HangHoleSpacing – the gap between the top of the hang tag and the hole
  • HangHoleDiameter

Assembly tabs:

  • SideTabSize – the width of the tab that runs vertically up the box
  • TopBottomTabSize – the depth of the flaps that fold on the top and bottom of the box to support the outermost flap. This has been set to use #Depth, but it doesn’t need the full depth (make it smaller if you need to save space when fitting multiple boxes on a page)

Tear strip:

  • TearStripWidth – width of the tear strip
  • TearSegment – length of the perforation
  • TearSegmentGap – gap size between perforations
  • TearStripBeltGap – distance from the top of the box to the top of the tear strip (belt style tear strips only)

If you enjoyed this post and found it useful, please consider leaving me a tip. Thank you!

Posted in: Crafts | Tagged: box, convention prep, papercraft

Double-Walled Frame Box

Posted on July 14, 2025 Leave a Comment

I’ve been using these boxes from AliExpress to package some of my items but I wanted to have a go at making a version of the boxes for myself so that I could more freely customise them.

Having my own files means that I can change the box dimensions and can design prints to go directly onto the box.

There’s a great website – https://www.templatemaker.nl/ – that provides templates for a wide variety of boxes, all for free. You can set the desired dimensions for your box and it’ll generate a vector file that you can use with a paper cutting (Cricut/Silhouette/Siser) or laser engraving machine to cut the files for you. If you don’t have a machine, you can still print the files to cut by hand.

Unfortunately, I wasn’t able to find the matching box template on the site. The closest file is the passepartout template which is assembled from two pieces. I wanted to try making my own template file, and I wanted to contribute to the free template space to give back to others the same way that sites like TemplateMaker gives to the community. I decided to make my own parametric design in OnShape to achieve this.

Click here to access OnShape file

If you have your own OnShape account, you can copy the workspace and update the file to set the dimensions to whatever you want.

In your copy of the file, double click the variables in the left side, which appear with the cursive “x” symbol next to them.

This will bring up a little dialogue allowing you to change the values – once you update them make sure to click the green click to confirm your change.

Repeat this for each variable. If you are using paper or light card, you probably won’t need to edit BoardClearance.

The template will recompute based on the values you chose.

You can export the templates from the drawing tabs, accessible at the bottom of the screen. There are two drawings – one that has extra spacing for thicker cardboard and another that has flush cuts, ignoring the BoardClearance value.

To ensure that the dimensions of your file update to match the variables that you chose earlier, make sure to click the refresh button at the top left of the Drawing view. It’ll be highlighted when there are changes to load in, and dimmed out when the changes are synchronised.

Right click the drawing tab and select “Export…” to view export options. For using with all common cutting machines, you can export the file as an SVG. It will put the graphics inside of a clipping rectangle which you can ignore when cutting the files.

Set the blue lines to score and the red lines to cut in your cutting machine software. To assemble, almost all the blue lines fold inwards (valley folds) except for the four arms that have the slots in them – they fold away (mountain folds).

I don’t yet have a source/plan for the sleeves – let me know if you have any ideas!

Posted in: Crafts | Tagged: box, resources, templates

Personalised Splashtag nametags

Posted on October 3, 2022 Leave a Comment

Follow these instructions to make your own splashtag that can be used as a name badge, fridge magnet… or whatever your heart desires!

You can also order a tag from me at this link: https://shop.chenonetta.com/product/personalised-splashtag/

Requirements:

  • Colour laser printer
  • Transparency paper/overhead projector film/acetate sheet
  • Spray adhesive
  • Plastic backing piece – I used 2mm thick acrylic, cut to the size that I wanted the badge to be.
  • Brooch finding

Prepare your splash tag

You can screenshot your splashtag from Splatnet, but the resolution might not be high enough for a nice print. If have issues with the resolution, you can use the resources at https://leanny.github.io/splat3/collectibles.html to recreate the splash tag. The font files for the Splatoon 1 and Splatoon 2 fonts are handy for replicating the text.

After composing the splashtag, mirror the design.

Print it onto the clear film, and cut it out leaving a generous margin (at least 10mm) around the edges.

This design has been printed at 87.5mm wide by 25mm tall.

Assembly

Apply glue to the the side of the sheet that you printed the text on.

Now align the transparency with the plastic backing and press them together. Make sure to only handle the extra margin of the plastic film so that you avoid smearing the glue on the splash tag itself.

Once you are confident that things are stuck well in place, you can trim the margin away from the transparent film. Tilt the blade slightly inwards – try to avoid leaving any overhanging plastic sheet, as this can catch and lead to the film peeling away from the plastic.

It’s done! You can now attach a finding to the back.

Posted in: Behind the Art, Crafts, Lasering | Tagged: splatoon, tutorial

Giant Catan

Posted on August 31, 2015 5 Comments

Let’s finish Blaugust with a bang. This post was initially going to be a week’s worth of posts, then I felt that was a cop-out so decided I should make it all one post. Then I kept putting off the post because it felt too big to tackle. With the end of the month rapidly approaching, it’s time to bite the bullet.

I built a set of Catan. (The game formerly known as Settlers of Catan)

44

In case it’s not obvious from that photo, I built a giant set of Catan.

48

Here’s how.

Cutting The Hexes

I started this project back in November of last year. While I am personally not a huge fan of Catan, it’s an iconic board game that served as introduction to the hobby for many people. It’s also quite aesthetically pleasing, so I planned that if at some point I failed to complete the project or if there was no interest in playing the game I would still have a series of nice-looking tiles that could be used for display.

I started by cutting the hexes from 3mm MDF. From a 1200mm x 900mm board, I initially thought that I’d be able to get 11 hexes per board, cutting them like so:

CuttingHexes

As you can see from the animation, I was not sure how to release the third piece from the group. I asked my dad for help cutting the pieces out using his table saw and mitre saw. He suggested that if we were to cut all of the hexes in bulk it would be easier to do the following:

realcuttinghexes

Each board was sized to the width of three hexes. The strip off the end was used to make the port triangles.

From those strips, rectangles were made. The corners of each rectangle were then taken off to make the hexes.

By doing things this way we minimised the times we needed to change the settings on the saws and better ensured that the pieces would be uniform. However we ended up with a little more waste as we were only able to yield 9 hexes per board. There are lots of the right-angled triangles left over, but I have ended up using the scrap material for laser-cutting all of my small pins and brooches.

Here’s the cut hexes and ports after they were primed in white.

5

Painting the Hexes

Desert Tiles

There are 30 tiles, and I planned to hand-paint them all. Most tiles have five or six of the same design (fields for wheat, forest for wood, quarries for brick, mountains for ore and pasture for sheep) however the Desert tiles are only repeated twice. I figured they’d be a good start for testing the painting process out.

I established a style that used a mix of acrylic paints and a black water-based ink. To protect the borders, I masked off the sides of the tiles with masking tape.

3

After doing these first couple of tiles I also decided to use newspaper on the back to protect the back of the tiles

4

At the time, I was hoping to create a double-sided game with Catan on one side and Takenoko on the other. I think I will end up creating a separate set of hexes for Takenoko.

1

I am very pleased with these tiles. They are recognisable but still have my personal flair to them. A bit of satin spray varnish serves to protect the tiles against light scuffing.

I was so chuffed with the art on these I was tempted to turn one of them into a clock…

Forest Tiles

After declaring the desert tiles a success, I moved onto the forest tiles.

I painted all of the forest tiles green at once to ensure they had a consistent colour throughout.

6

I then spent almost a month on the first forest tile, experimenting with using washes of ink to establish the forms of the trees.

8

Once the forms were in place, I sponged on green, yellow and white paint to represent the foliage. Balancing the highlights and blacks proved to be tricky. This tile took so long because I kept trying to layer things on, and I ended up going around in circles. Finally I decided the tile had enough time spent on it and I finished it off with some brown on the trunks and declared it done.

9

Disappointingly, once un-masked it turned out that the edges were not sufficiently protected from the paint. A little bit of sandpaper and touch-up paint fixed this, but the paint bleeding proved to be a nuisance throughout the project and when I ended up against the clock most of the tiles didn’t get this touch-up treatment.

11

It took another three months for me to complete the rest of the forest tiles.

Pasture Tiles

Filled with despair about how slowly progress was being made on the hexes, I decided to tackle the pasture tiles. I knew that they would be quite simple to execute.

I brushed on a light mix of green and while the paint was still wet I used the plastic handle of the sponge to scrape out blades of grass.

12

Once the grass was in place I sponged in darker patches to create interesting patterns, scraping out a few more blades of grass as I went.

13

All six of the tiles were completed over two days. I had some momentum back.

16

Mountain Tiles

I launched straight into the mountain tiles, after having the idea of using glad wrap to create some of the rocky texture.

Each tile was painted with a mix of greys and blues and the glad wrap was laid into the still-wet paint.

18

On lifting the glad-wrap, all sorts of crazed-like textures are created.

19

After letting the textured layer dry, I painted in white cliff faces. I tried to pick out shapes in the textures to guide what shapes the mountain tops would take.

21

The tiles were finished off with greys, blacks and blues.

23

PS always save the crosswords.

24

Field Tiles

I had a lot of trouble deciding what these tiles would show on them. The colour would easily make them distinct from the other tiles, but how was I meant to represent the fields of grain without going mad from painting hundreds of wheat stalks? This idea popped into my head at work and I quickly scribbled it down.

17

The background fields were sponged in with a few colours, Vertical brush strokes gave a hint at the stalks while the occasional horizontal interruptions to the receding rows of grain implied heads of wheat. While the paint was still wet, I used the back of a paintbrush to scrape out the shapes of some wheat stalks. I also brushed in a little white into the top sides of the stalks and some brown into the bottom sides.

29

Once the paint was dry, I used a blade to scrape back even more of the paint.

31


32

Finally, some additional depth was added with darker paints and ink. This set of tiles show the progression from initial painting to final detailing.

34

Quarry Tiles

These guys are technically incomplete. I used up all my steam on completing the pastures, mountains and fields in a four day period. While I was painting those tiles, I got started on creating the texture with glad-wrap in the same way as the mountains.

27

I only got as far as adding some vague hilly shapes with black ink.

38

I’ve now gotten stuck thinking about how to finish them off. From a distance they look great – the red colour makes them stand out, but I’m not sure how to paint them up without interfering with how the awesome bold red appears from a distance.

Roads and Buildings

39

I spent a few days with my dad planning and making these.

Timber can be pretty expensive. Nice timber would have easily broken the bank, so I looked around at Bunnings and ended up grabbing a single 4.8m x 90mm x 45mm length of decking pine for around $20. I had it cut into 120cm and 60cm lengths to be able to fit into my car.

From these lengths, I hoped to yield 30 settlements, 24 cities and 90 roads.

I found working on these really interesting but unfortunately I forgot to take photos for most of the process! I’ll do my best to explain with some diagrams.

Settlement

City

Here’s my dad ripping a length of timber.

40

Here’s how many road-sized lengths of wood I got from a single 60cm length. I ended up with the 90 roads I needed and tons more to spare.

42

The Robber

The robber is just a fence-post capital with the little post cut off.

43

As with all of the other timber bits, it was finished with a coat of enamel spray paint.

Chits

The chits were laser etched and cut from 3mm MDF.

44

The little dots at the bottom of each chit represents the probability that the number will be rolled. Although it wouldn’t take too long to hand-create those circles, I had a a neat little inDesign script (that I first wrote for a Lords of Waterdeep re-theme) that saved me lots of time. The script expands a numeric value, X, paired with an image and instead turns that into an image repeated X times.

I initially forgot that I would need to paint the 6s and 8s red. Luckily I realised before removing the freshly-etched pieces from the machine. Without moving the pieces, I put masking tape over the relevant areas and re-etched the outlines of the numbers and the dots. I then removed the masking over the cut-out areas and painted them red before removing the rest of the masking.

The Dice

The dice are made of blocks of foam covered in fabric. The foam was bought from a 30x30cm offcut – the guy at the store told me it was 15cm tall so we cut the blocks into 15x15cm squares. Turns out however that the offcut was actually around 12cm tall. I tried trimming the blocks when I got home using a serrated bread knife, but that ended poorly. As a result the dice aren’t perfect cubes.

I was short on time and my sewing skills are lacking. So I gave the foam and lycra that I’d planned to use to make the dice to my friend Laura and she worked through illness and gave me these. She even painted the dots on them! Thank you so much Laura!

42

Still to Come…

Obviously the unfinished quarry tiles could use some attention.

I’d like to add felt to the base of each of the buildings and the robber, to reduce the chances of scratching the painted surface of the hexes.

Currently I’m using a triangle to distinguish each port location and using the hexes from the regular-sized game to provide the actual trade-value information. I may yet make proper art for the ports directly on the triangles, but I’m unsure how I’ll do the art for the resources.

No, I’m not intending to super-size the cards. ; )


Thanks for joining me for a month of Blaugust posts, and thanks for reading through this build-log of giant Catan. At some point I’ll finish off giant Tsuro…

49

…and maybe even get to work on Takenoko… but that’s for another blog post, another time.


Posted in: Behind the Art, Crafts | Tagged: blaugust, board games, catan, giant catan, made by me, settlers of catan, tsuro

Sushi Go! Score cards

Posted on August 19, 2015 2 Comments

sushigo_scorecards

We recently acquired a set of Sushi Go. It’s an excellent game that caught my eye when I was on a print-and-play kick. It appeared in many PnP lists due to a trial version of the cards being made available while they were trying to raise funding for the game.

One difference between the PnP game and published one is a lack of scoring mechanism included with the game. The PnP game tried to use a pair of cards to represent the player’s food tray moving along the score track. I understand why it wasn’t included in the final game – it was a somewhat clunky way to keep track of points. But Sushi Go is a game that needs to have points kept track of between rounds, so I decided to make scorecards so that we don’t always have to scramble for pen and paper whenever we play a game!

These are inspired by a similar set of score cards that I saw on Board Game Geek. The art is grabbed from this player aid card. The important part is the scoring wheels that can be rotated to reflect the player’s current score. The rules and scoring details are all just window dressing really.

If you would like to make your own, you can download my file here.

Print out two copies of the first page and one copy of the second page onto stiffish paper.

Cut the scoring wheel page between the second and third row of circles. Fold the paper along the lines and glue together to create the double-sided scoring wheels.

The paper folds into a sturdy card once folded over itself. I used watercolour paper so I didn’t even need to glue them. If you’re using lighter paper you may want to apply glue across all faces (watch out for the ‘glue-free zones’, my nod to the Midnight Quiz) so that everything holds together.

You can get small split pins (brads) from the scrapbooking section of an art supplies store.

sushigo_scorecards_wip

Okay, I think I’m now up to date for Blaugust! Just need to work out what I’ll be posting about tomorrow…

Posted in: Crafts | Tagged: blaugust, board games, made by me, player aid, score card, sushi go

Three-Dee Thursday #3: Dominion Storage

Posted on August 21, 2014 Leave a Comment

This one’s less an art project but still something I’m quite pleased to have designed and made.

John and I have been playing a lot of Dominion lately. We now own five of the sets – Intrigue, Seaside, Hinterlands, Dark Ages and Guilds.

These boxes take up a fair bit of space on our shelf!

1802

Due to the amount of space they take and how much fuss it can be to shuffle around all these boxes when we want to play, I decided to work out an alternative solution for storing all the game components.

Solution? Binders!

1801

Back in my Pokémon trading card days, whenever I was in a pinch and needed new storage for cards, my mum would make these sleeves out of ordinary A4 protector sleeves. They wouldn’t fit the Pokémon cards perfectly, but they would be good for sticking a bunch of duplicate cards in one slot, which most off-the-shelf card sleeve pages wouldn’t allow.

Multiple-cards-in-one-slot is exactly what I needed for Dominion, so I decided to make my own sleeves!

To seal the plastic together, I borrowed an old device of my mum’s – it’s a contraption with two heating elements that when pressed down heat plastic between them to melt the plastic and create a seal. It’s designed to seal up sandwich bags and the like, but also works on other plastics.

1805

I measured out the height of each card and made horizontal cuts along the sheet protector on the front of the sleeve. This gave me pockets for the cards. Then I sealed the sheets to make 9 pockets per sheet!

1806

For one sheet I sealed it in quarters – this way it can fit a larger stack of cards or even a stack of the mats used in Seaside

1804

But for other components I decided to use these zip-up sleeves.

1803

1810

Finally I printed out some labels with each of the card names. If I did this over again I think I might try and match the label to look like the name section of the card, and put the sticker up at the top of each pocket.

1808

1807

My first prototype used a normal document binder, but I was concerned that traveling with the cards would allow for cards to escape! So I got these zip-up binders instead. This way it keeps any potential escapees confined to safety.

1809


Posted in: Crafts | Tagged: board games, card games, dominion

Three-Dee Thursdays #2: AVCon 2014 Trophies

Posted on August 14, 2014 Leave a Comment

This week I’m showing off the trophies I made at AVCon!

Once again, these were made of laser cut acrylic. The dragon design was done by design-team member Dima. I worked out the trophy design from that.

The overall look is simpler than last year’s – I had a bit less time to mess around with the designs.

Here’s the first prototype:

prototype

And here are a bunch of completed trophies!

finals

This year I sent a bunch of the laser work off to be done by a local business. They were great to work however the cutting side of the acrylic seemed to pick up dust or discolouration or something. It was rather disappointing to find the finish on some of the trophies wasn’t as nice as I’d have liked. I also found out just how drastically the thickness of acrylic sheets can vary and how different laser cutters can have noticeably different kerf widths.

Posted in: Crafts | Tagged: avcon, dragon, fabbing, laser cutting, maker, trophy

Three-Dee Thursday #1: Pokémon Shoes

Posted on August 7, 2014 Leave a Comment

beforeafter

These shoes were an impulse buy at Kmart! I decided to paint my current Pokémon team on them for a personal touch.

rightshoesketches

I started by deciding which shoe each Pokémon would feature on, then sketched each one individually in my sketchbook before transferring the sketch onto the shoe with pencil.

leftshoeprogress

Initially when painting the shoes I used masking tape over the areas of the shoe to keep the white borders of the shoe clean of paint. As I continued and got more confident with the painting I stopped masking these areas and instead painted carefully around them.

rightshoeprogress

I painted each Pokémon separately. Here you can see some different steps in the process – on Kangaskhan I’m putting down some fine guidelines. After doing the guidelines I painted in the colours of each Pokémon with acrylic paint. Once I’m done with the colours and shading, I put down thicker ink lines. Finally, I sealed the shoes with a couple of coats of Mod Podge.

shoescomplete

Here are the completed shoes! I’m quite happy with the way they’ve come out. I’ve since trained up a Nidoking; I’ll have to add him to the tongue of one of the shoes!


Posted in: Crafts | Tagged: breloom, espeon, fan art, goodra, hawlucha, kangaskhan, liepard, malamar, pokemon, seismitoad, shoes, zapdos

Life-sized Lucario Papercraft

Posted on March 30, 2014 1 Comment

My latest papercraft project is almost complete, and it stands on its own, too!

lucario

Posted in: Crafts | Tagged: fan art, life-size, lucario, papercraft, pokemon, video games

Helix Fossil

Posted on March 2, 2014 1 Comment

With the frenzy that has been Twitch Plays Pokemon taking the internet by storm over the last couple of weeks, I felt that I ought to do something to join in on the festivities.

I started by modeling a helix fossil pendant.

Helix

(Want one for yourself? Get it on Shapeways!)

I then thought that I’d like to have something a bit bigger… and since I’m no stranger to papercraft, that seemed like a good way to go!

IMG_1537IMG_1539

The model required a fair bit of simplification to make it a practical papercraft project, but I think it came out ok. I’m also not so used to working on smaller papercraft projects, since I normally work on life-sized Pokemon so some of the joins are pretty messy.

Want to make your own? The PDF file is here. I printed the pattern out on light cardstock and then assembled the pieces with the printed lines on the inside of the model. You can start from the top left of the first page and build piece by piece. If you have any questions let me know and I’ll do my best to help you out.


Posted in: Crafts | Tagged: helix fossil, omanyte, papercraft, pokemon, twitch plays pokemon
1 2 3 4 Next »

Recent Posts

  • Template – Box with tearaway strip
  • Double-Walled Frame Box
  • Show TickTick countdowns above your todo list
  • Cricut Hacks #2 – Template frames
  • Rainbow Eagles

Archives

  • August 2025
  • July 2025
  • April 2025
  • November 2024
  • August 2024
  • March 2024
  • November 2023
  • August 2023
  • June 2023
  • April 2023
  • January 2023
  • December 2022
  • October 2022
  • August 2022
  • May 2022
  • April 2022
  • November 2021
  • September 2021
  • August 2021
  • August 2020
  • September 2019
  • August 2019
  • August 2018
  • May 2018
  • September 2016
  • August 2016
  • October 2015
  • September 2015
  • August 2015
  • April 2015
  • February 2015
  • October 2014
  • August 2014
  • July 2014
  • April 2014
  • March 2014
  • February 2014
  • September 2013
  • August 2013
  • July 2013
  • April 2013
  • March 2013
  • January 2013
  • December 2012
  • October 2012
  • September 2012
  • August 2012
  • July 2012
  • May 2012
  • March 2012
  • January 2012
  • December 2011
  • November 2011
  • September 2011
  • August 2011
  • June 2011
  • May 2011
  • March 2011
  • January 2011
  • December 2010
  • November 2010
  • October 2010
  • September 2010
  • August 2010
  • April 2010
  • March 2010

Blogroll

  • Hallucinfection
  • Jp's Lab
  • Leaflocker
  • Telling Stories

Copyright © 2025 Chenonetta Creations.

Theme by themehall.com.