Chenonetta Creations

Find Me On...

  • deviantArt
  • Twitter
  • Mastodon
  • Instagram
  • Facebook
  • Bluesky
  • Home
  • About
  • Selected Works
  • Shop

board games

Board game stream overlay – Azul

Posted on September 1, 2019 2 Comments
Image

My latest board game overlay is a visual aid for Azul! Azul is a great game for streaming because it has no hidden information. However the player boards are occasionally difficult to discern from above because they are printed with the same designs as the tiles themselves.

This overlay attempts to solve for that by clearly showing which tiles have been placed into the right hand grid. I didn’t want to recreate the whole game board entirely, because that would take away the charm of playing a physical board game, so I think this strikes a decent balance.

I had some fun creating these glossy preview tiles. I also recreated the patterns on the yellow, black and teal tiles which involved some fun with geometric shapes. I’d hoped to create the effects in pure CSS but in the end I opted to use an extra image for the “reflection”.

The data for a player’s scoring area is stored in 5 lines of text, with each character in a line representing whether the tile is present or not. The overlays are also capable of summing up the scores if a point value is provided for each tile but we usually lost count at some point, so fortunately I had also enabled a manual override.

Below is the points that I scored throughout the game for each tile. A penalty of 3 was taken from this, and bonuses were added at the end of the game to form my final score.

04331
06517
10752
00171
00073

I had realised as we wrapped up the games last night that it is possible to score 10 points for a single tile placement, which would not have worked with the way that my code split the strings. A quick code change this morning makes the numbers parse as hex values, so that we can use the string “A” to represent 10 points.

While we were streaming our games last night, a friendly viewer asked to join in. Janardhan, from Bangalore, India shared a bit about his local board game community and became our first viewer to join us for games. I made some hasty code changes to allow for three players and off we went.

Thank you JD for being a great sport as we trialed this way of playing! We’re looking forward to more board game streams with viewers in the future.

Posted in: Board Games | Tagged: azul, board games, overlays, streaming

Istanbul Stream Overlays

Posted on August 4, 2019 2 Comments

Lately we’ve been streaming our board game misadventures.

With the webcam set up over our table, we can capture a reasonable amount of the play area, but things are quite hard to read. So I’ve been experimenting with some overlays to convey pertinent game information.

Here’s a demo of the overlay in action – the popup in the top left only appears for a little while when I change the “last tile visited” variable, and the player information allows us to track all of the different resources and upgrades that the players pick up along the way.

I think keeping the overlays updated is quite the distraction though – I guess that’s my excuse for John going 3-0 undefeated tonight!


Posted in: Code | Tagged: blaugust, board games, istanbul, overlays, streaming

Games in Black and White

Posted on August 18, 2016 2 Comments

unfairpnp

Unfair is a game that came up on Kickstarter a couple of days ago. It was brought to my attention when the organiser of ConCentric made a little noise about it on Facebook. This put the game in a favourable light right off the bat as I consider Ben a trustworthy source when it comes to board games. Not only because he organises ConCentric, but also because he’s worked with the team behind Unfair on their previous game project – Monstrous.

The Unfair team have made the full draft files for the game available for print-and-play, so I felt it prudent to give the game a go before jumping into backing it. To be honest, the art had already won me over so it was with some nervousness that I suggested we try the game. I was afraid that the mechanics would not hold up.

It took a little bit of convincing, but tonight I managed to get John to sit down and play the game, and I can safely say it’s solidly crafted. Relevant information on the cards is laid out quite orderly-like, so I took a chance on printing it in black and white. By keeping things black and white I also made sure that I’d still have an incentive to purchase the game even if the mechanics weren’t so strong – I’d need to back the game to get the full-colour art!

Spending an hour with the grayscale cards did get kind of tiring after a while. We had no issues telling the cards apart but a lot of the fun, vibrant cues weren’t there. The wonderful colour gradients translate especially badly to grayscale so things that you just know look great on the complete cards become bothersome in the black and white context.

Anyway, to the game itself! The game is centred around creating theme parks with all the shnazzy attractions, and includes themed decks, each with a slightly different emphasis on mechanics. We played the recommended decks for a first-time two-player game: Robots and Pirates. The game is played in eight rounds, and global events make things rosy for the first half, but meaner for the second half. There’s a suggested “First Date” set of rules that reduce the number of “Unfair” rounds but since often when playing games we talk about needing more turns, extra time to explore mechanics or time to make up for newbie-mistakes we decided to play out all eight rounds. I think this was the right decision.

There’s a strict-ish order to things, and while Event cards can be gained freely during the “Park” stage of the game, they cannot be played until the next “Event” stage rolls back around. Combined with a hand-limit that gets enforced between the rollover of game rounds and a fluctuating game situation between the opportunities to actually play the event cards means the number of events that can be played are moderated. The events tend to be situationally powerful, even occasionally useless. Each event card has two choices on it however so you can usually pick something to do.

We didn’t use the attacking events terribly liberally, but with the coming of the second half of “Unfair” global-event cards we did start attacking each other. This was interesting in the context of the two-player game as there was only one rival to keep track of. Most nastiness goes away on its own by the next round, but it’s also possible to build defenses around yourself.

Money is an interesting thing in the game, and is mostly only earned at the end of a round. Fortunately there’s no upkeep costs as I spent much of the game on not a lot of money. John however managed to put together a nice engine, and ended the game on well over 100 coins. Quite a handsome bounty considering the two-to-one coins to points conversion.

My overall impressions right now are positive, and I have backed the game, but I’m trying very hard to *not* do a “review” (with only one playthough I don’t think I can do a good review). That said, I’m sure I’m not giving a decent enough overview of the gameplay itself for it to be useful to anyone reading it in deciding if they want to back the game so I’ll wrap things up here.

Tell you what, EVACers – if people are interested I will print the additional theme decks to allow up to four players to play and we can give it a go tomorrow. You’ll just have to put up with the cards being in black and white.

Posted in: Uncategorized | Tagged: blaugust, board games, kickstarter, unfair

Giant Catan

Posted on August 31, 2015 5 Comments

Let’s finish Blaugust with a bang. This post was initially going to be a week’s worth of posts, then I felt that was a cop-out so decided I should make it all one post. Then I kept putting off the post because it felt too big to tackle. With the end of the month rapidly approaching, it’s time to bite the bullet.

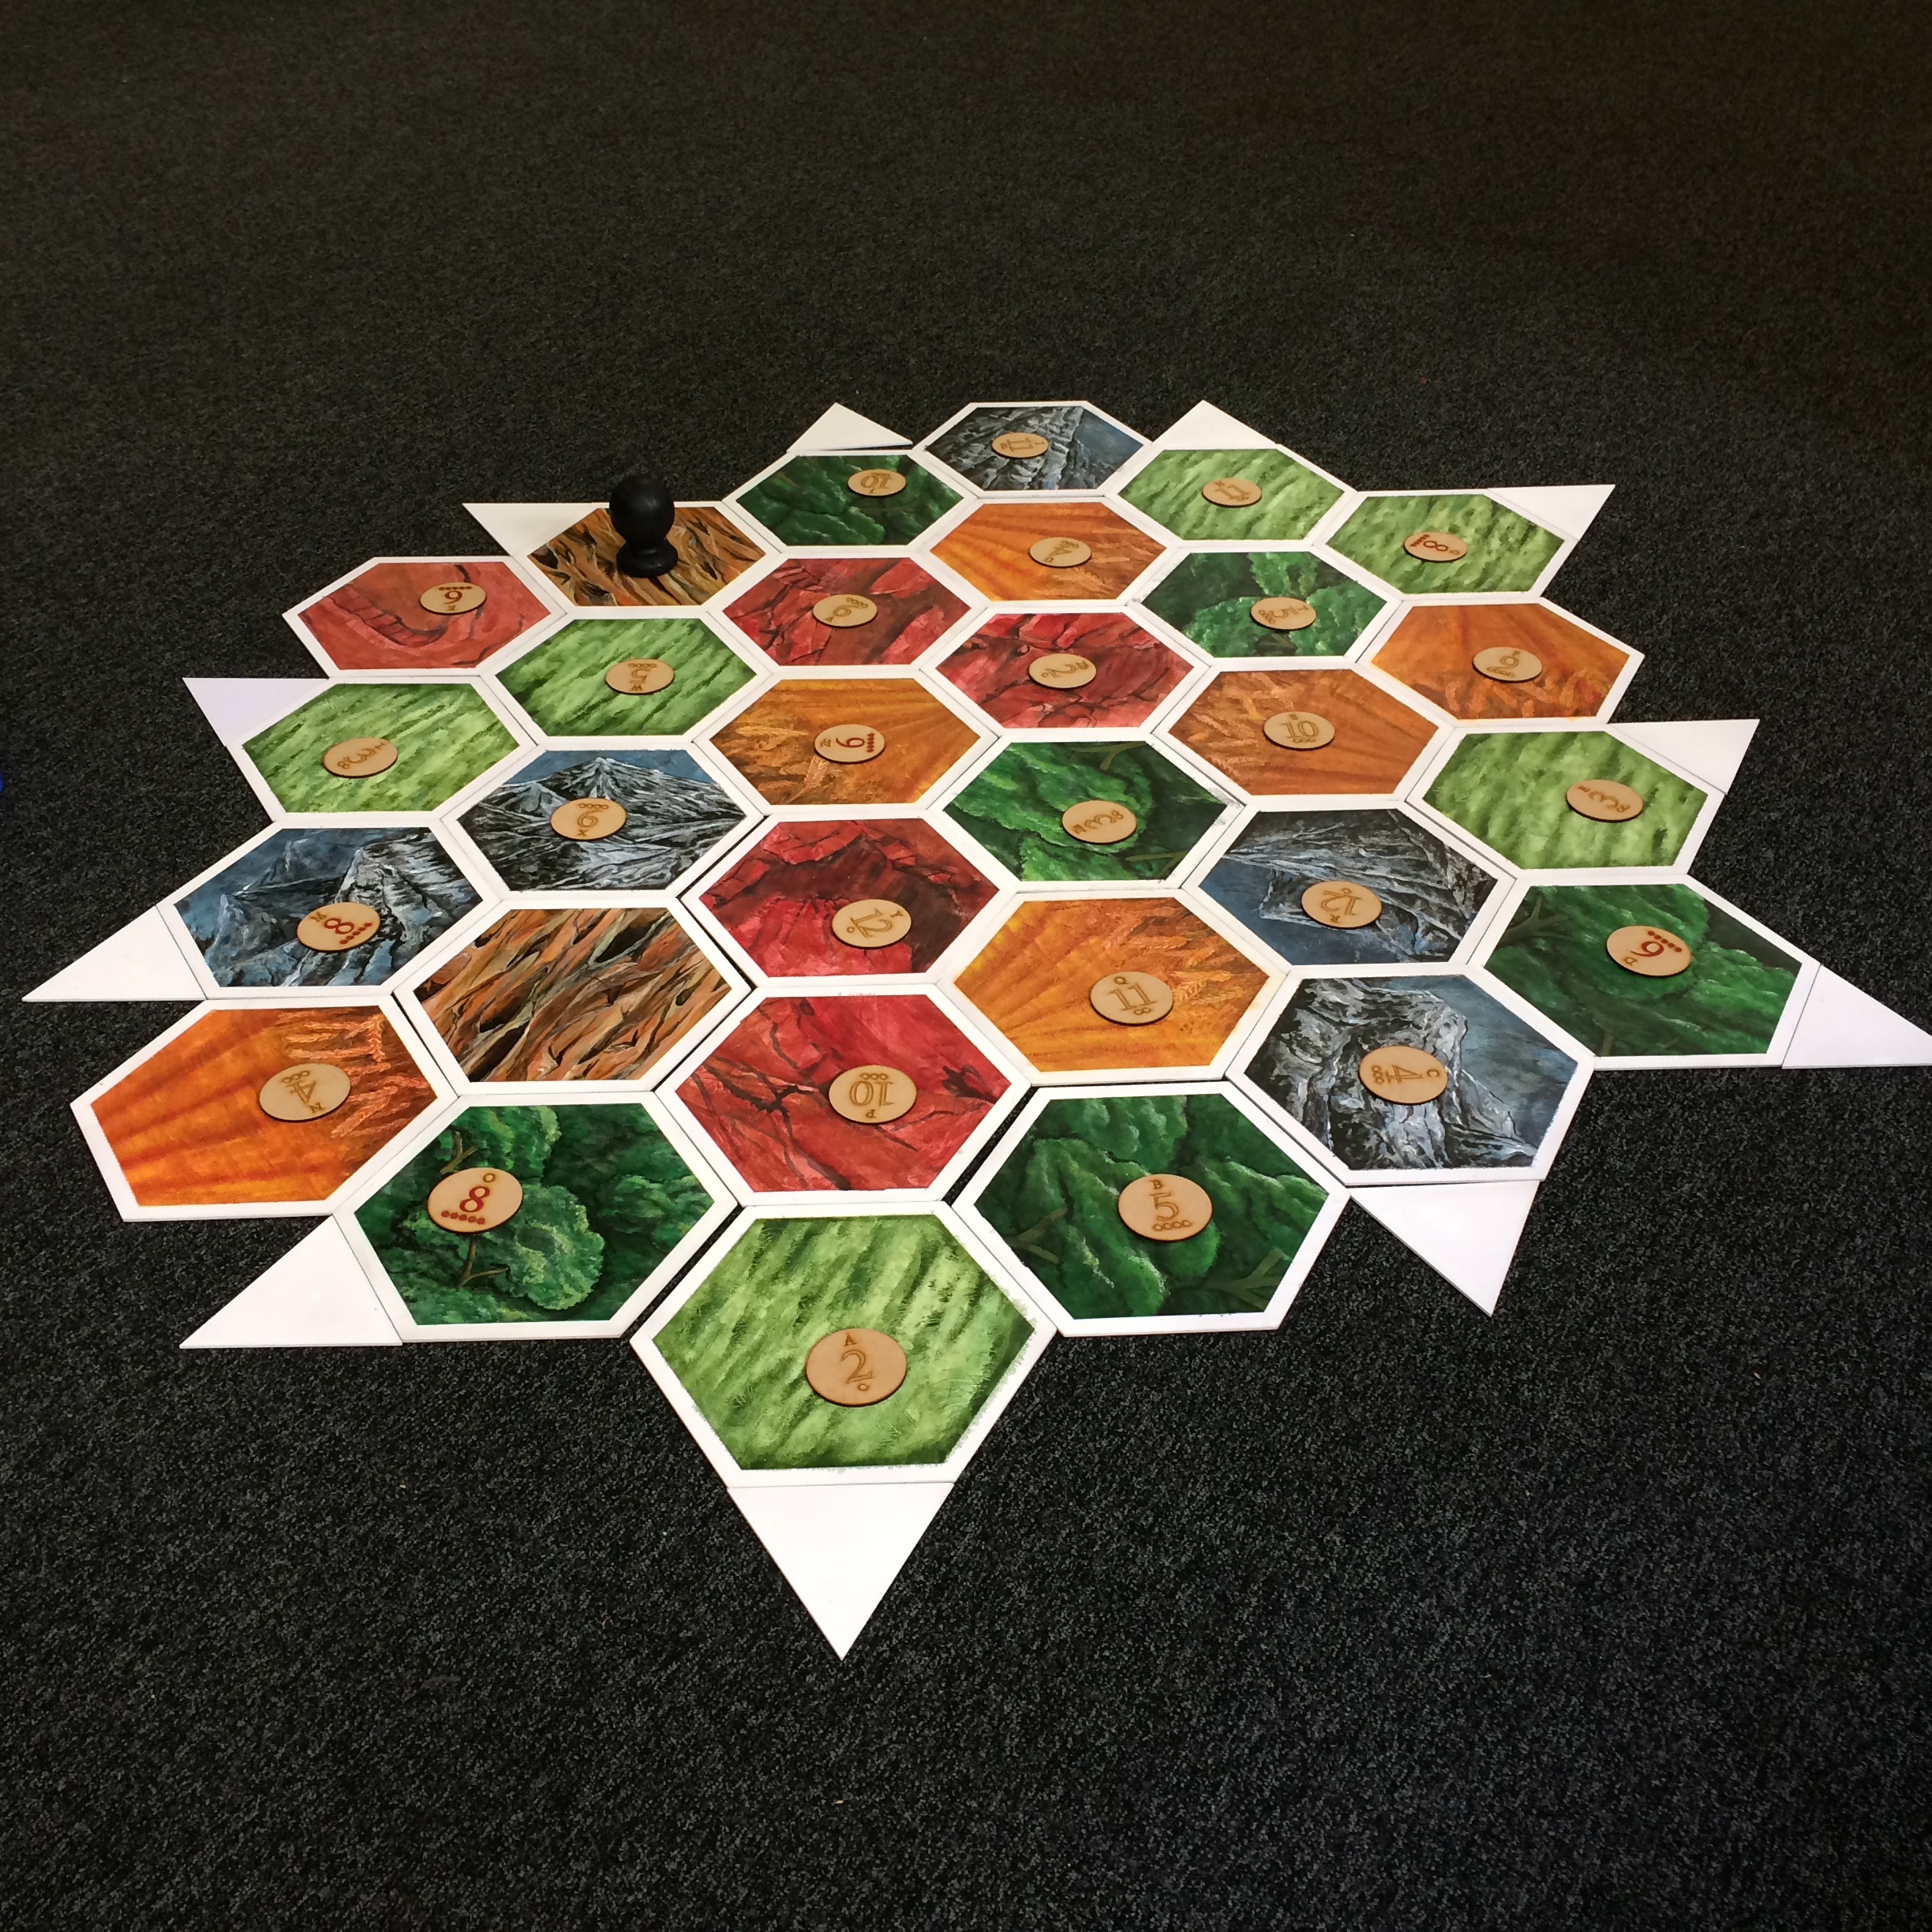
I built a set of Catan. (The game formerly known as Settlers of Catan)

44

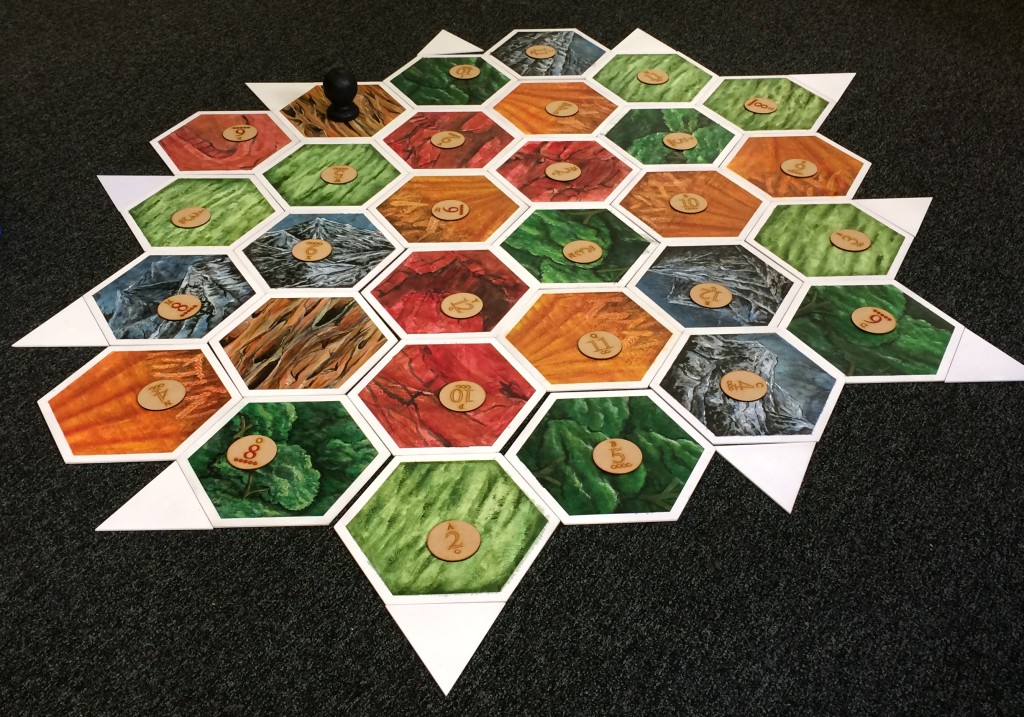
In case it’s not obvious from that photo, I built a giant set of Catan.

48

Here’s how.

Cutting The Hexes

I started this project back in November of last year. While I am personally not a huge fan of Catan, it’s an iconic board game that served as introduction to the hobby for many people. It’s also quite aesthetically pleasing, so I planned that if at some point I failed to complete the project or if there was no interest in playing the game I would still have a series of nice-looking tiles that could be used for display.

I started by cutting the hexes from 3mm MDF. From a 1200mm x 900mm board, I initially thought that I’d be able to get 11 hexes per board, cutting them like so:

CuttingHexes

As you can see from the animation, I was not sure how to release the third piece from the group. I asked my dad for help cutting the pieces out using his table saw and mitre saw. He suggested that if we were to cut all of the hexes in bulk it would be easier to do the following:

realcuttinghexes

Each board was sized to the width of three hexes. The strip off the end was used to make the port triangles.

From those strips, rectangles were made. The corners of each rectangle were then taken off to make the hexes.

By doing things this way we minimised the times we needed to change the settings on the saws and better ensured that the pieces would be uniform. However we ended up with a little more waste as we were only able to yield 9 hexes per board. There are lots of the right-angled triangles left over, but I have ended up using the scrap material for laser-cutting all of my small pins and brooches.

Here’s the cut hexes and ports after they were primed in white.

5

Painting the Hexes

Desert Tiles

There are 30 tiles, and I planned to hand-paint them all. Most tiles have five or six of the same design (fields for wheat, forest for wood, quarries for brick, mountains for ore and pasture for sheep) however the Desert tiles are only repeated twice. I figured they’d be a good start for testing the painting process out.

I established a style that used a mix of acrylic paints and a black water-based ink. To protect the borders, I masked off the sides of the tiles with masking tape.

3

After doing these first couple of tiles I also decided to use newspaper on the back to protect the back of the tiles

4

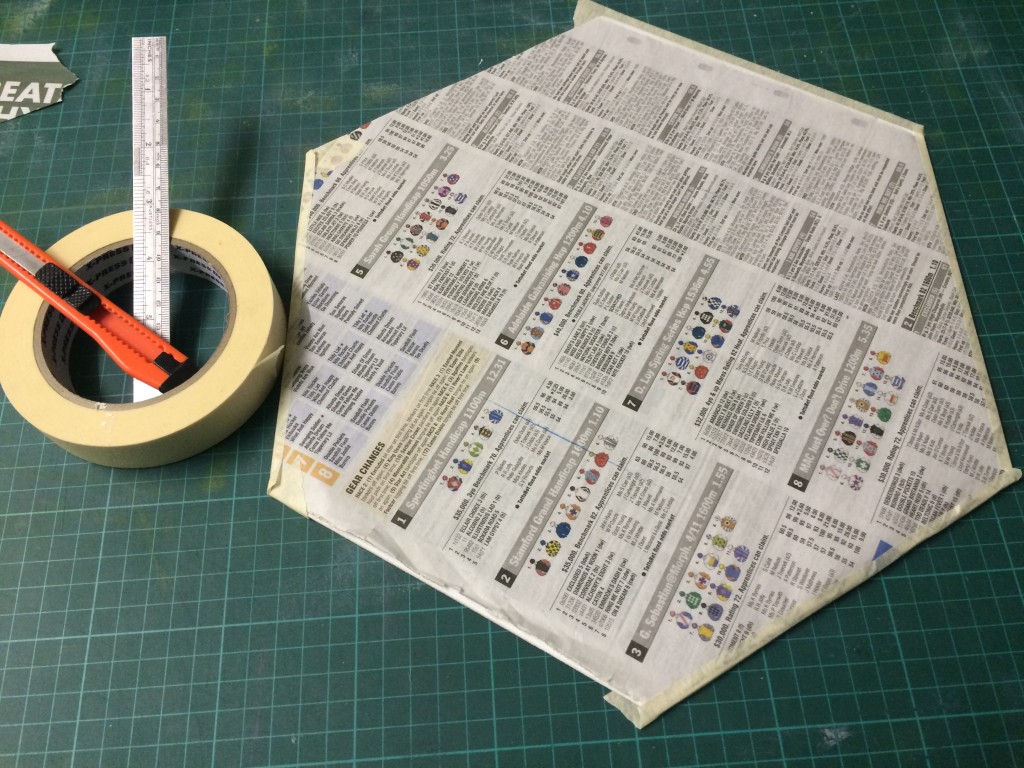
At the time, I was hoping to create a double-sided game with Catan on one side and Takenoko on the other. I think I will end up creating a separate set of hexes for Takenoko.

1

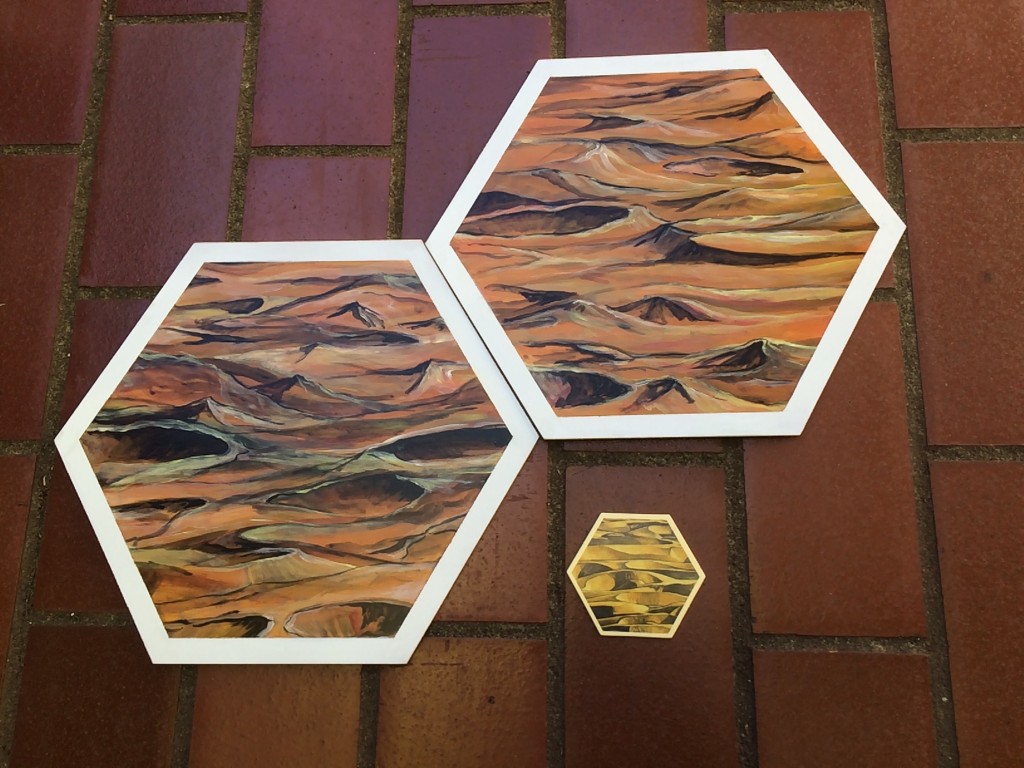
I am very pleased with these tiles. They are recognisable but still have my personal flair to them. A bit of satin spray varnish serves to protect the tiles against light scuffing.

I was so chuffed with the art on these I was tempted to turn one of them into a clock…
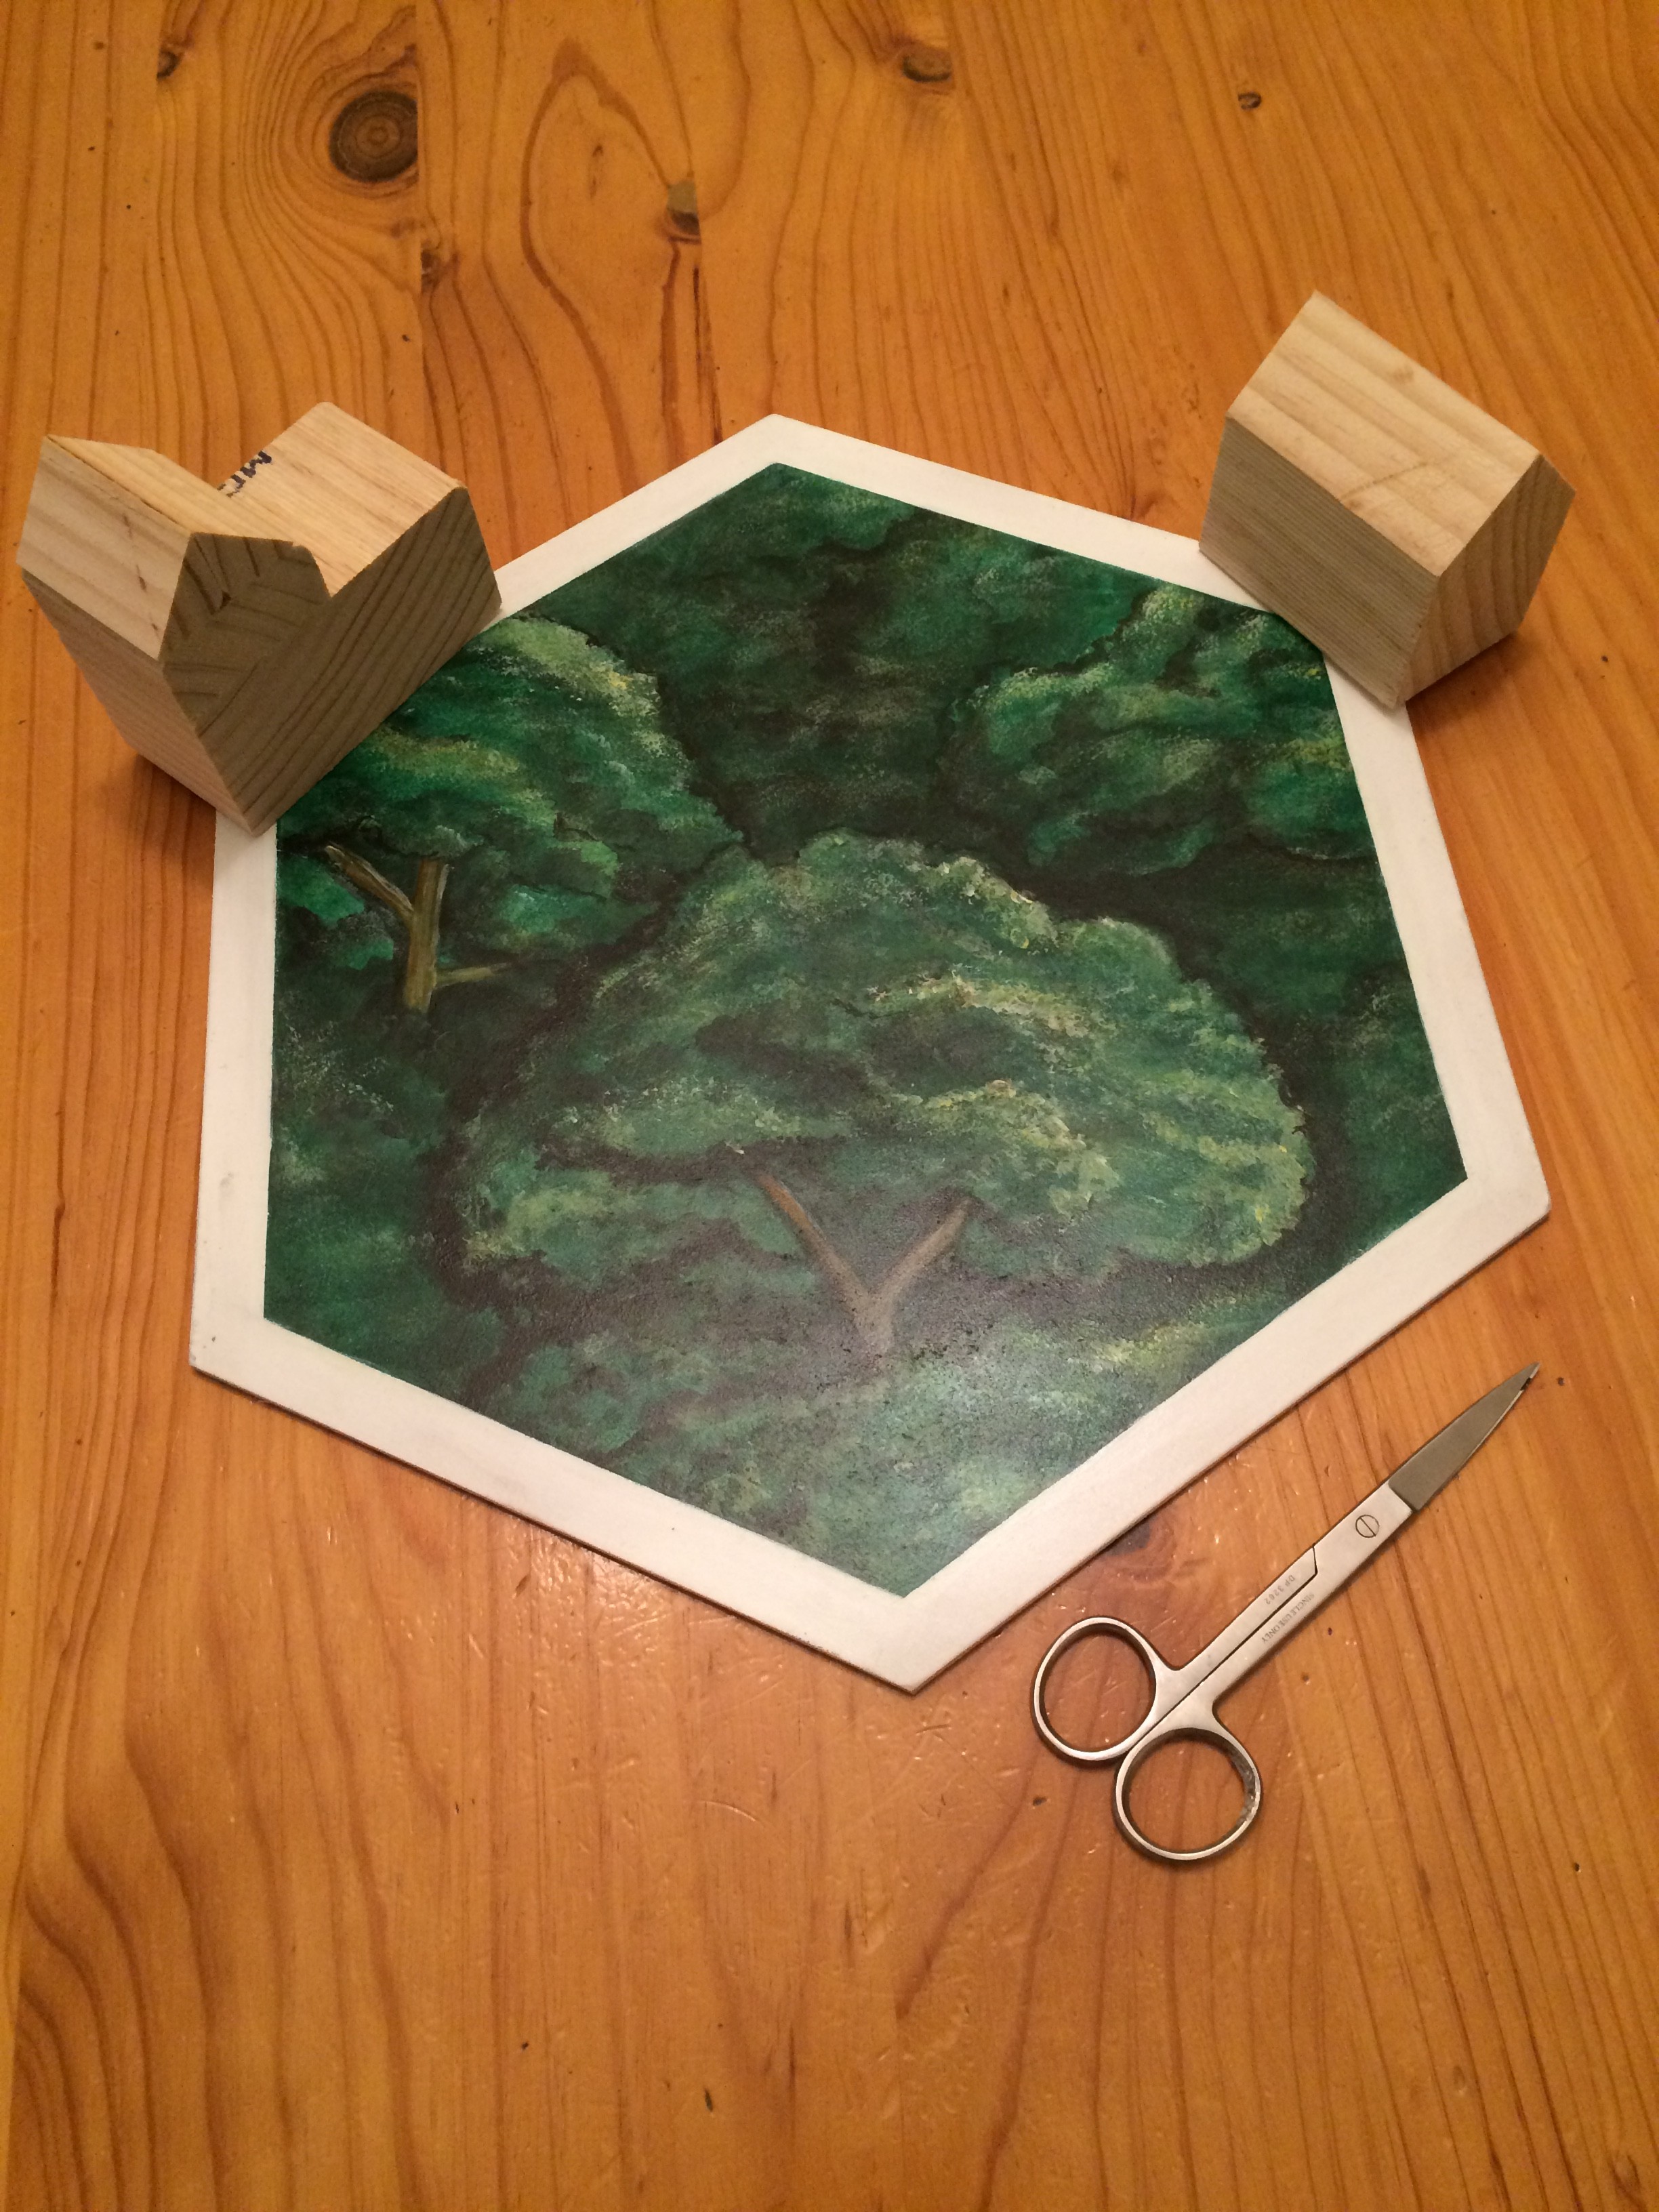
Forest Tiles

After declaring the desert tiles a success, I moved onto the forest tiles.

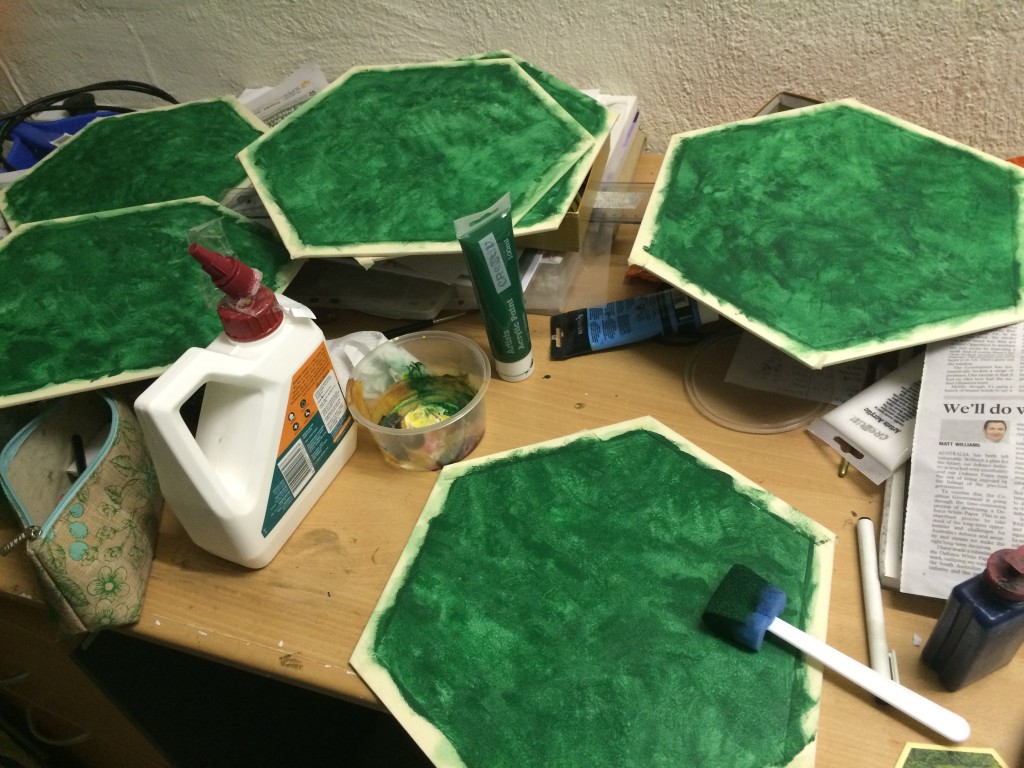
I painted all of the forest tiles green at once to ensure they had a consistent colour throughout.

6

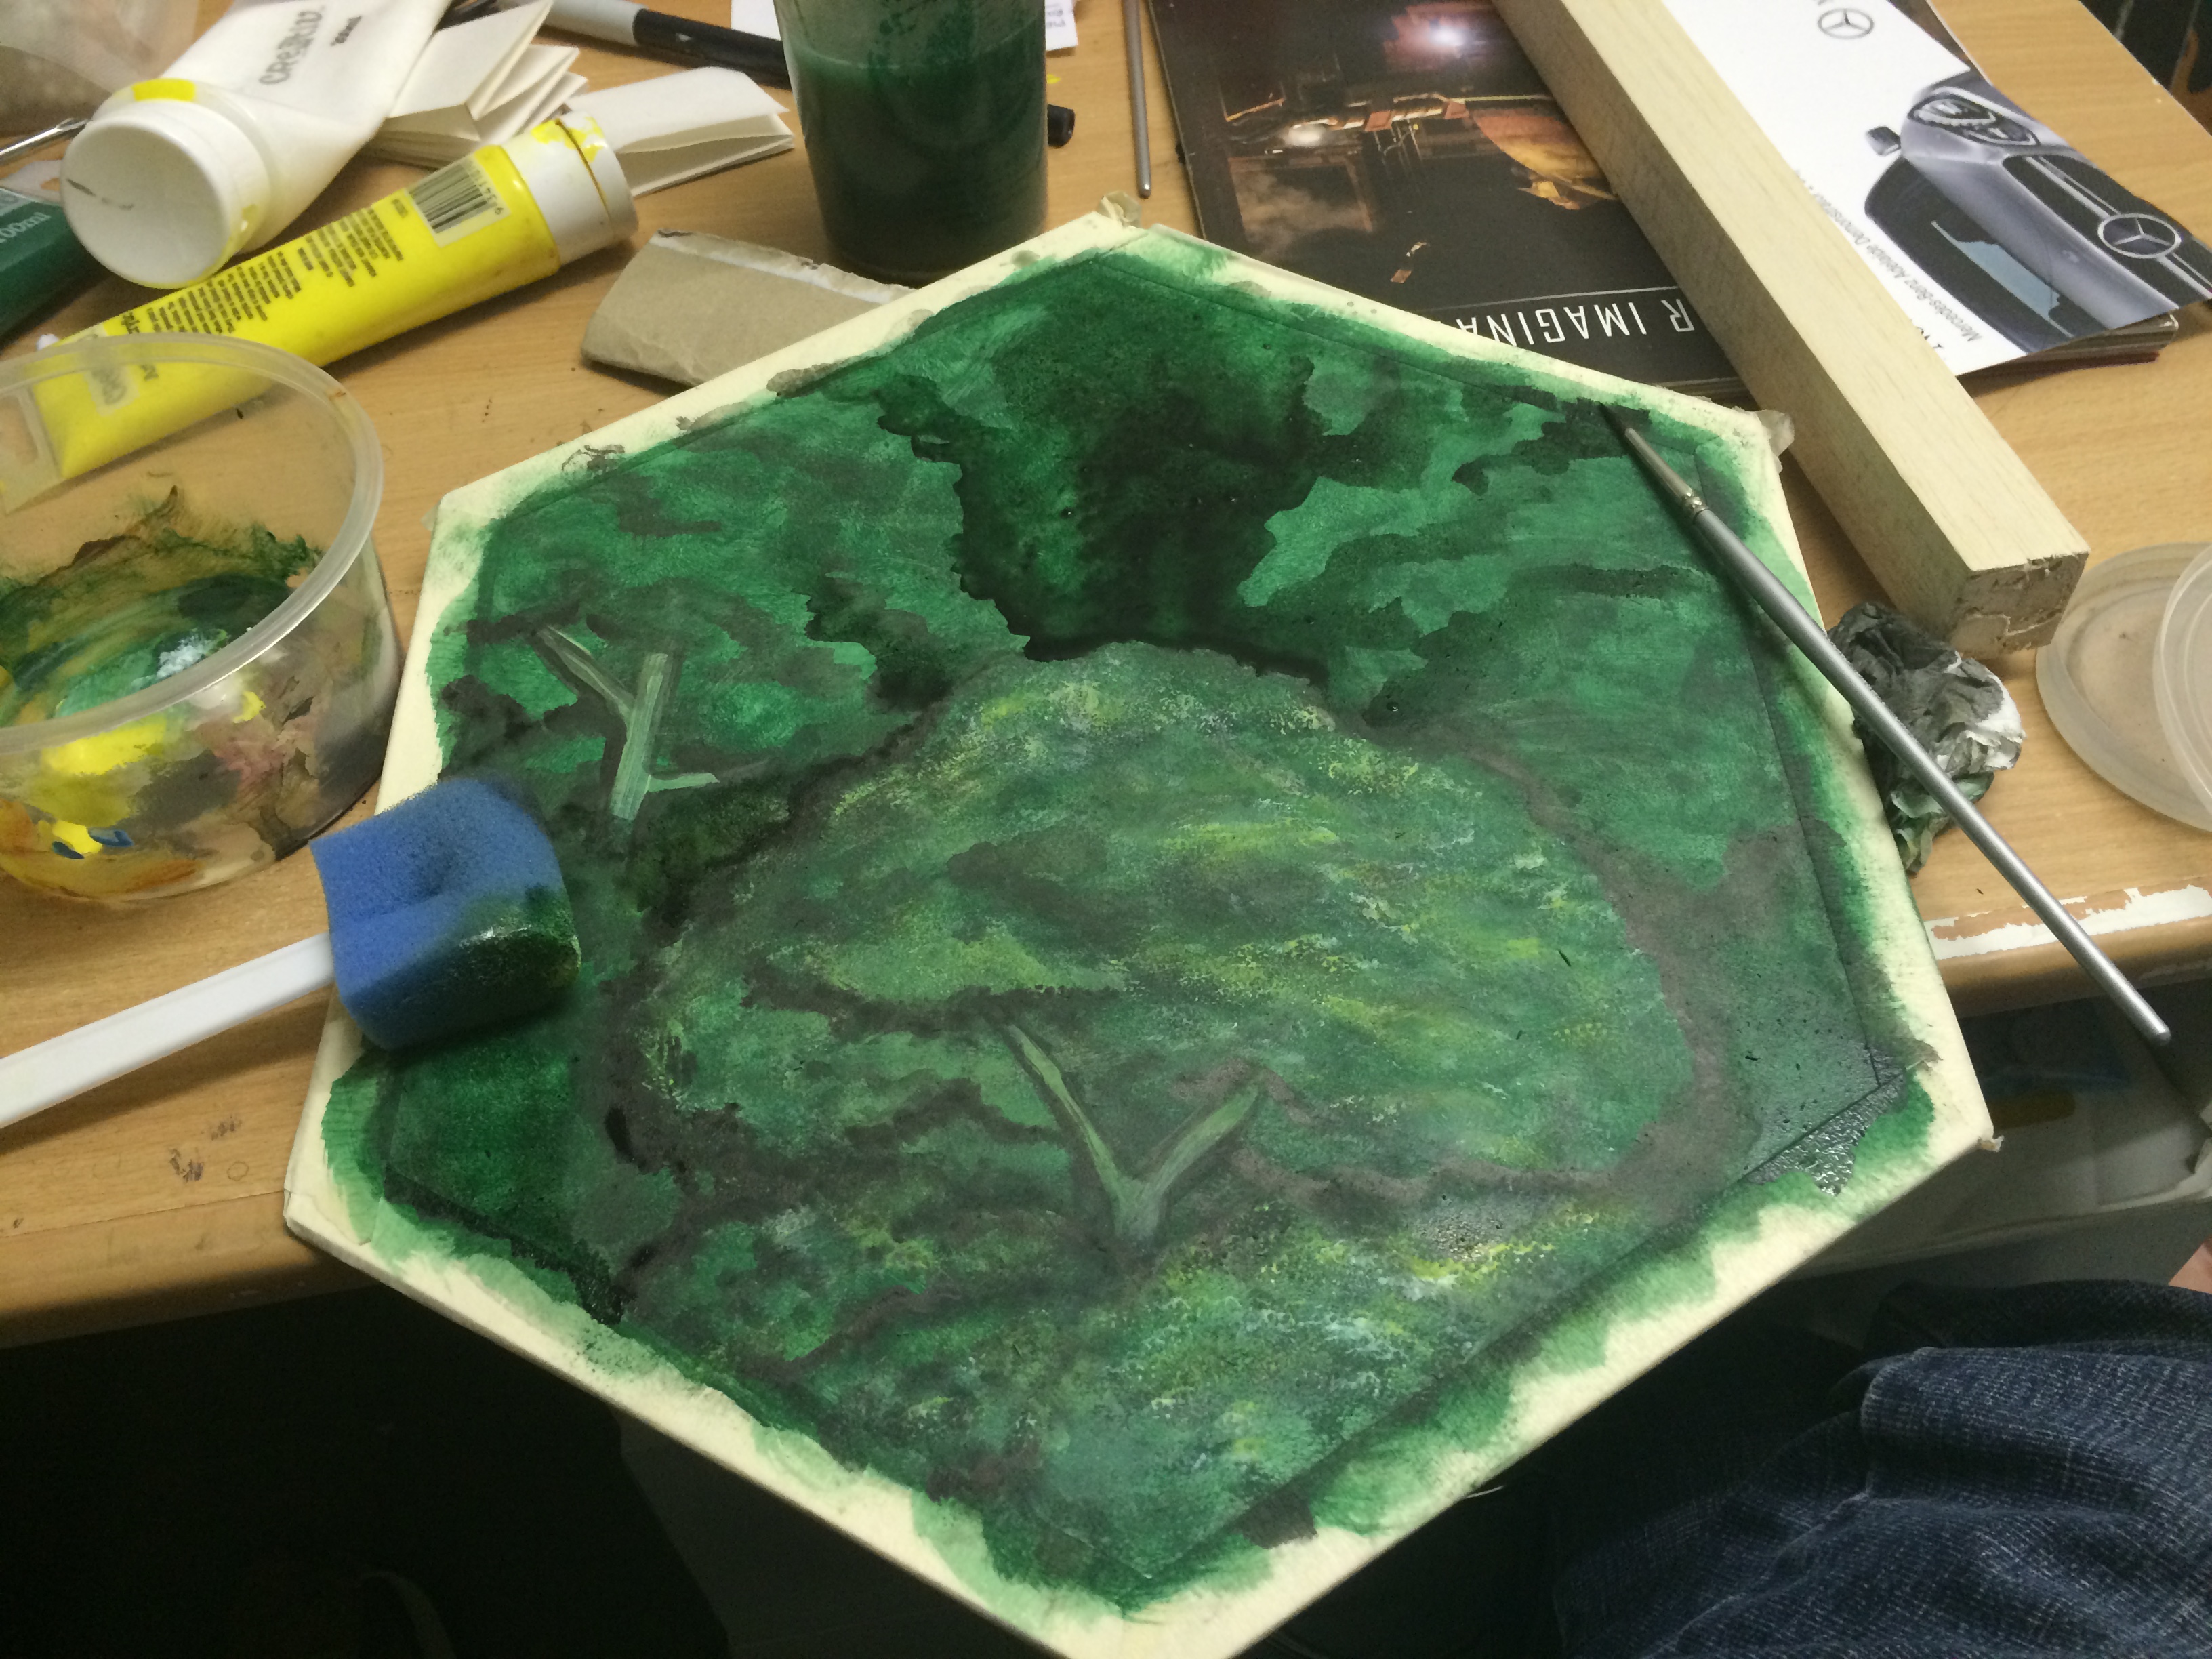
I then spent almost a month on the first forest tile, experimenting with using washes of ink to establish the forms of the trees.

8

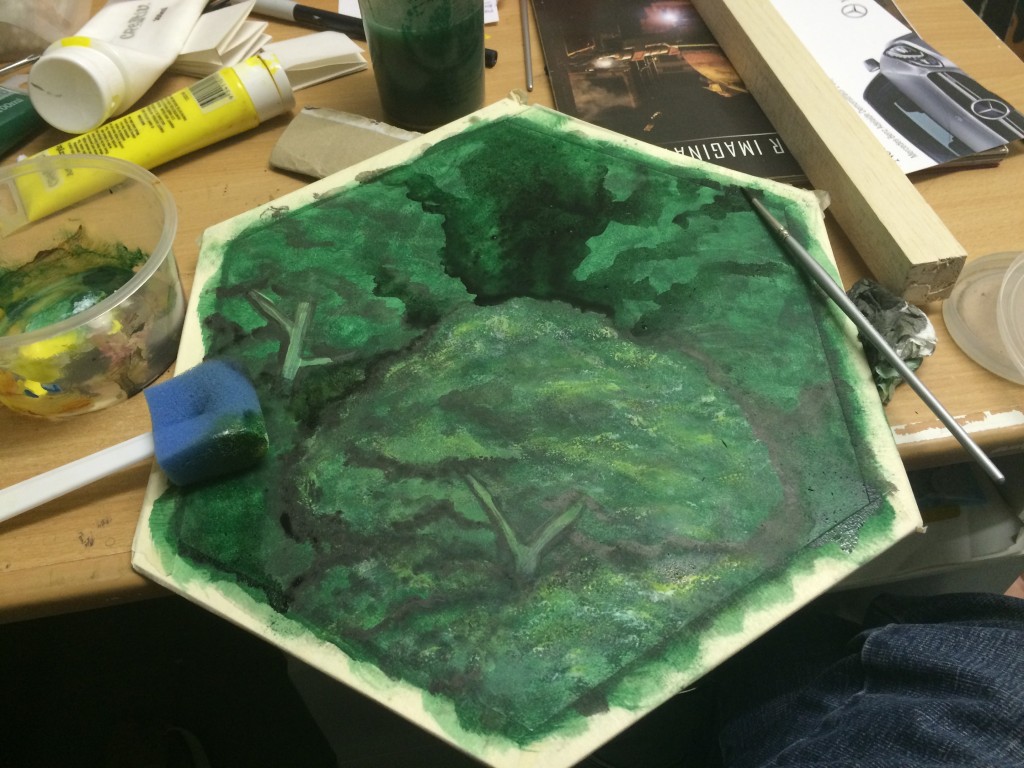
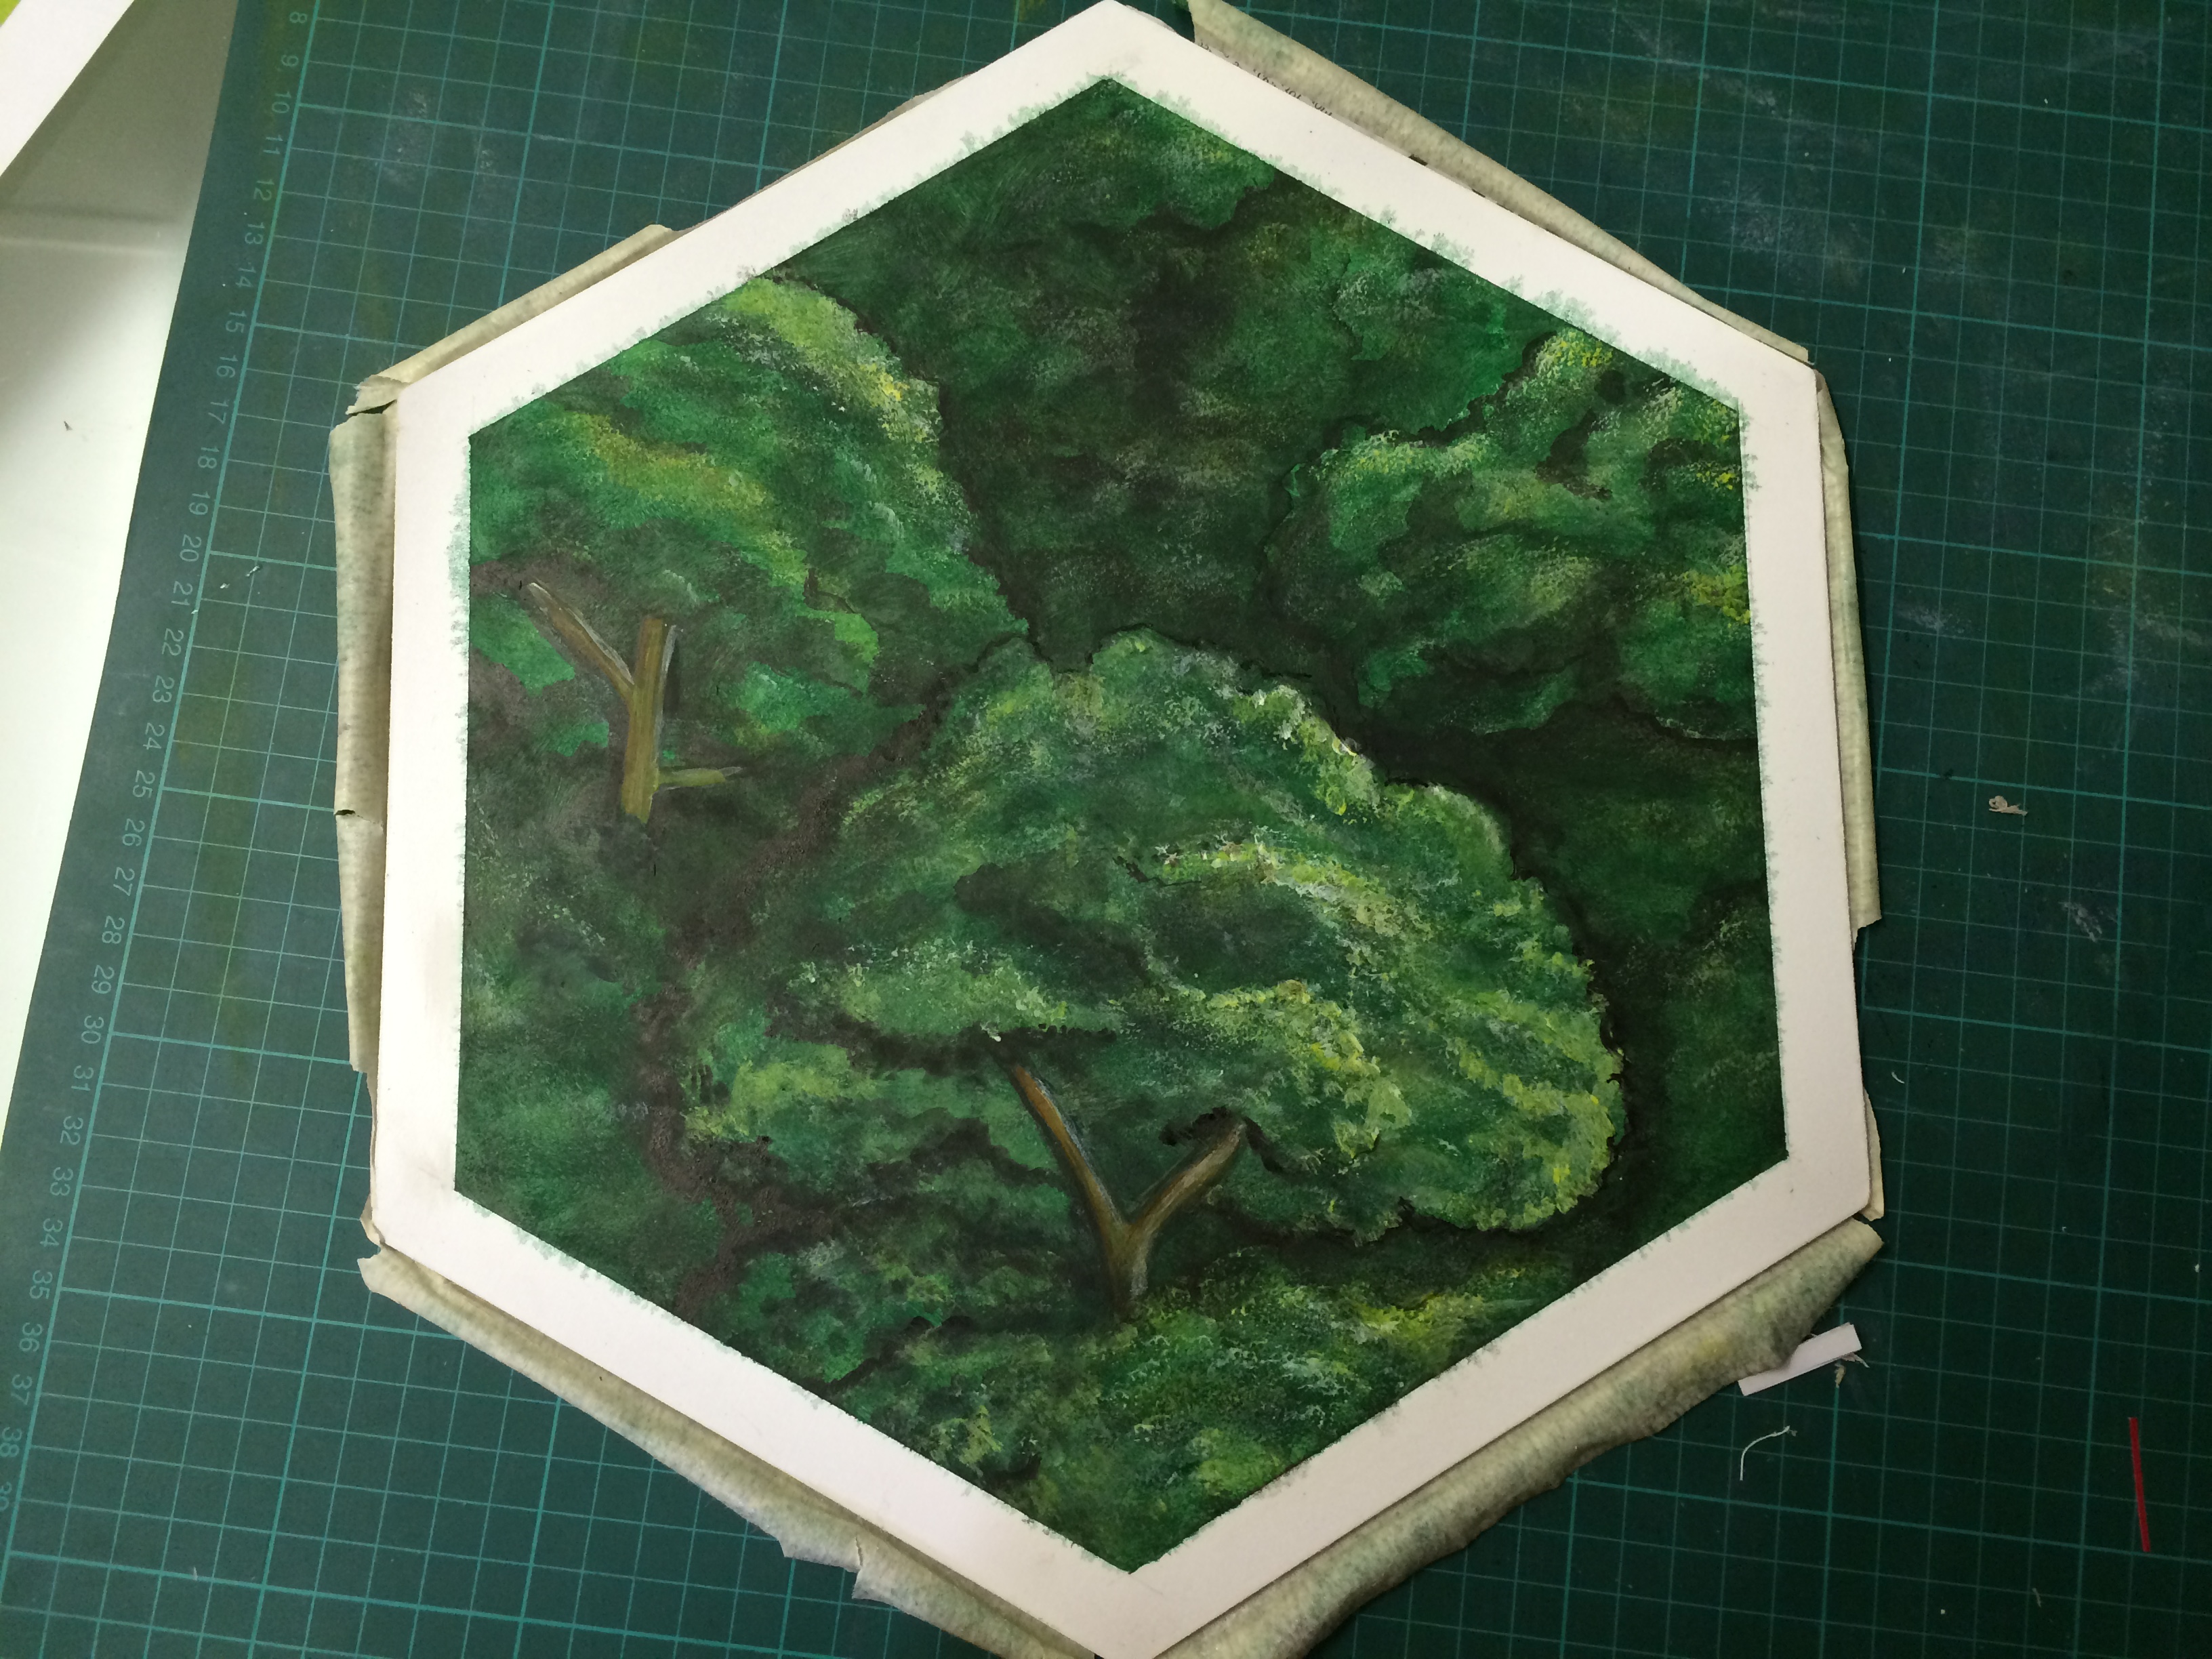
Once the forms were in place, I sponged on green, yellow and white paint to represent the foliage. Balancing the highlights and blacks proved to be tricky. This tile took so long because I kept trying to layer things on, and I ended up going around in circles. Finally I decided the tile had enough time spent on it and I finished it off with some brown on the trunks and declared it done.

9

Disappointingly, once un-masked it turned out that the edges were not sufficiently protected from the paint. A little bit of sandpaper and touch-up paint fixed this, but the paint bleeding proved to be a nuisance throughout the project and when I ended up against the clock most of the tiles didn’t get this touch-up treatment.

11

It took another three months for me to complete the rest of the forest tiles.
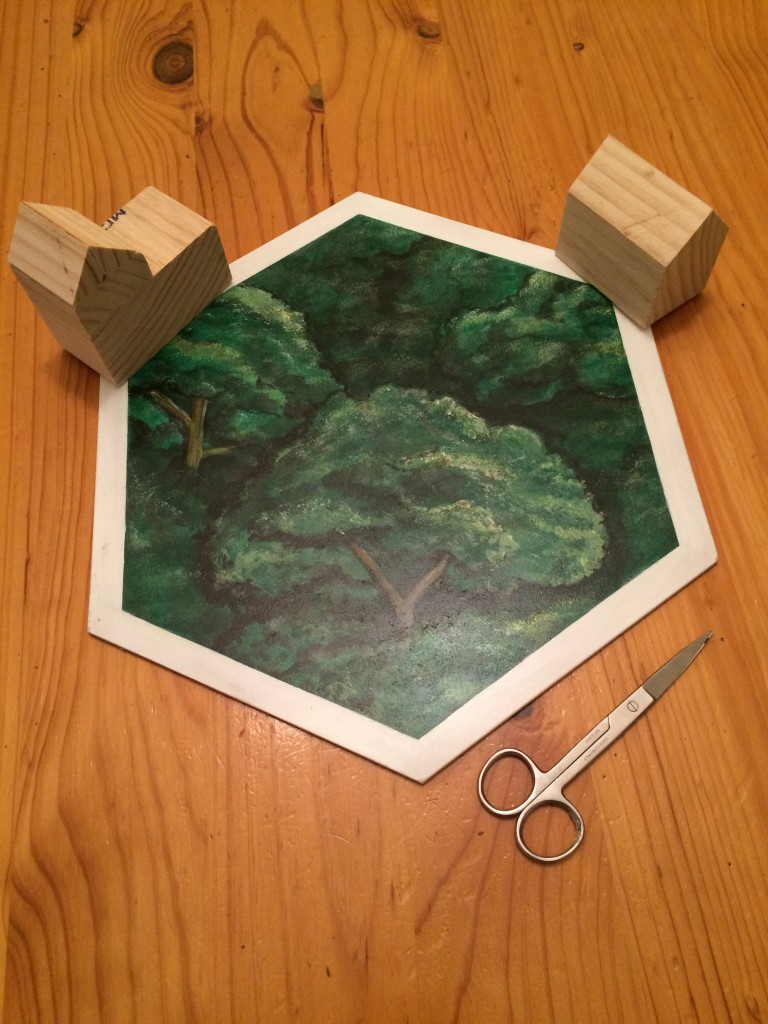
Pasture Tiles

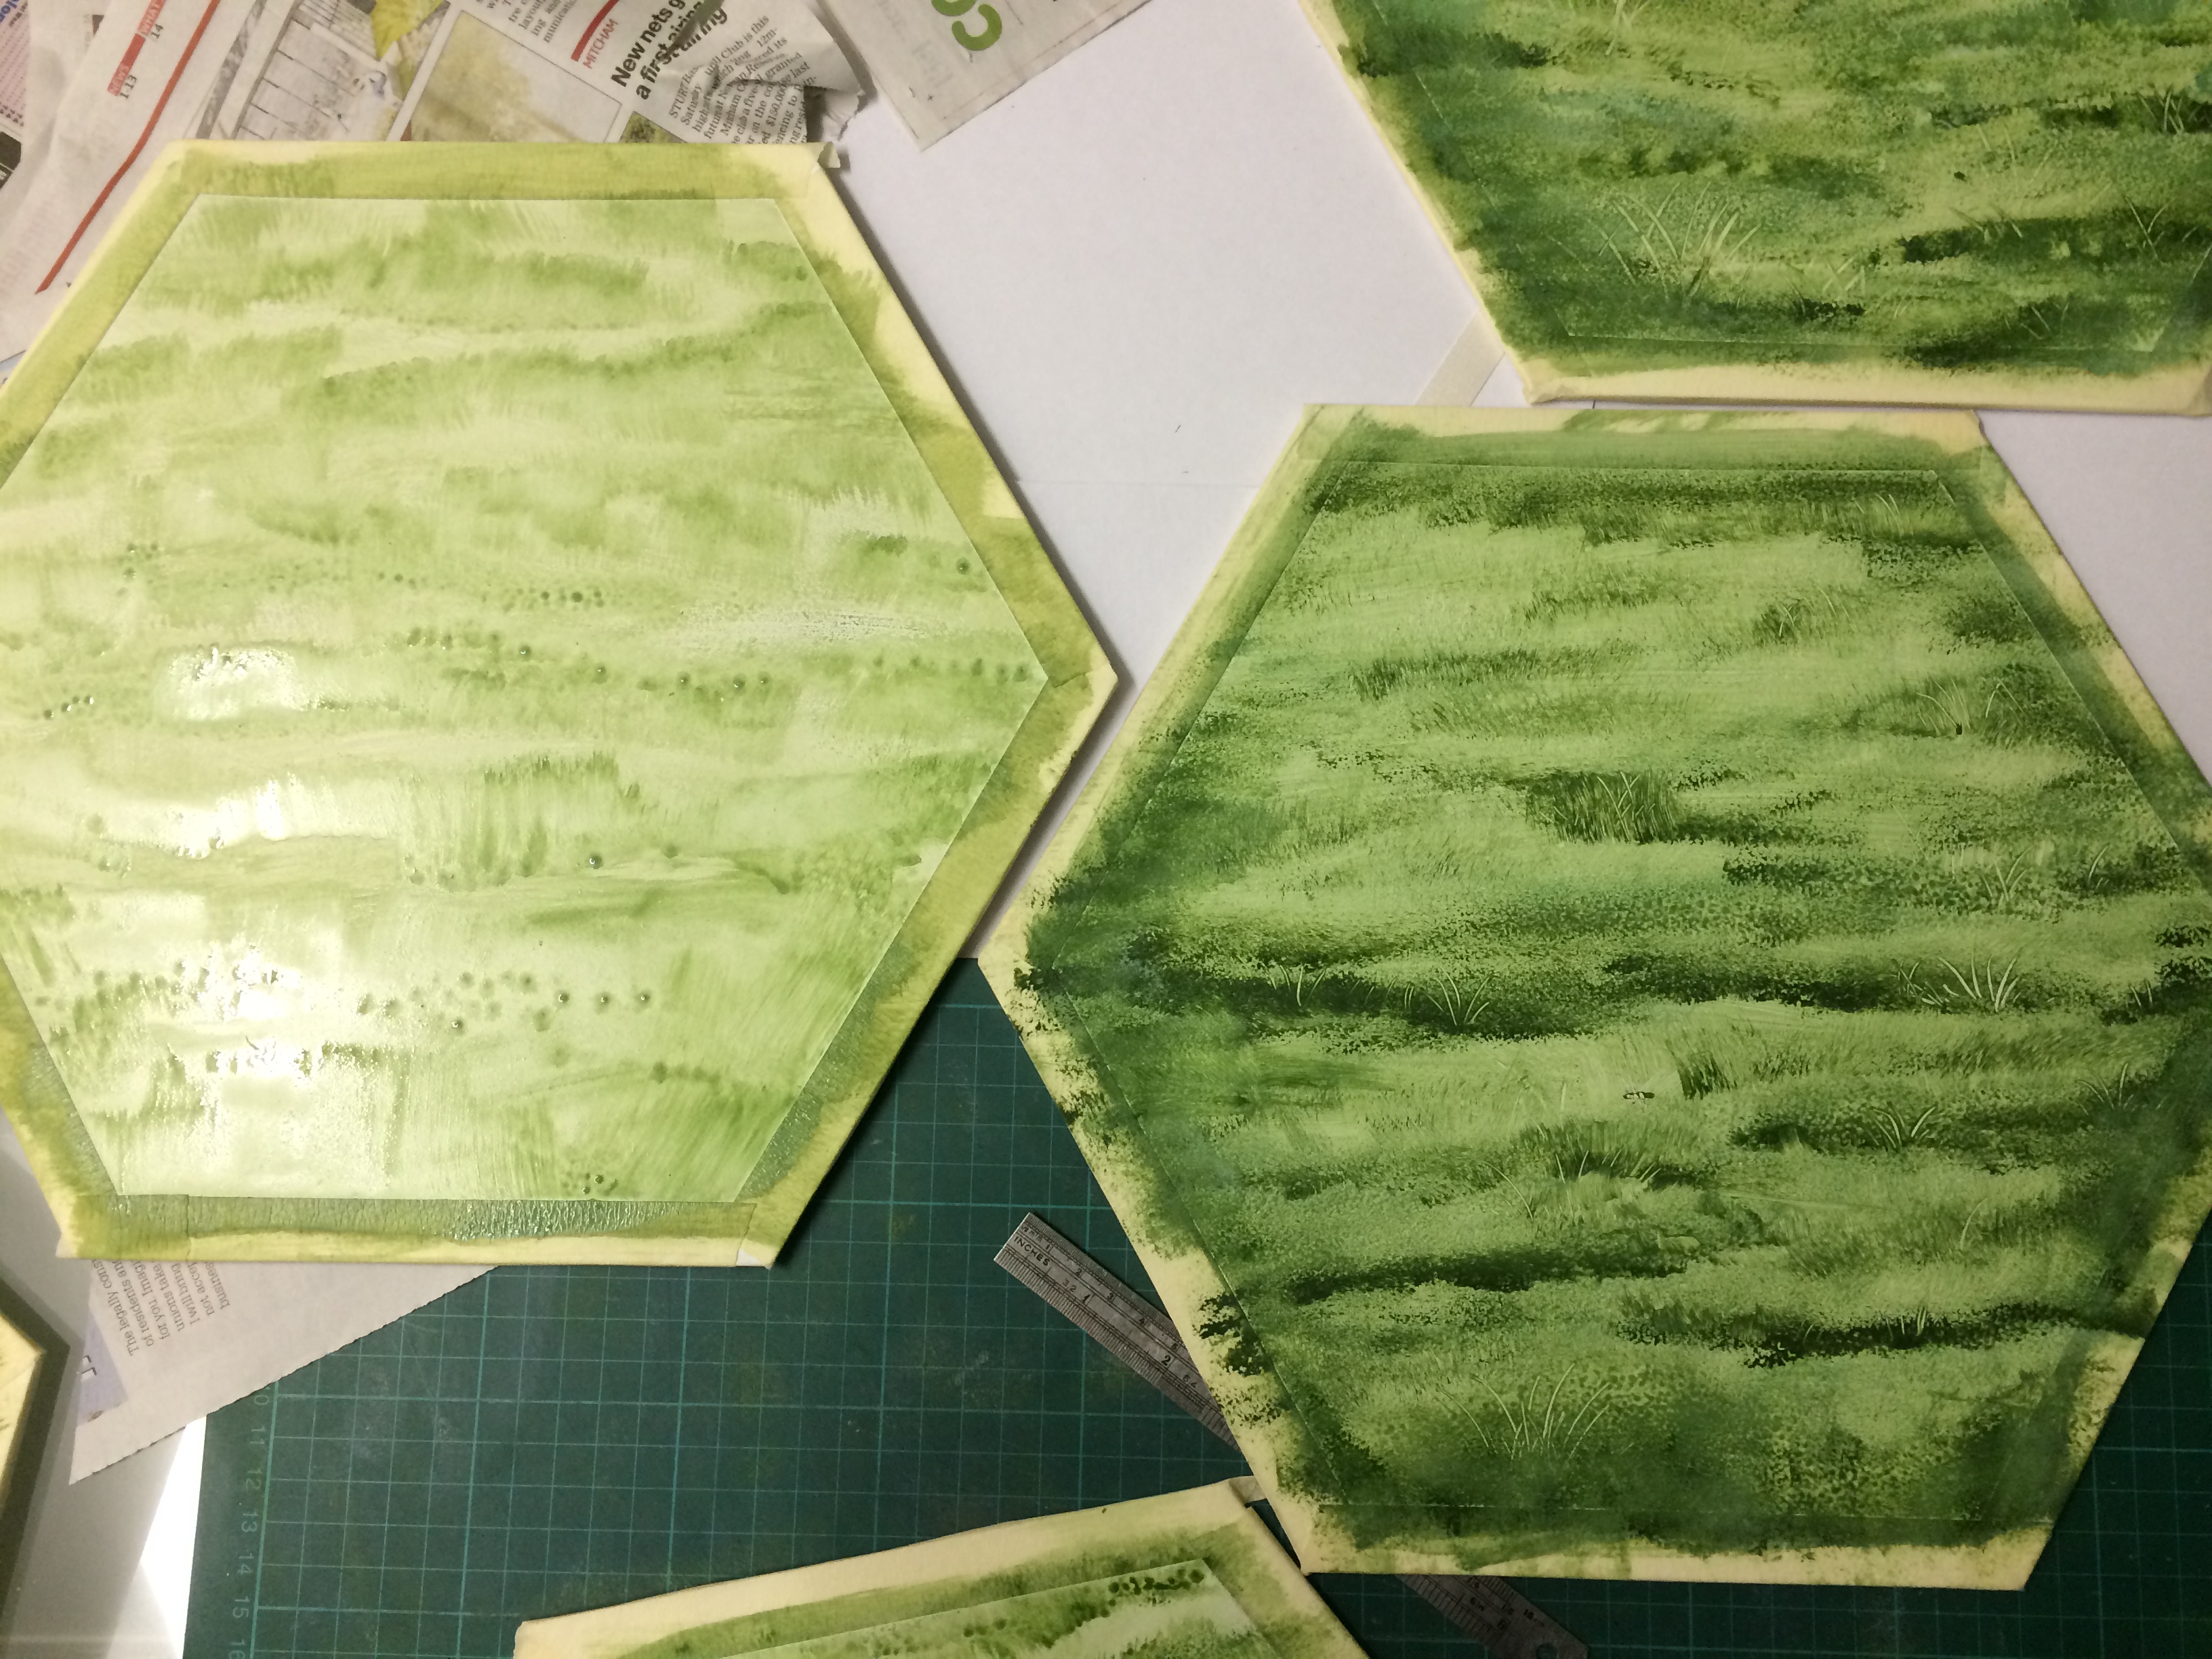
Filled with despair about how slowly progress was being made on the hexes, I decided to tackle the pasture tiles. I knew that they would be quite simple to execute.

I brushed on a light mix of green and while the paint was still wet I used the plastic handle of the sponge to scrape out blades of grass.

12

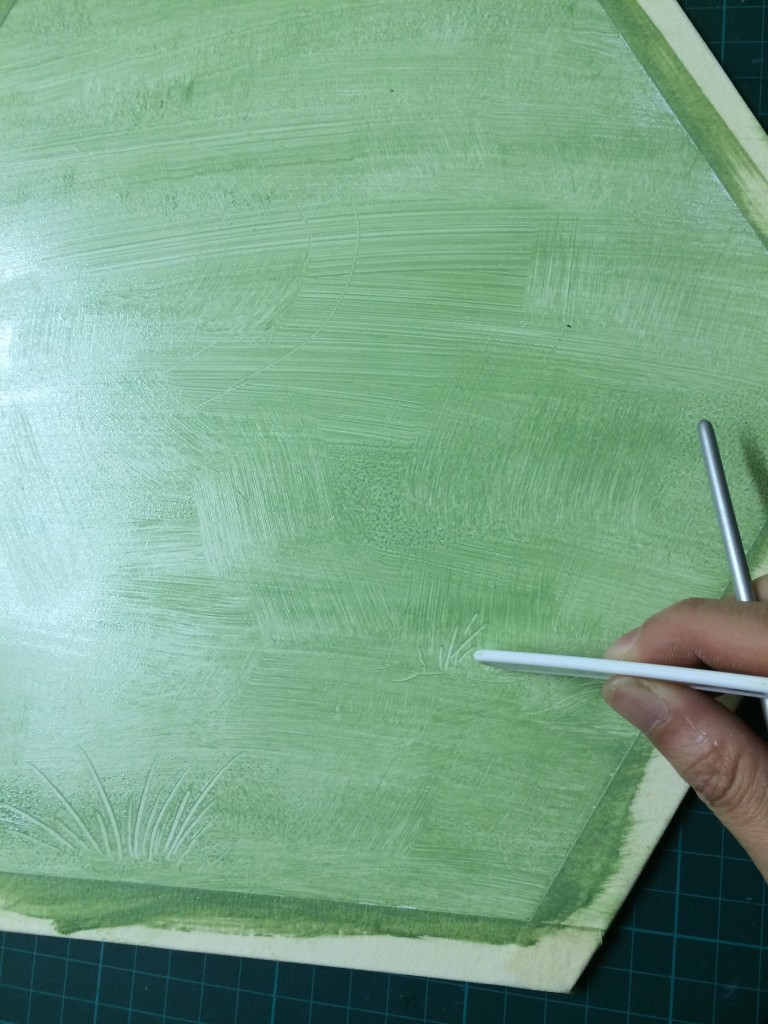
Once the grass was in place I sponged in darker patches to create interesting patterns, scraping out a few more blades of grass as I went.

13

All six of the tiles were completed over two days. I had some momentum back.
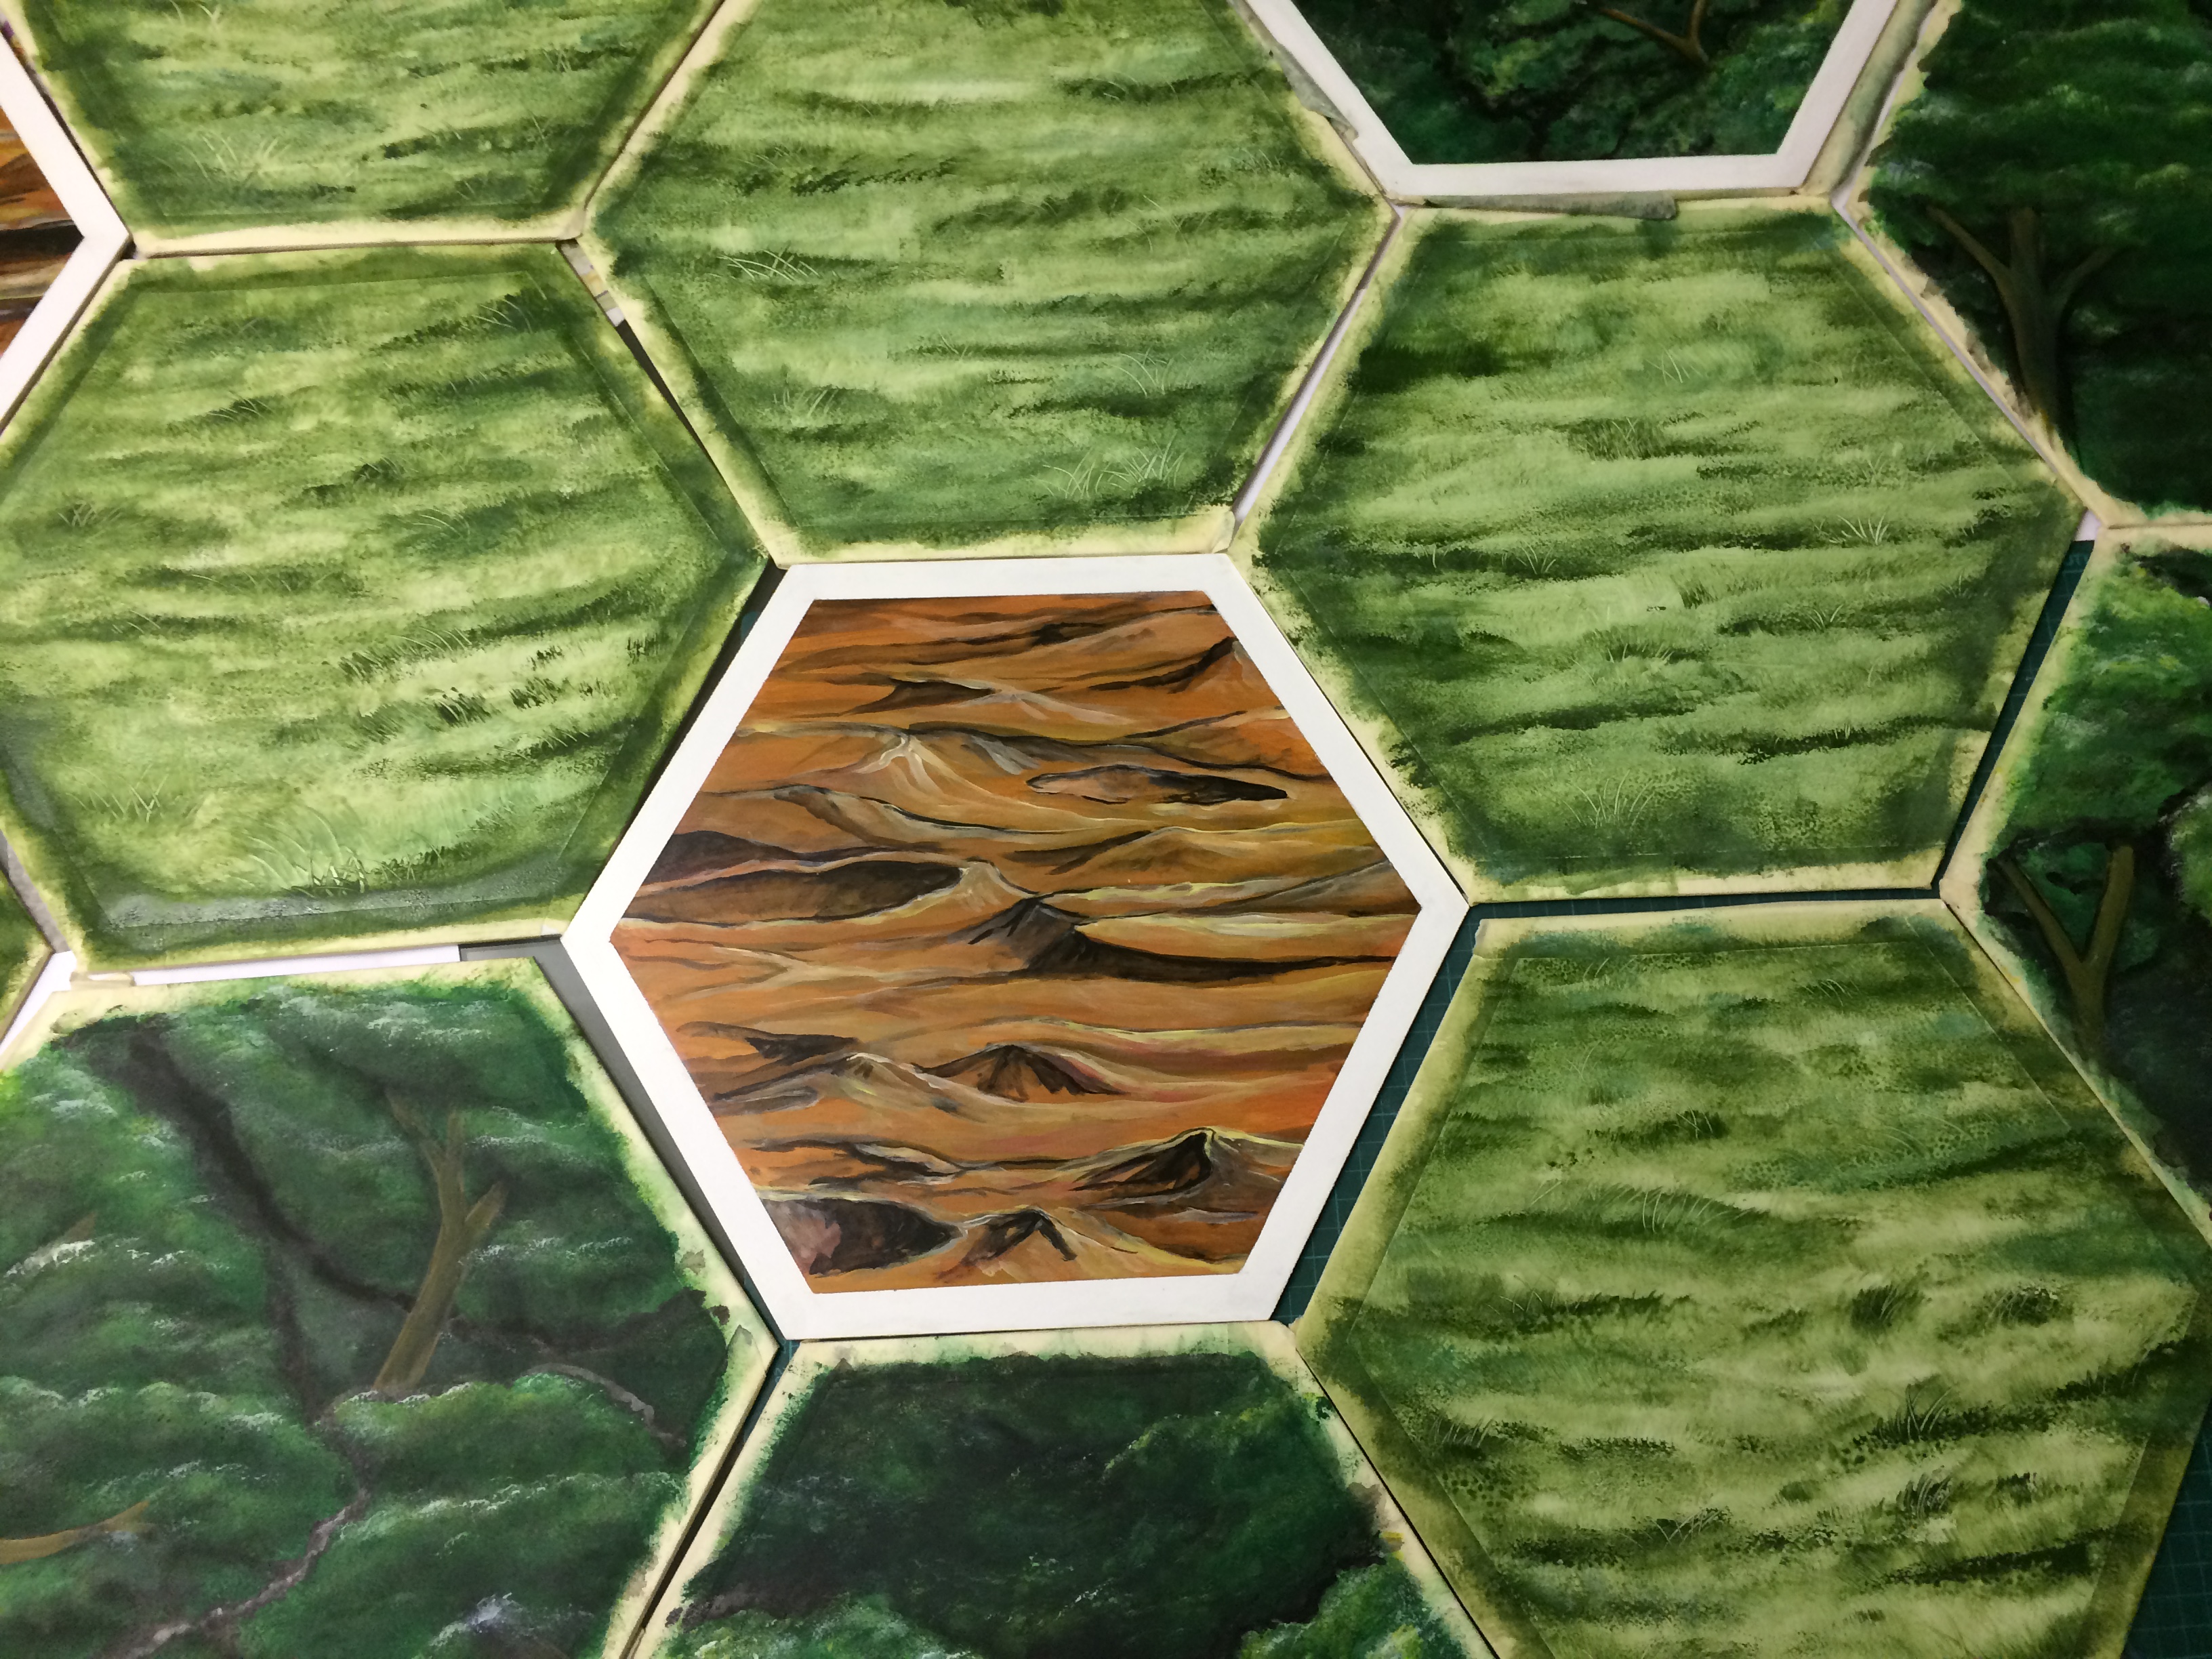
16

Mountain Tiles

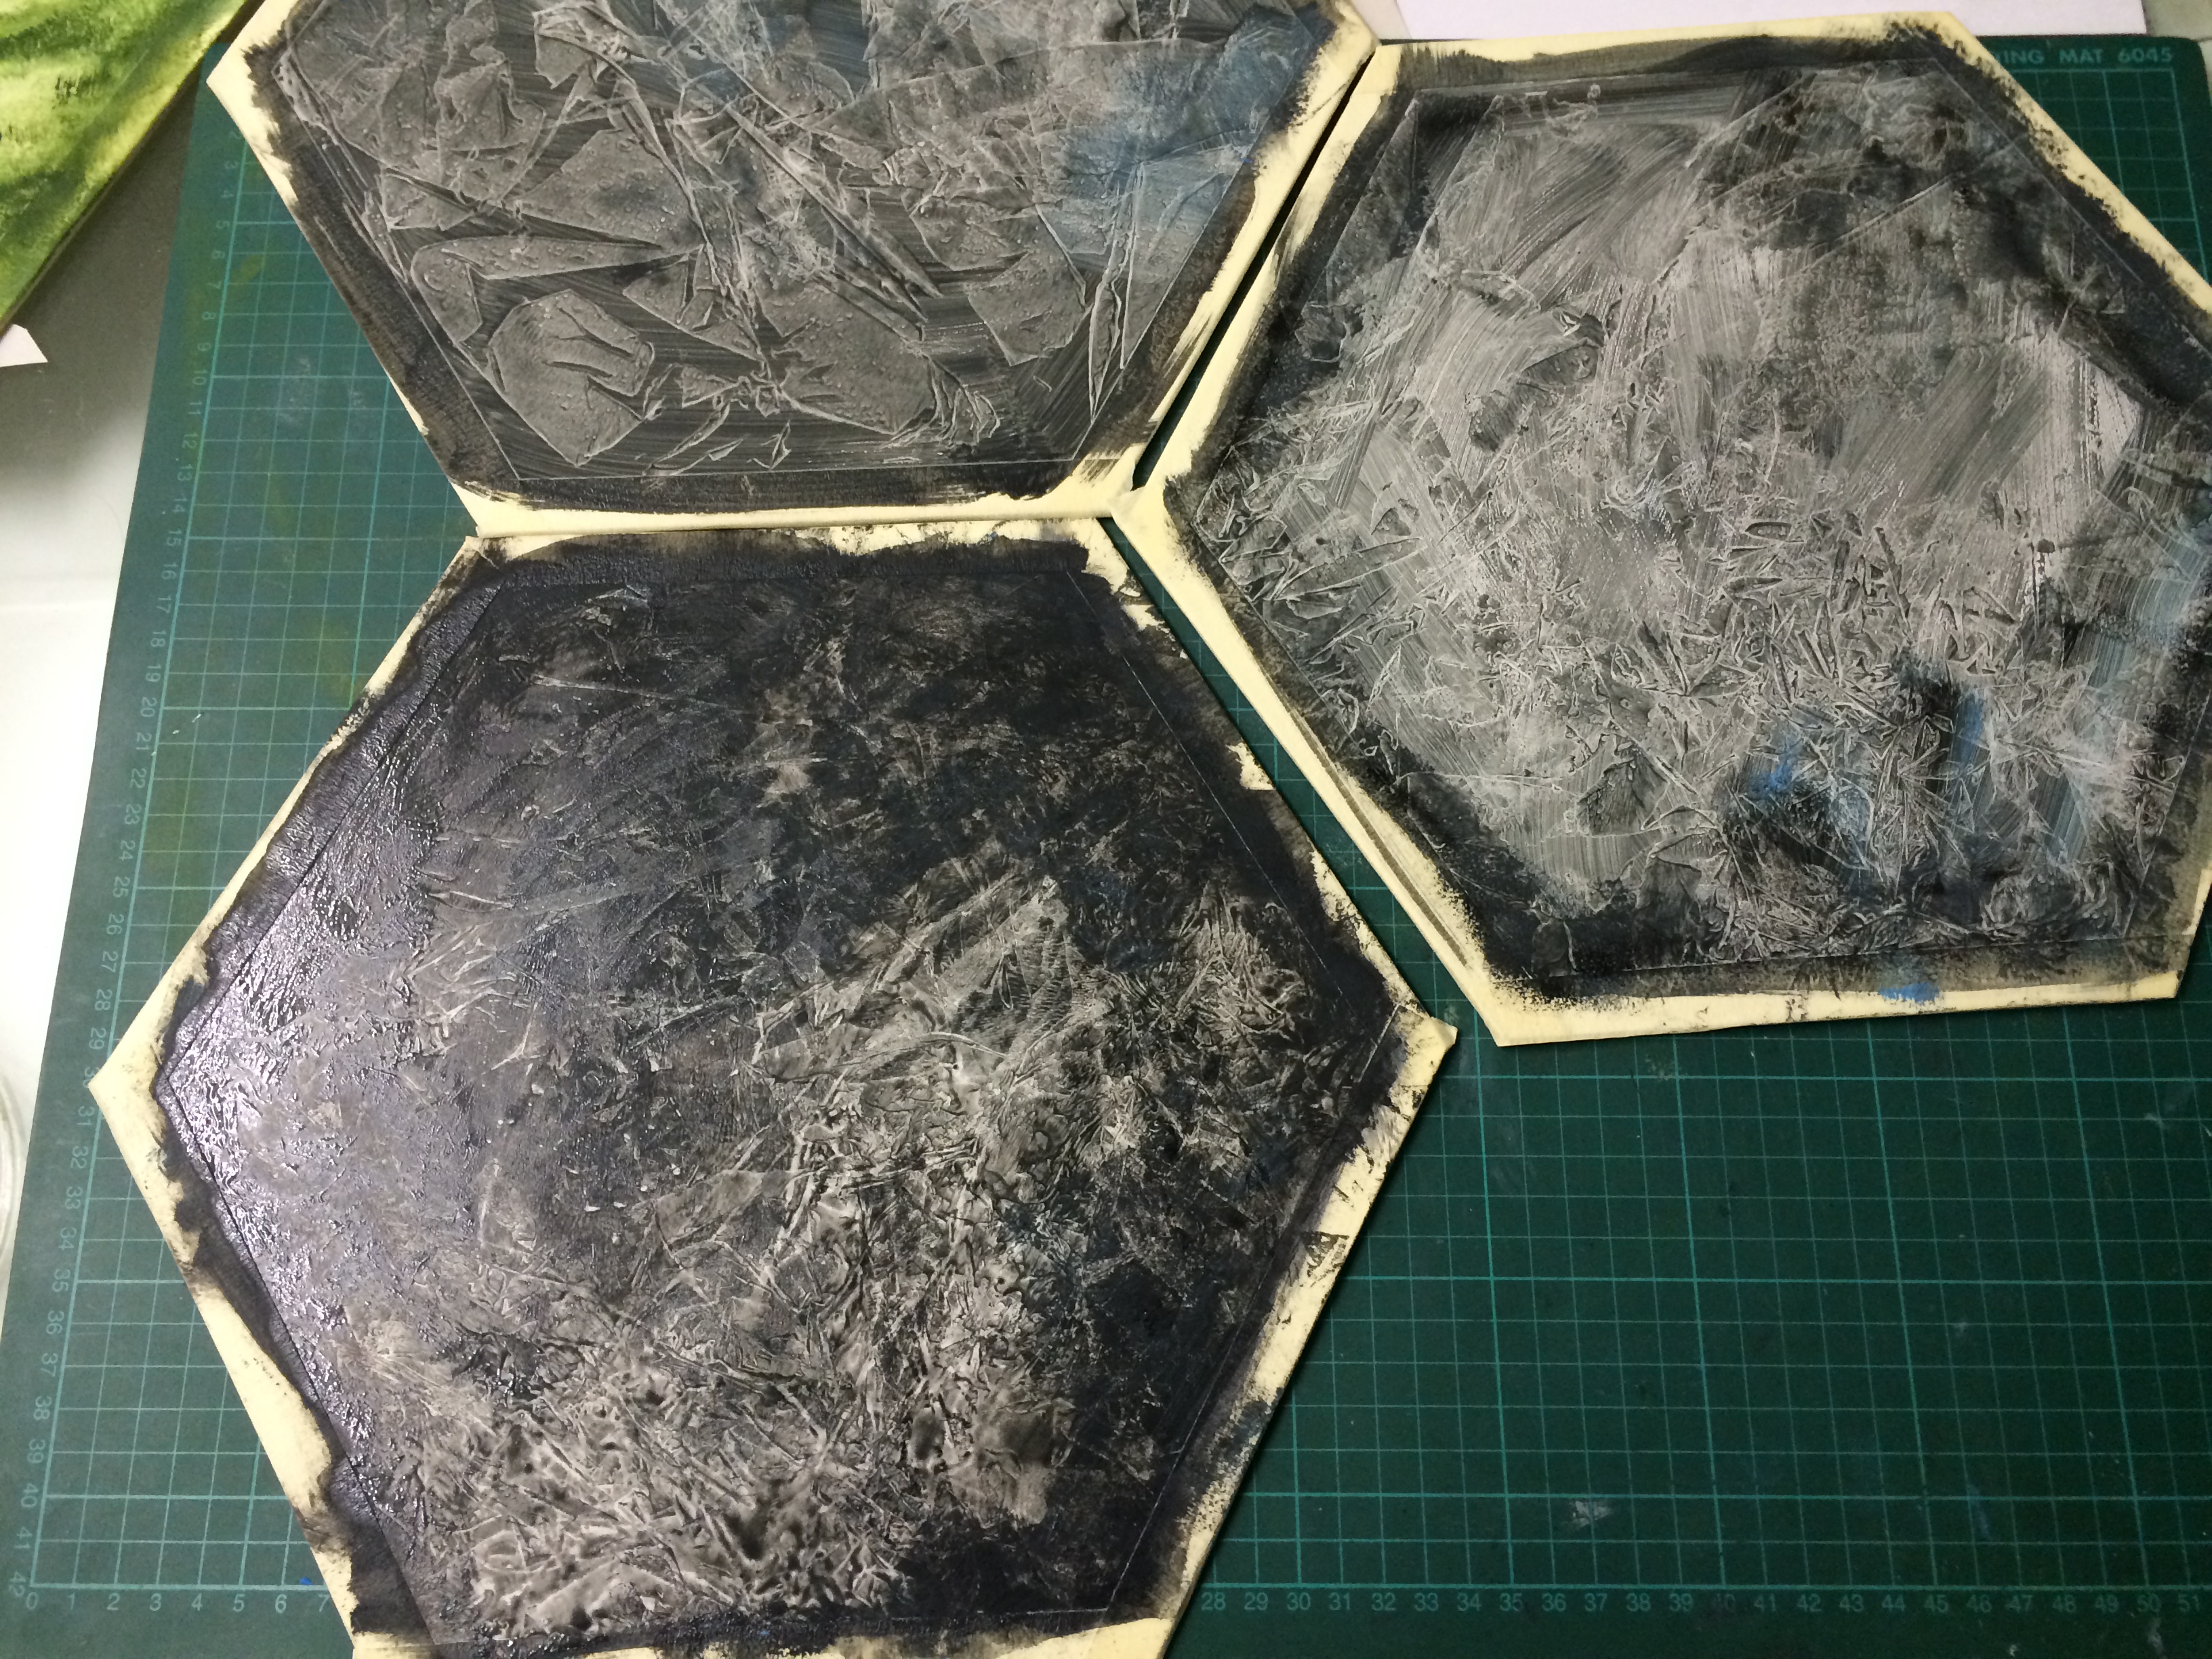
I launched straight into the mountain tiles, after having the idea of using glad wrap to create some of the rocky texture.

Each tile was painted with a mix of greys and blues and the glad wrap was laid into the still-wet paint.

18

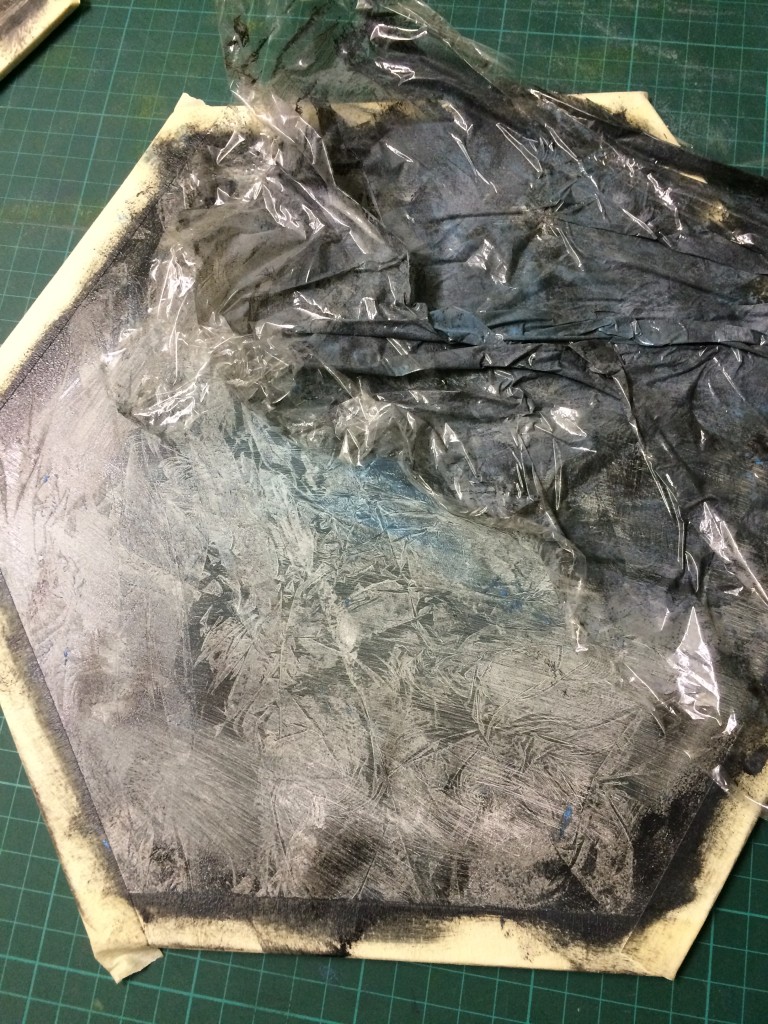
On lifting the glad-wrap, all sorts of crazed-like textures are created.

19

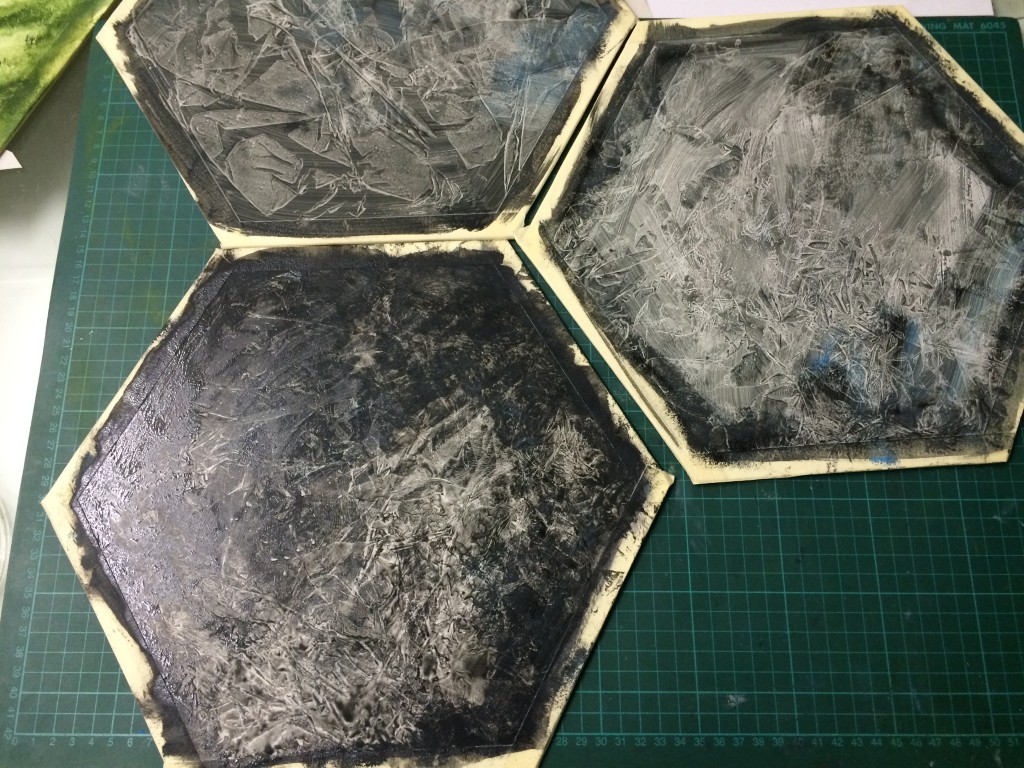
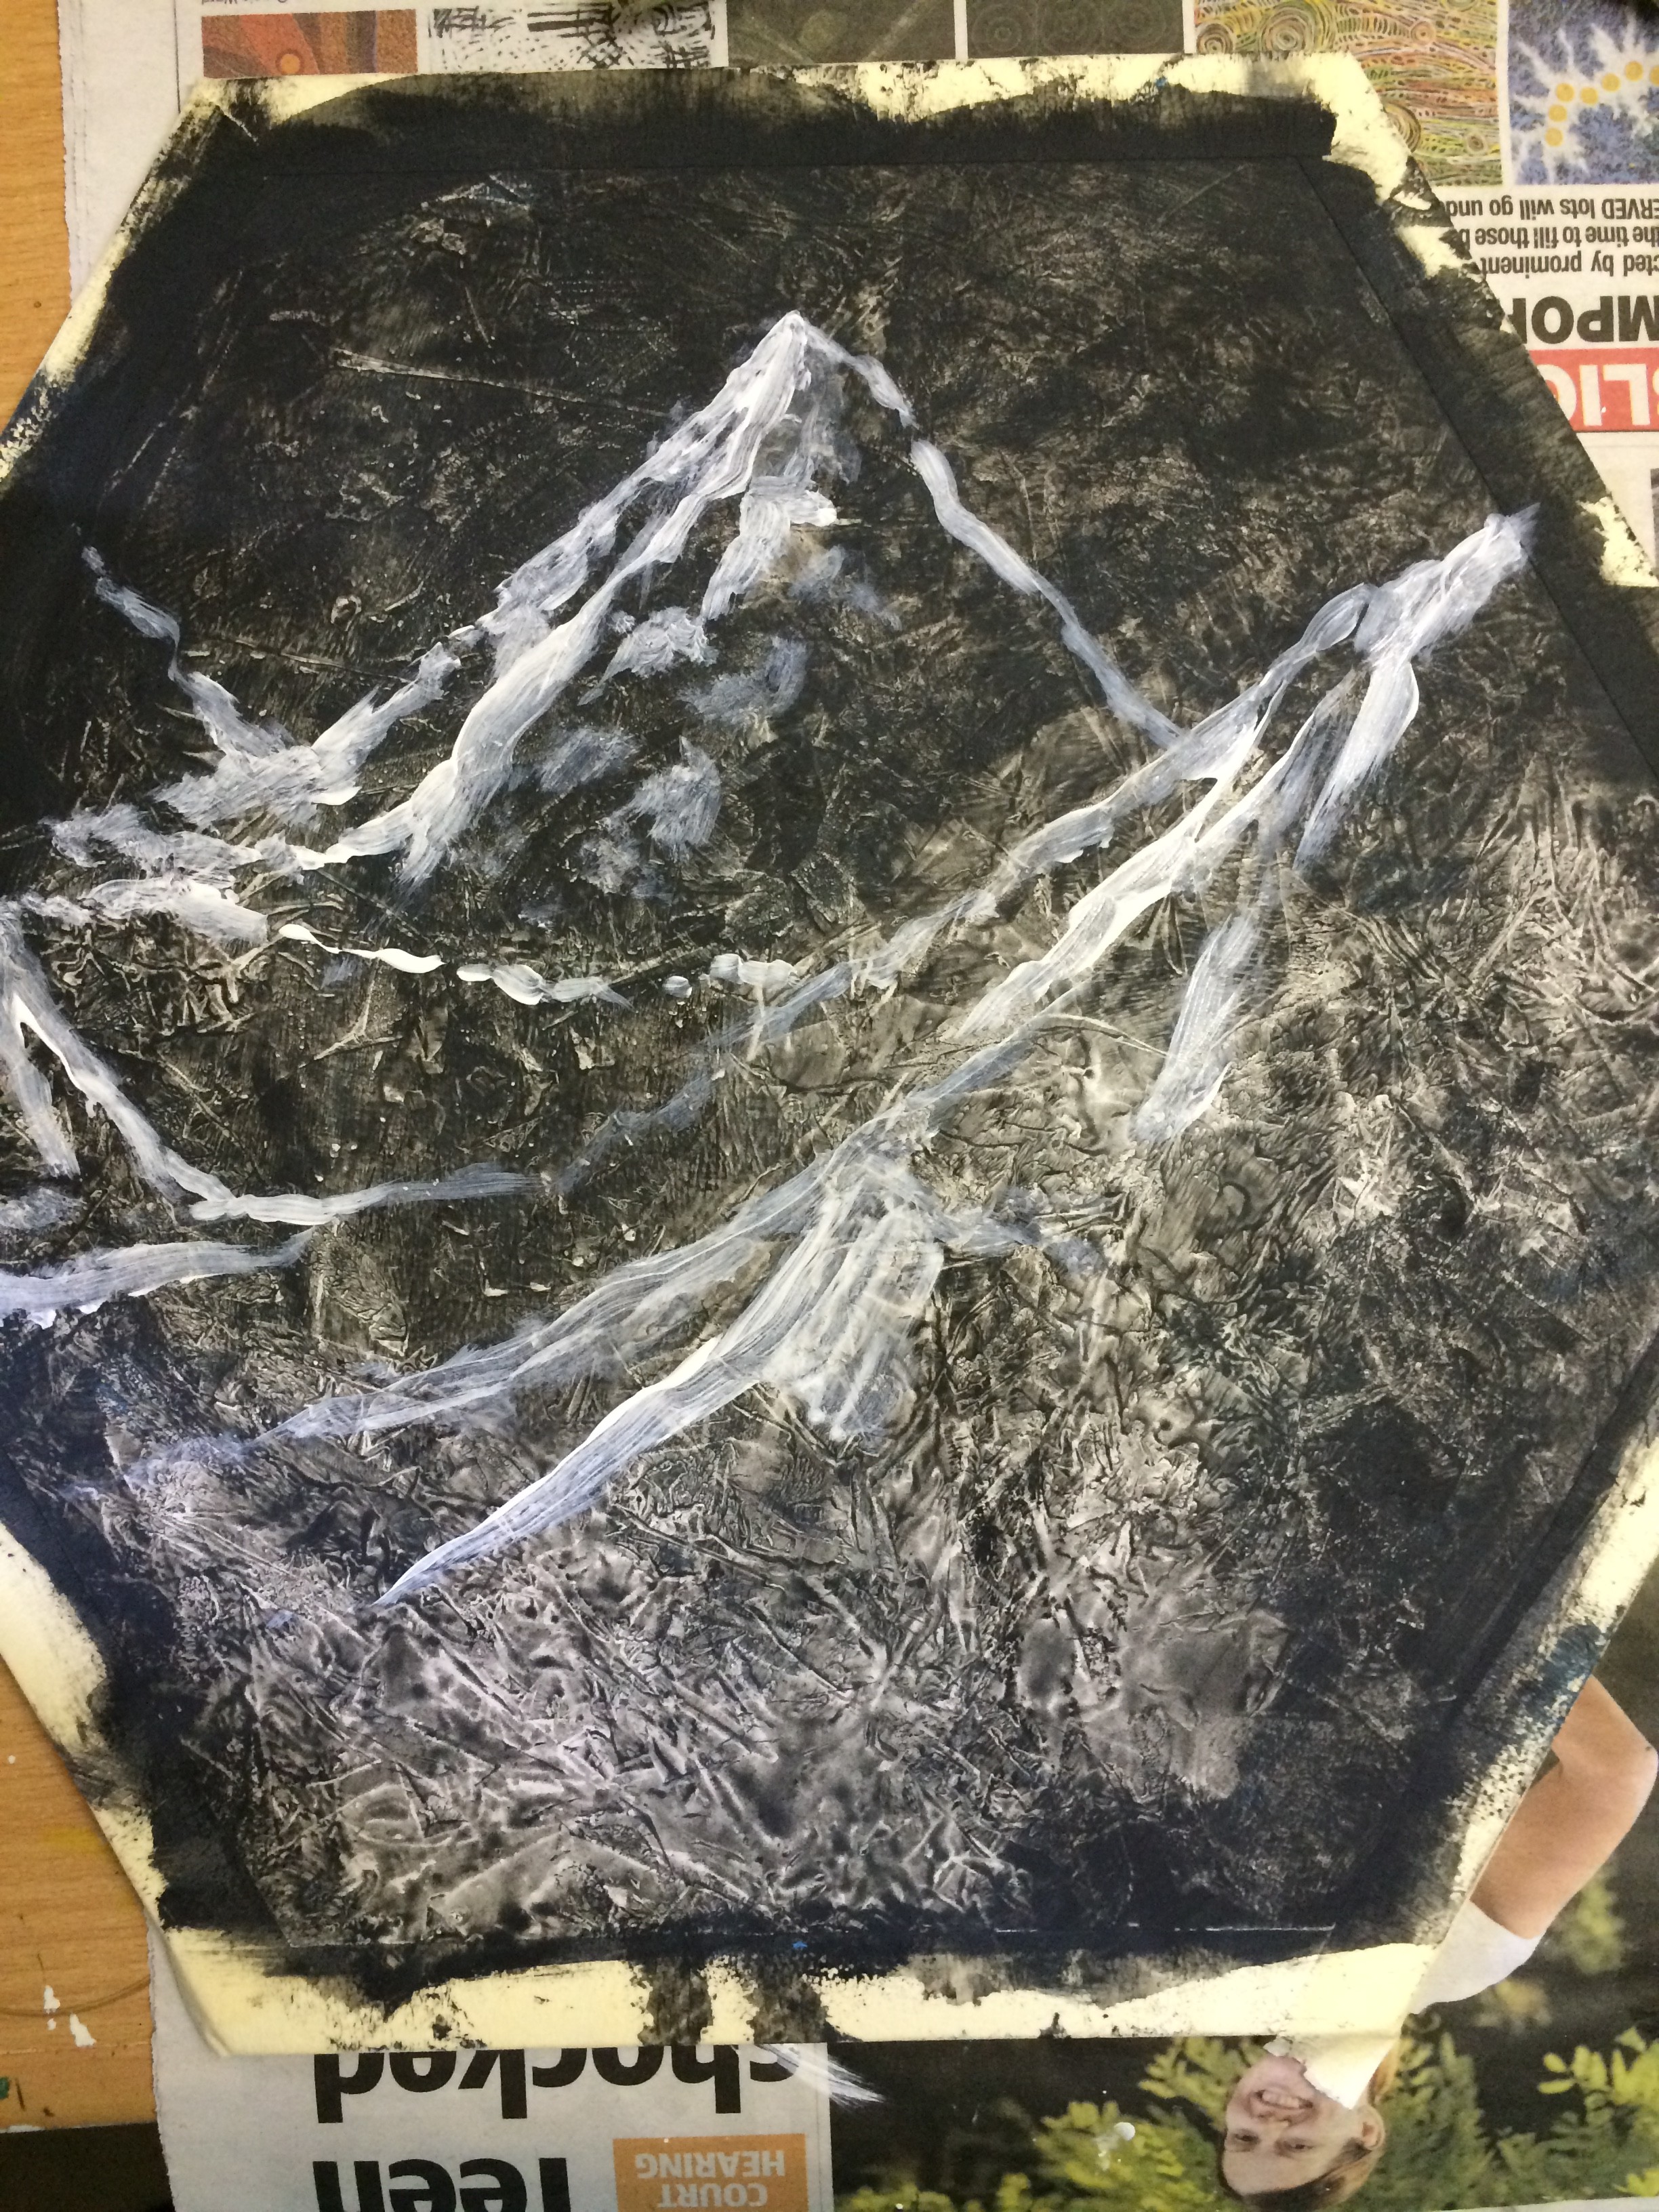
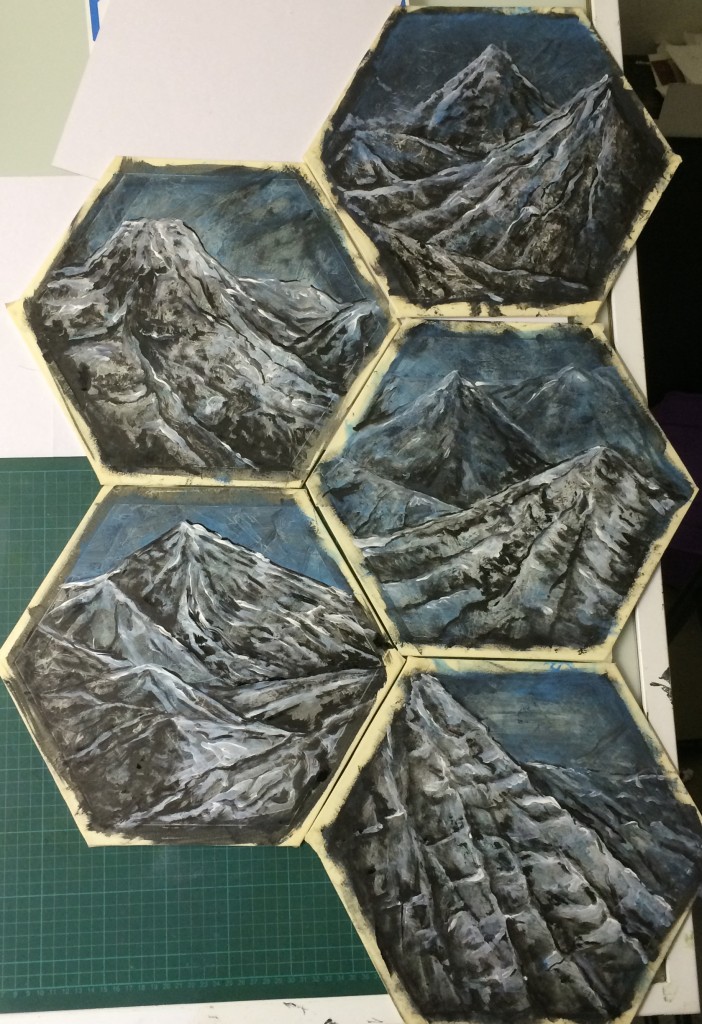
After letting the textured layer dry, I painted in white cliff faces. I tried to pick out shapes in the textures to guide what shapes the mountain tops would take.

21

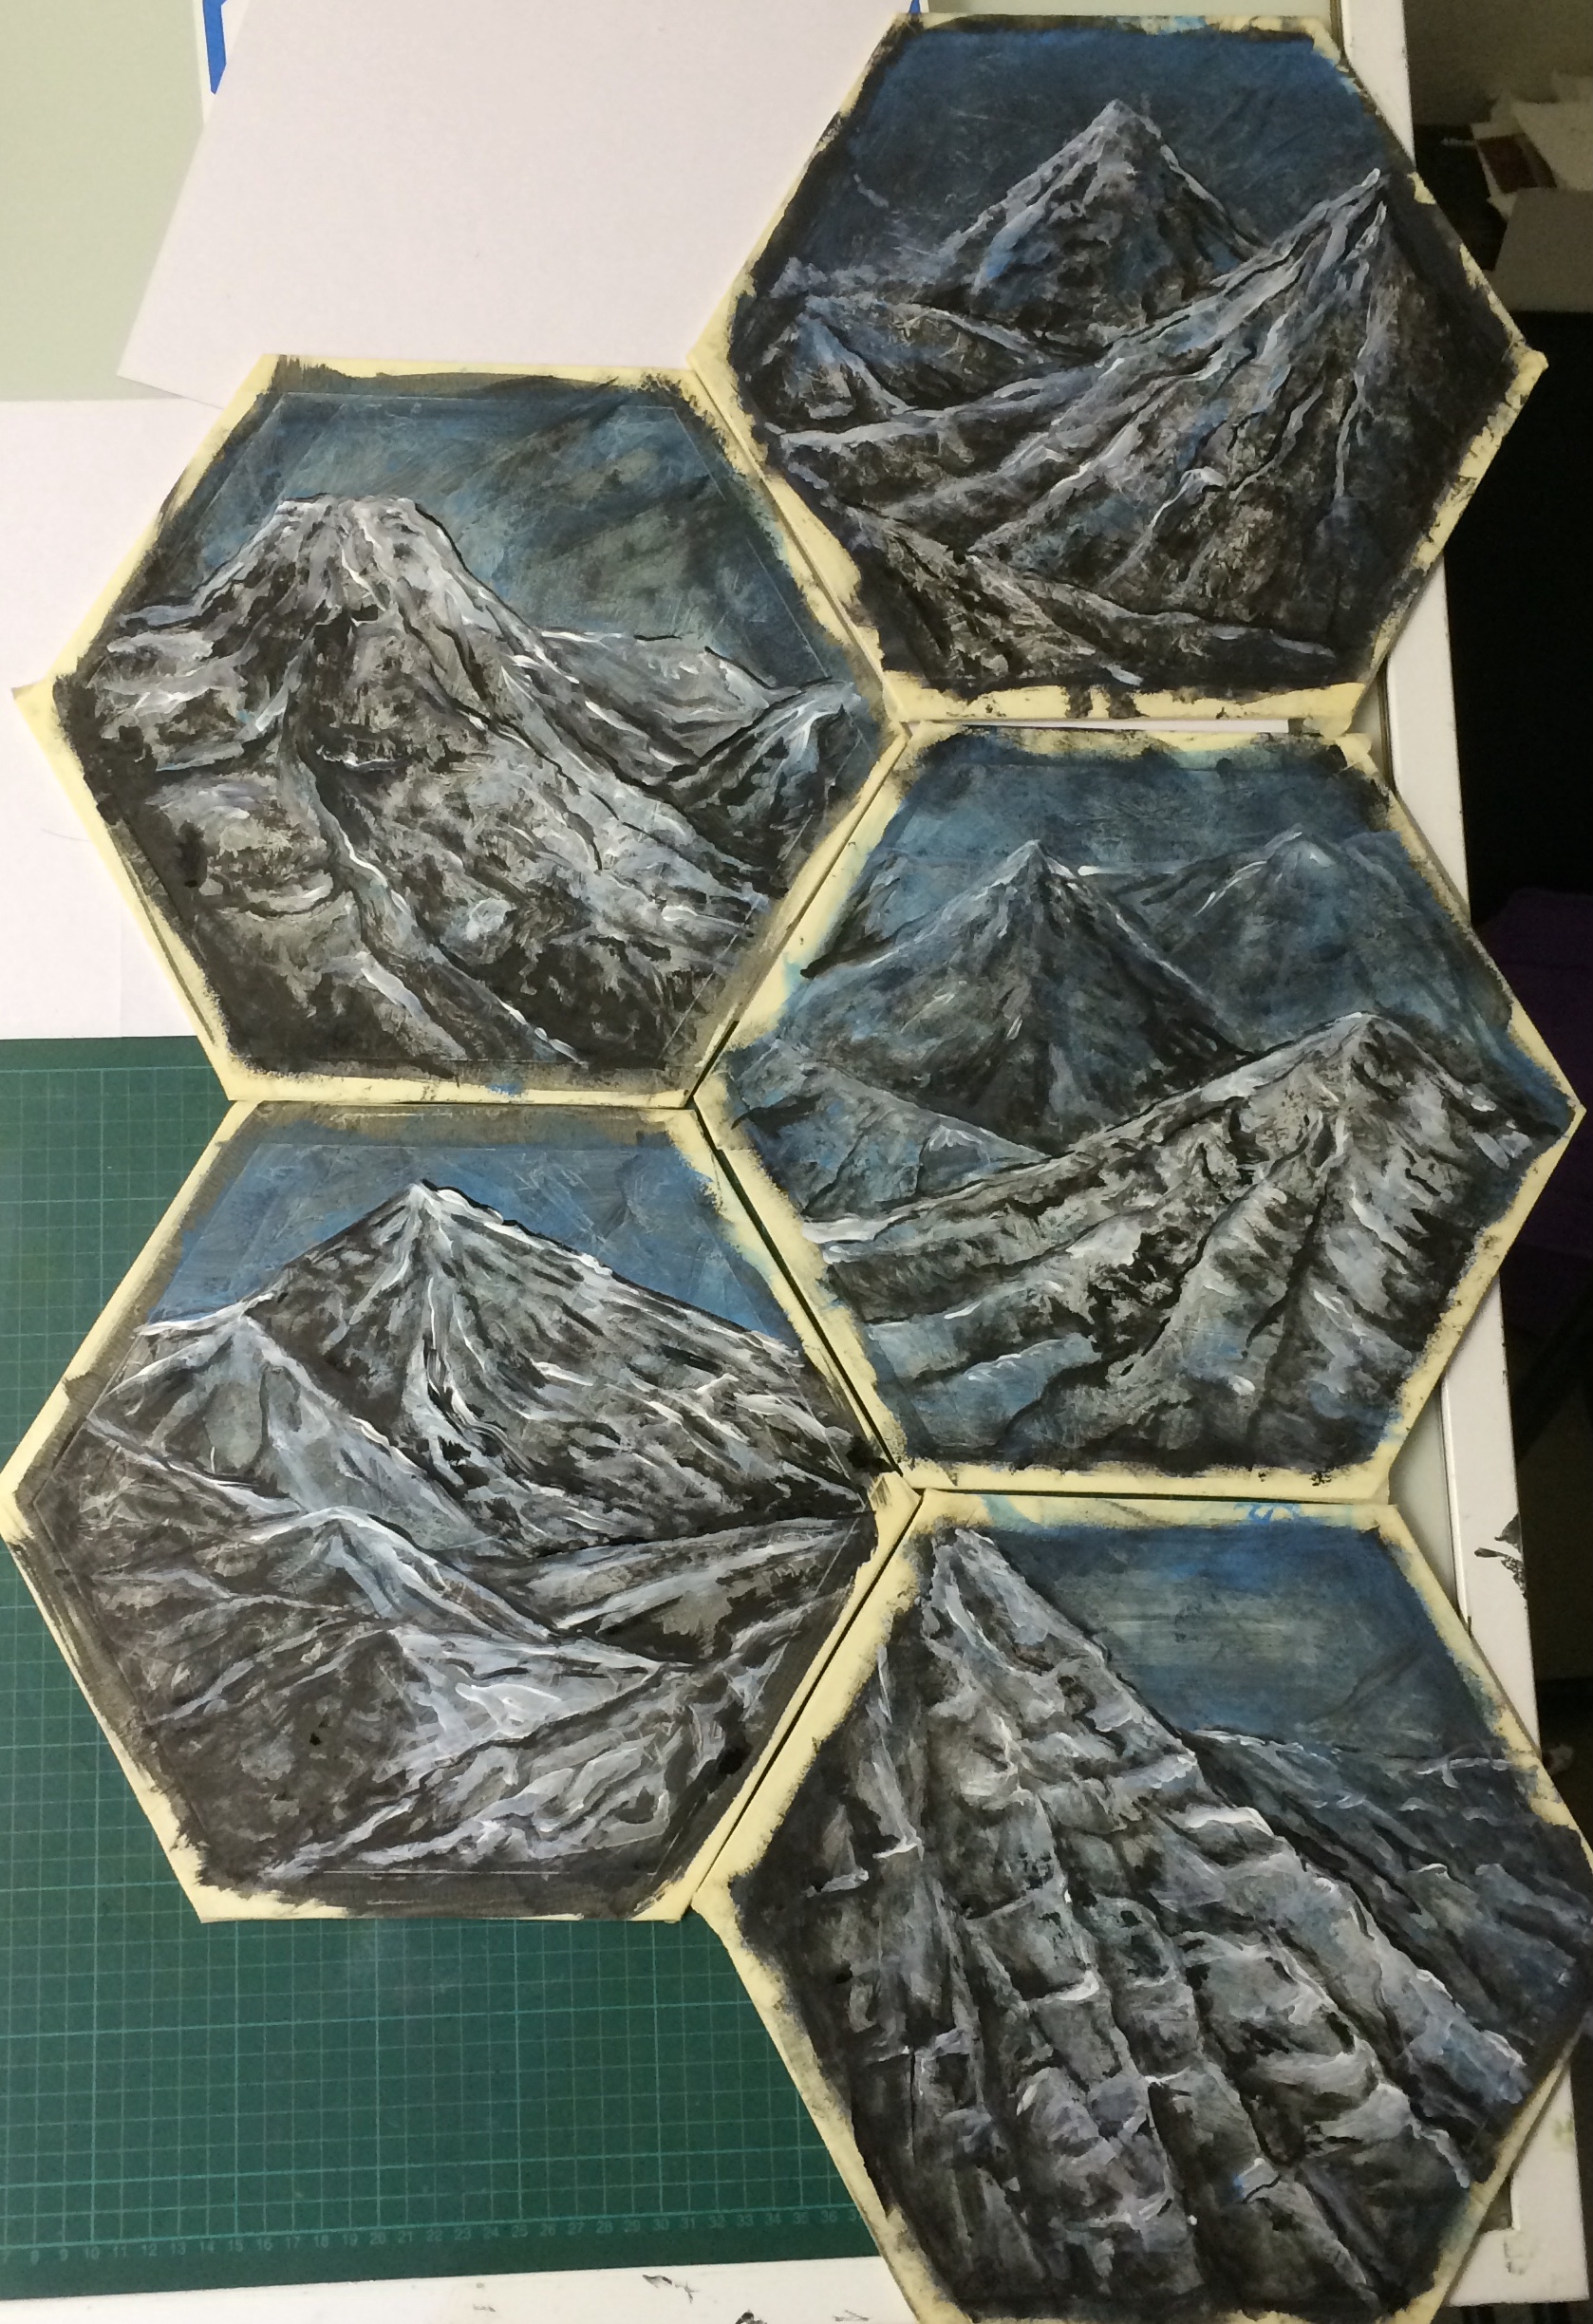
The tiles were finished off with greys, blacks and blues.

23

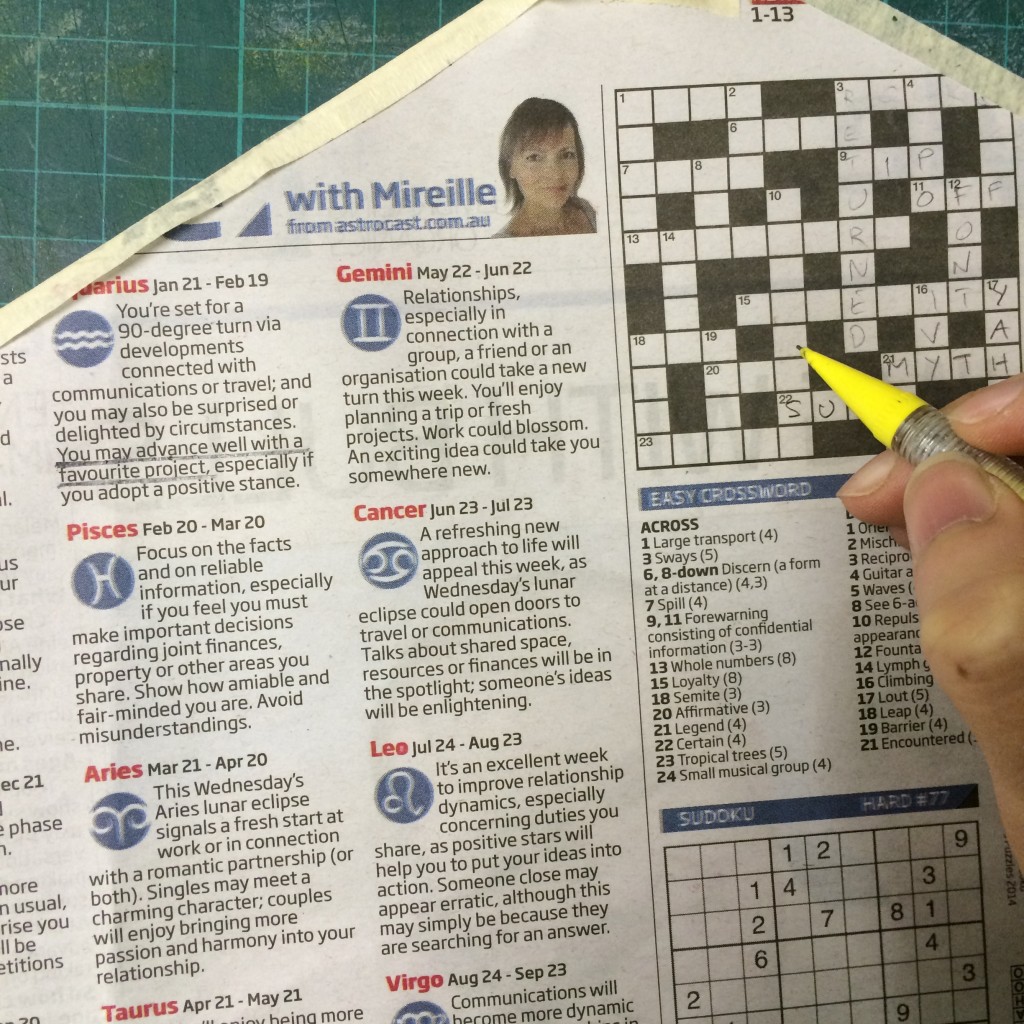
PS always save the crosswords.
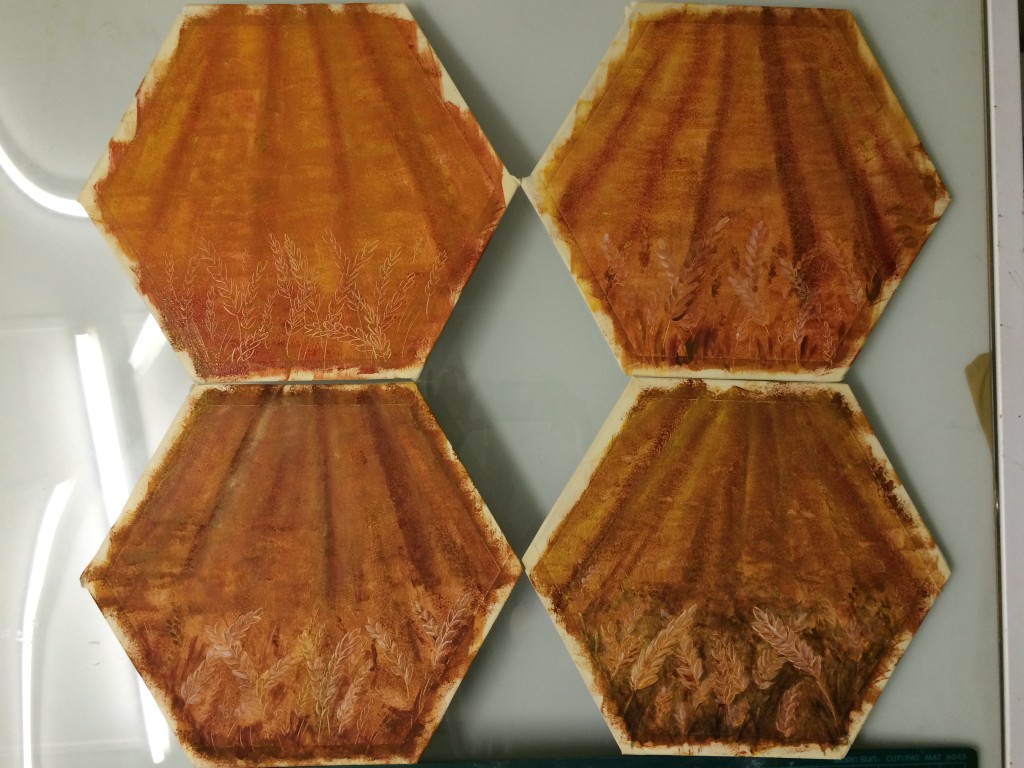
24

Field Tiles

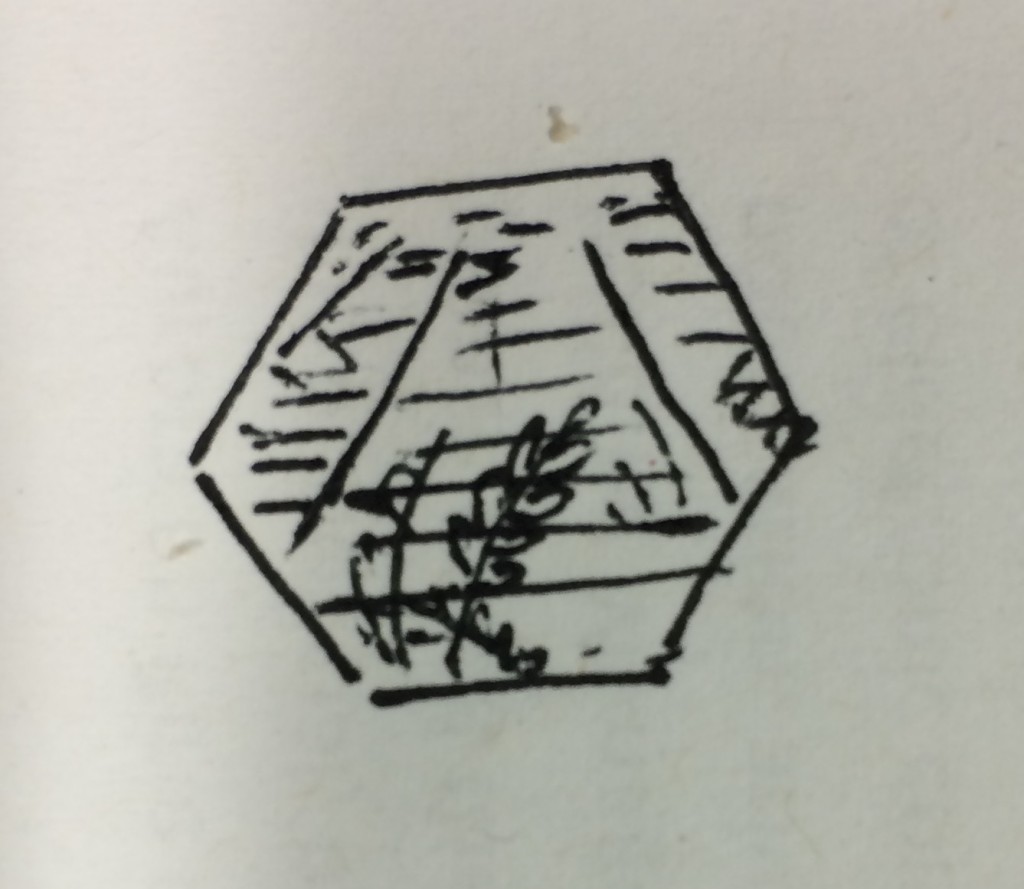
I had a lot of trouble deciding what these tiles would show on them. The colour would easily make them distinct from the other tiles, but how was I meant to represent the fields of grain without going mad from painting hundreds of wheat stalks? This idea popped into my head at work and I quickly scribbled it down.

17

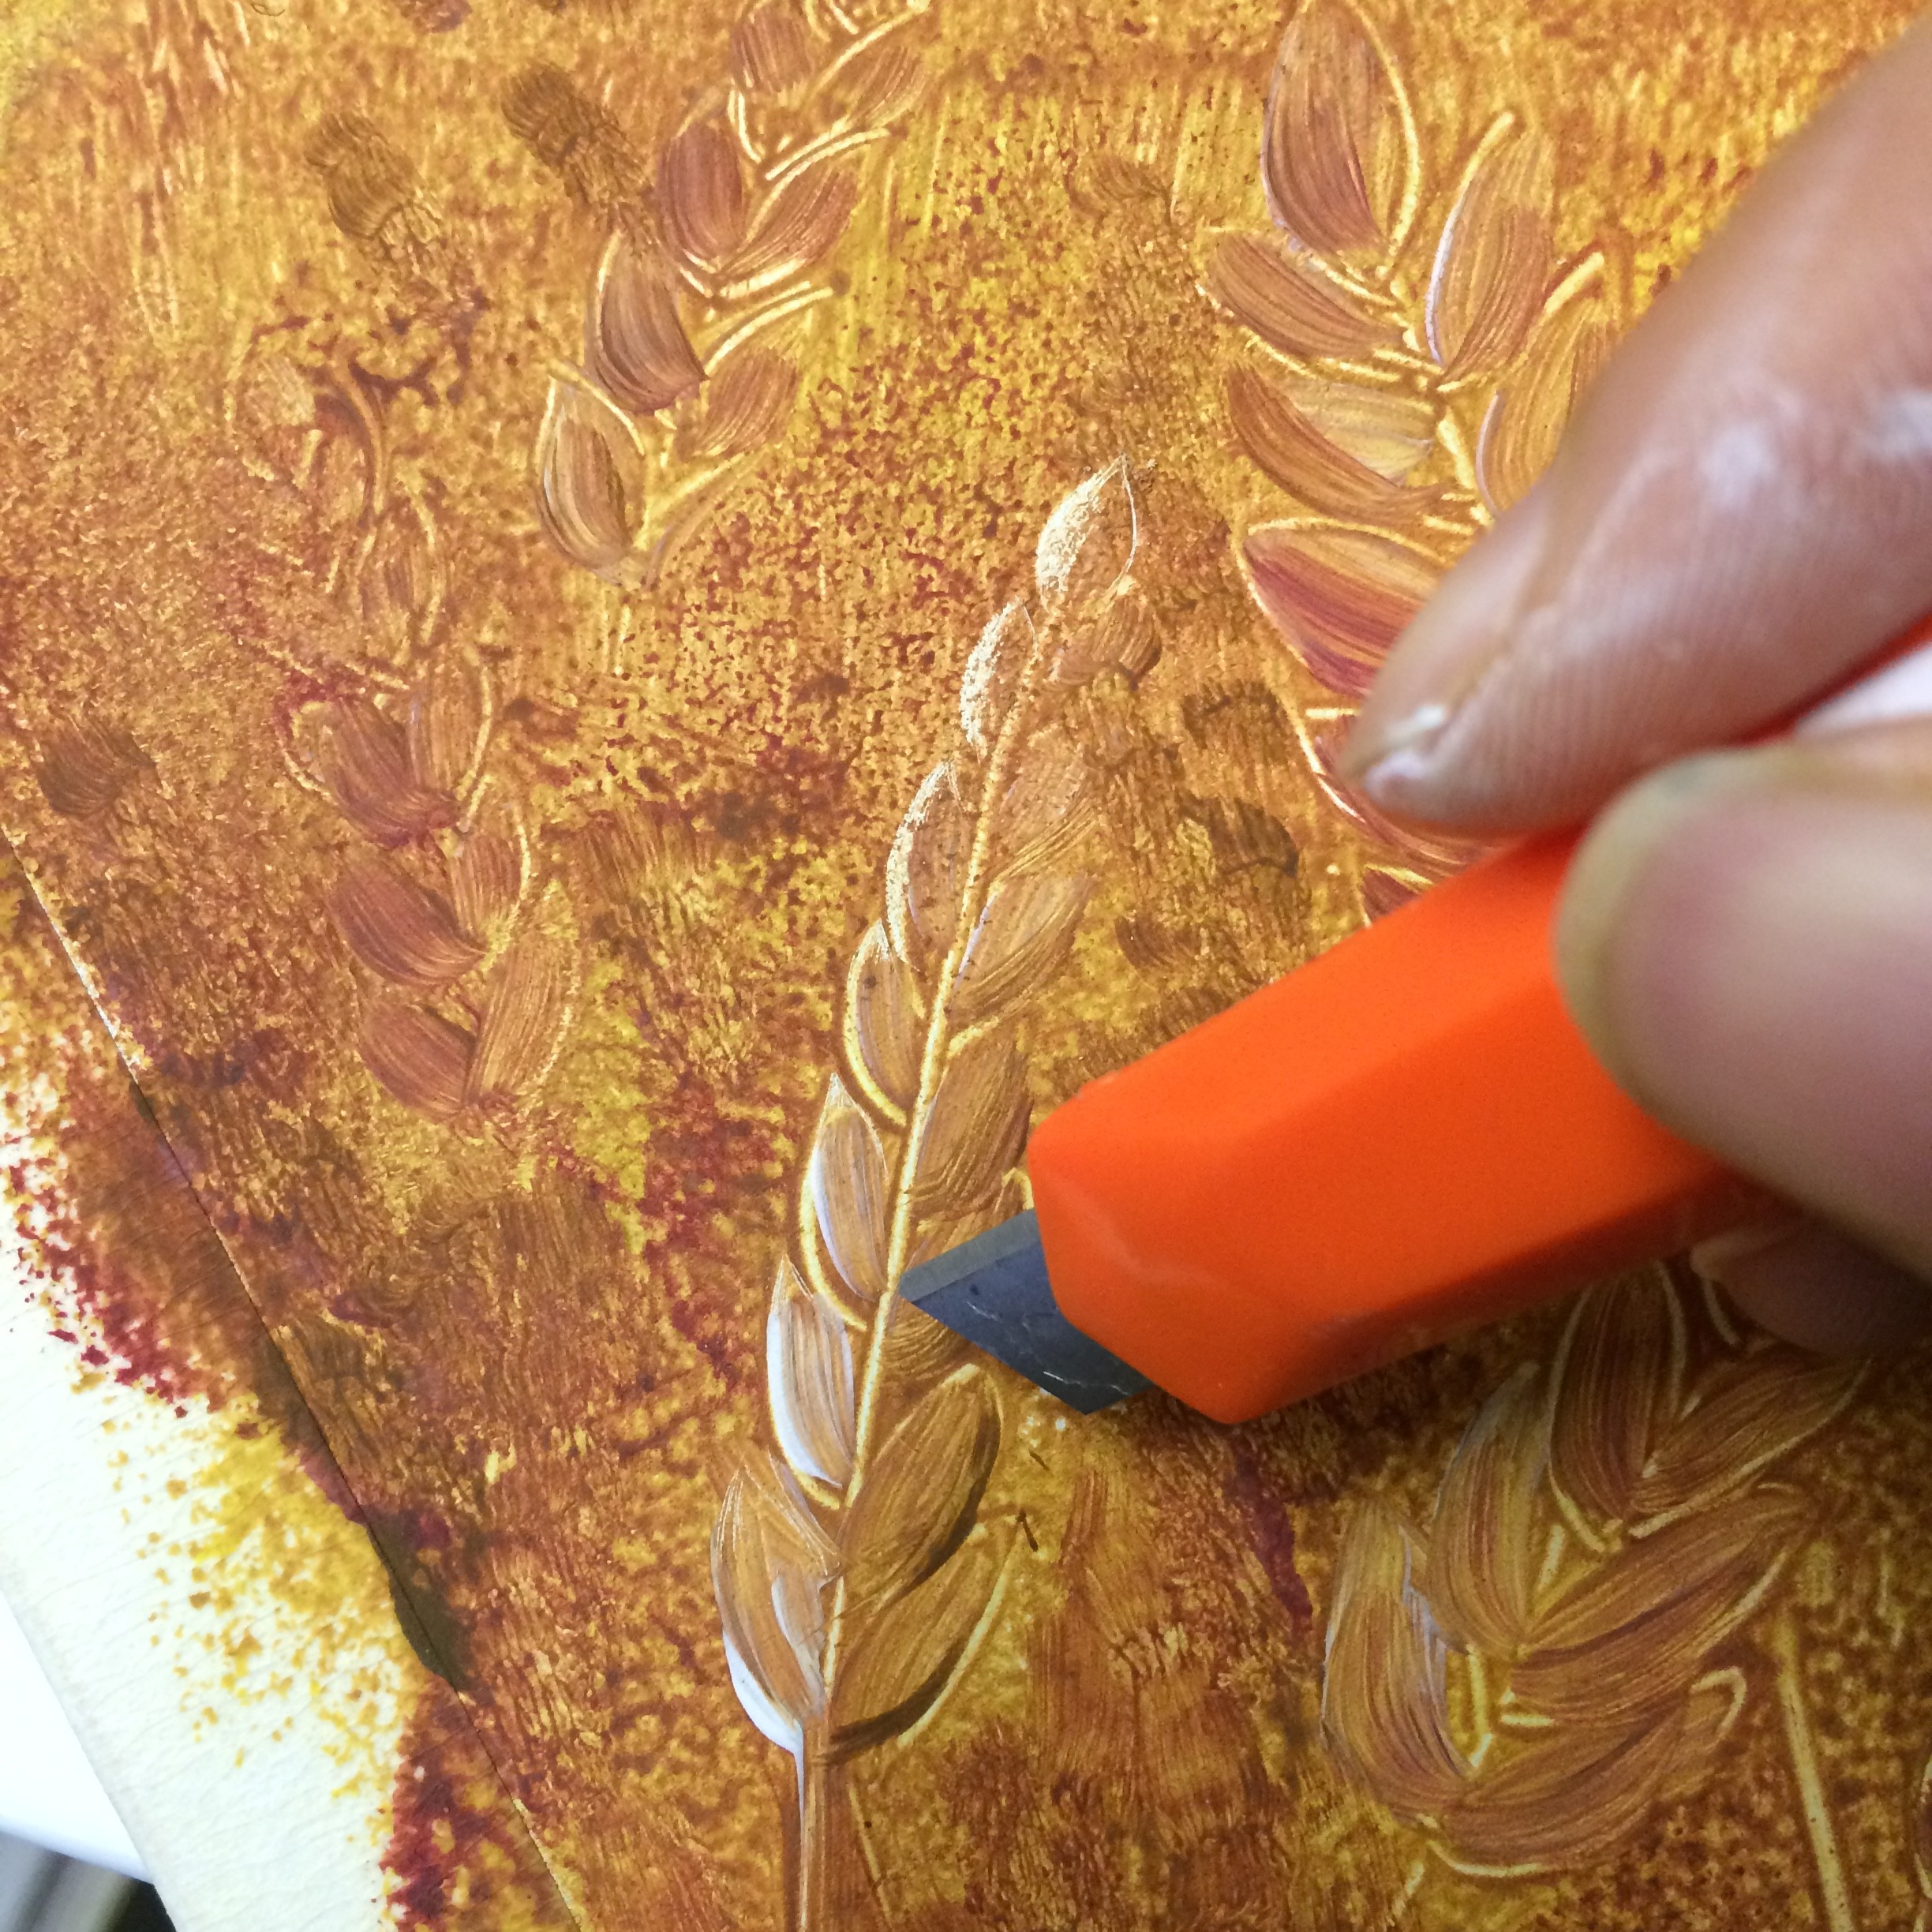
The background fields were sponged in with a few colours, Vertical brush strokes gave a hint at the stalks while the occasional horizontal interruptions to the receding rows of grain implied heads of wheat. While the paint was still wet, I used the back of a paintbrush to scrape out the shapes of some wheat stalks. I also brushed in a little white into the top sides of the stalks and some brown into the bottom sides.

29

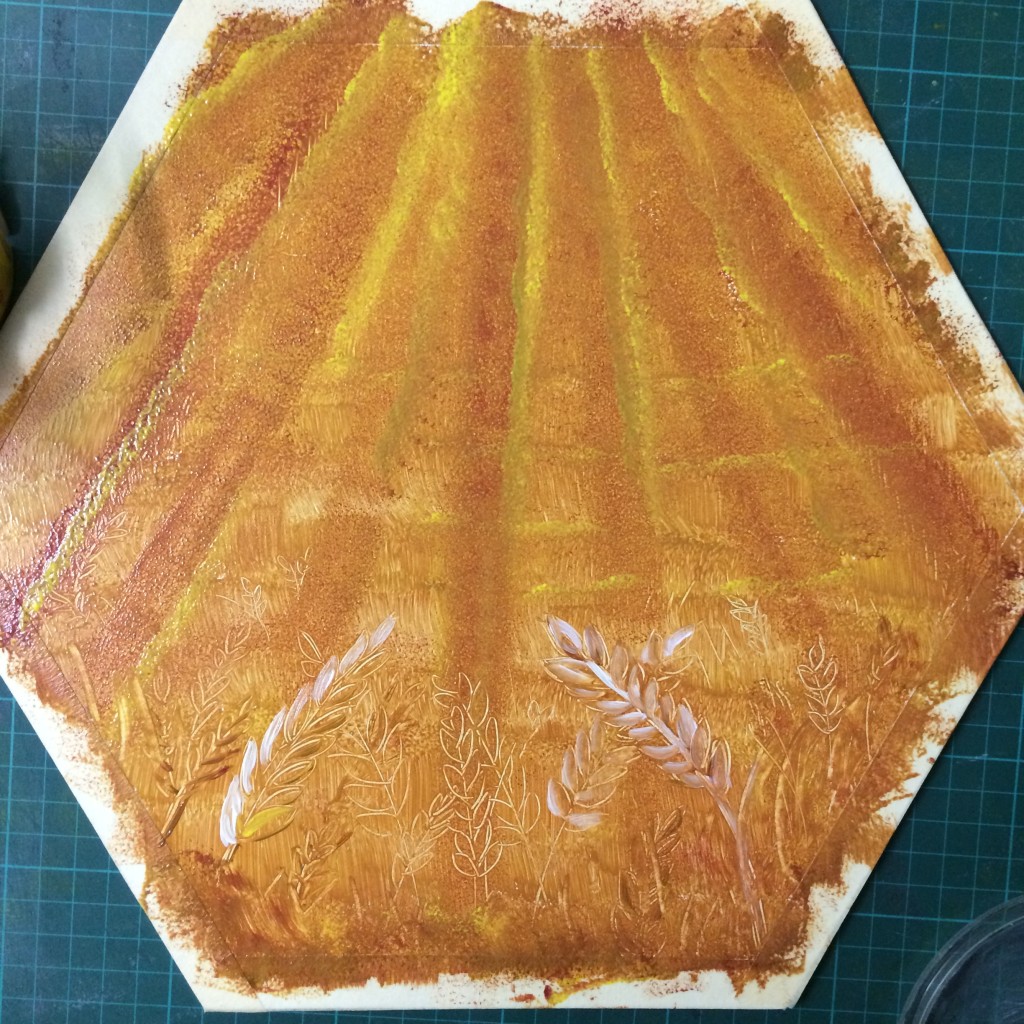
Once the paint was dry, I used a blade to scrape back even more of the paint.

31


32

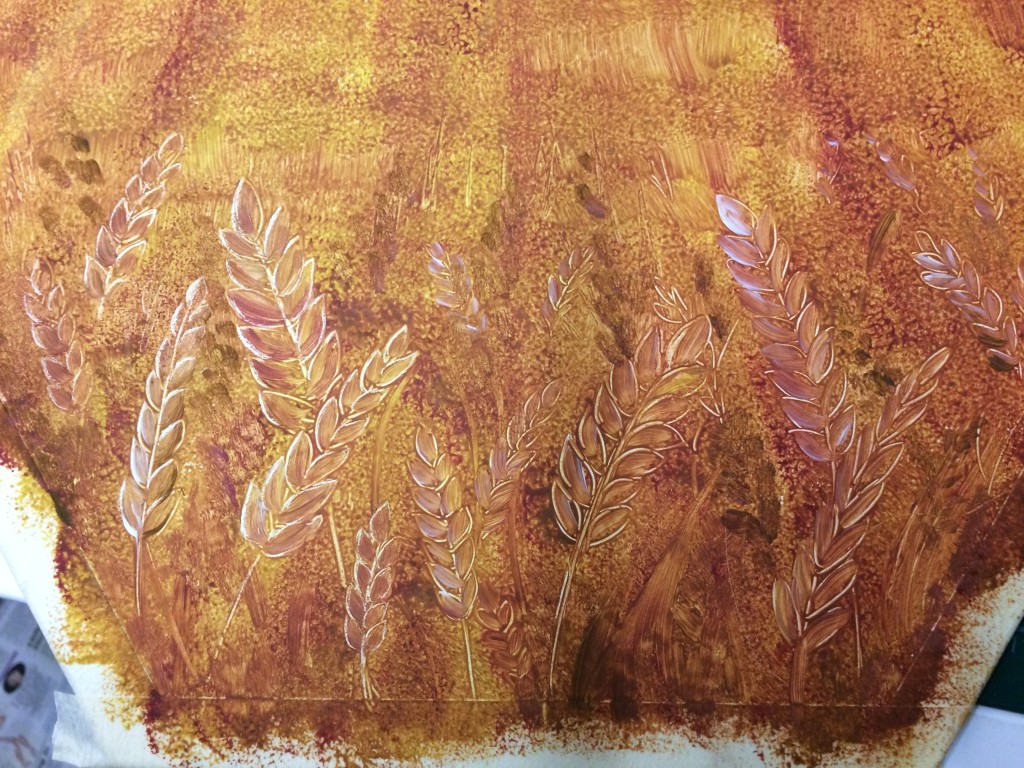
Finally, some additional depth was added with darker paints and ink. This set of tiles show the progression from initial painting to final detailing.
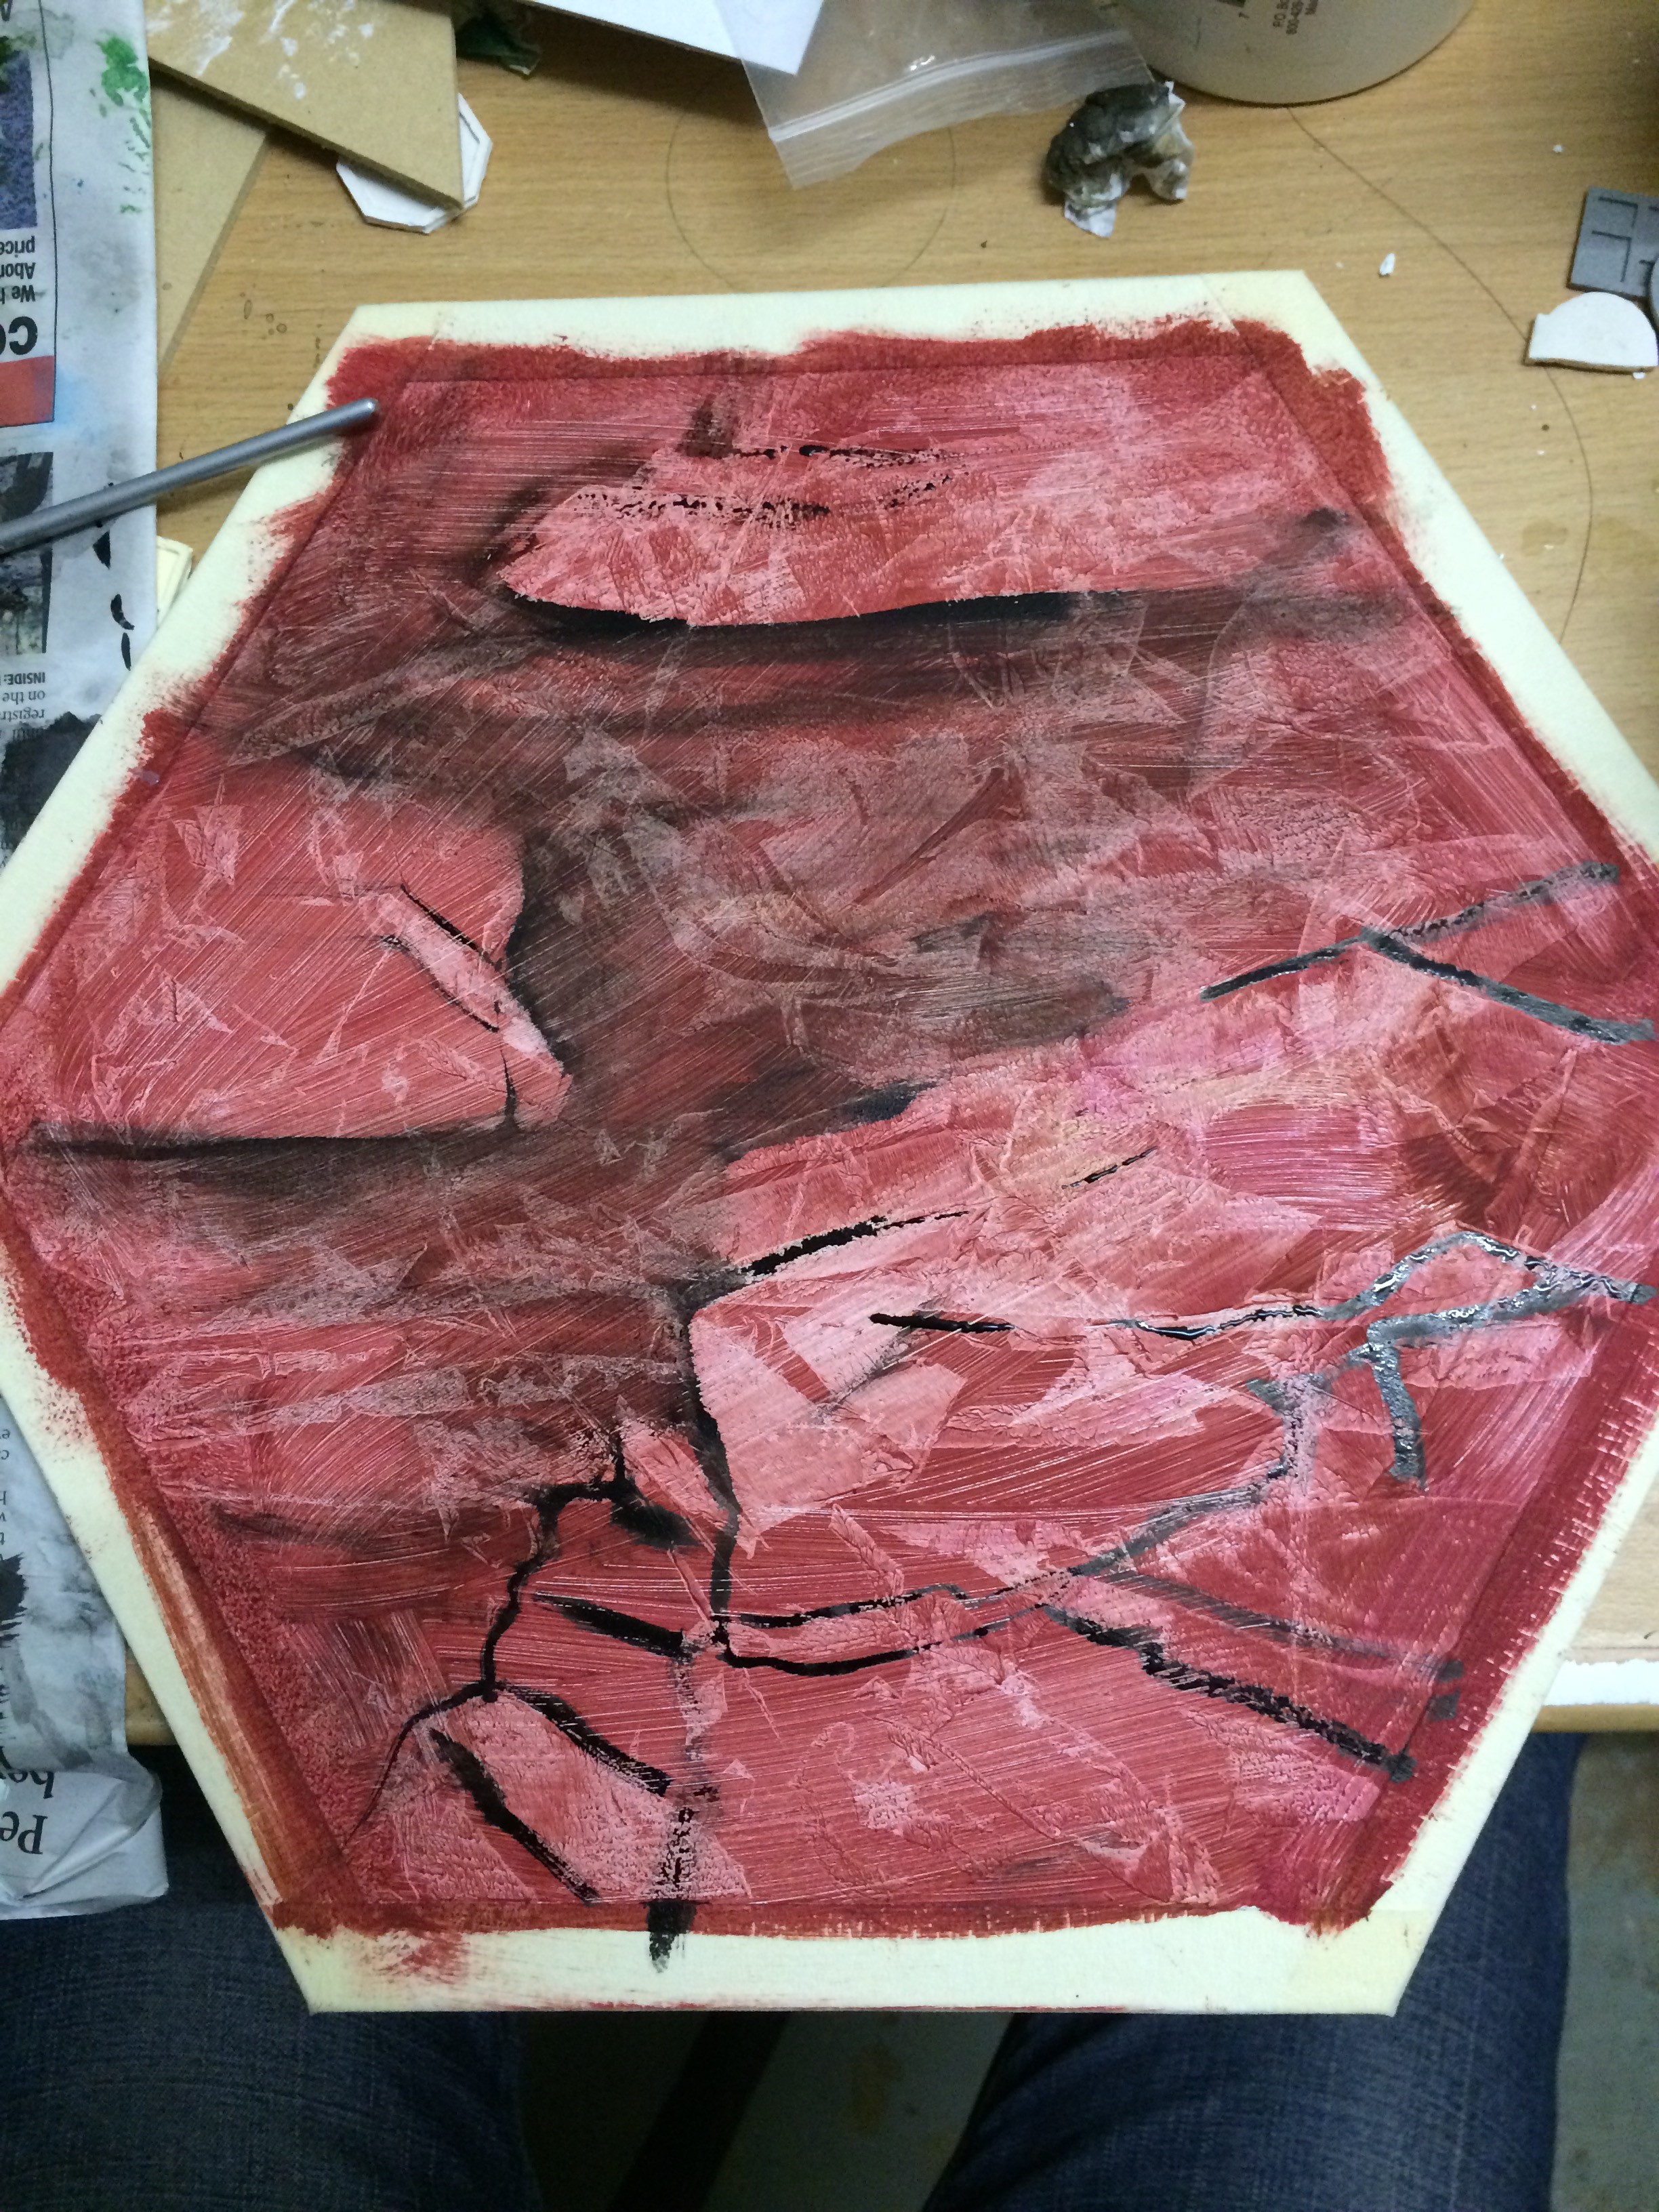
34

Quarry Tiles

These guys are technically incomplete. I used up all my steam on completing the pastures, mountains and fields in a four day period. While I was painting those tiles, I got started on creating the texture with glad-wrap in the same way as the mountains.

27

I only got as far as adding some vague hilly shapes with black ink.

38

I’ve now gotten stuck thinking about how to finish them off. From a distance they look great – the red colour makes them stand out, but I’m not sure how to paint them up without interfering with how the awesome bold red appears from a distance.
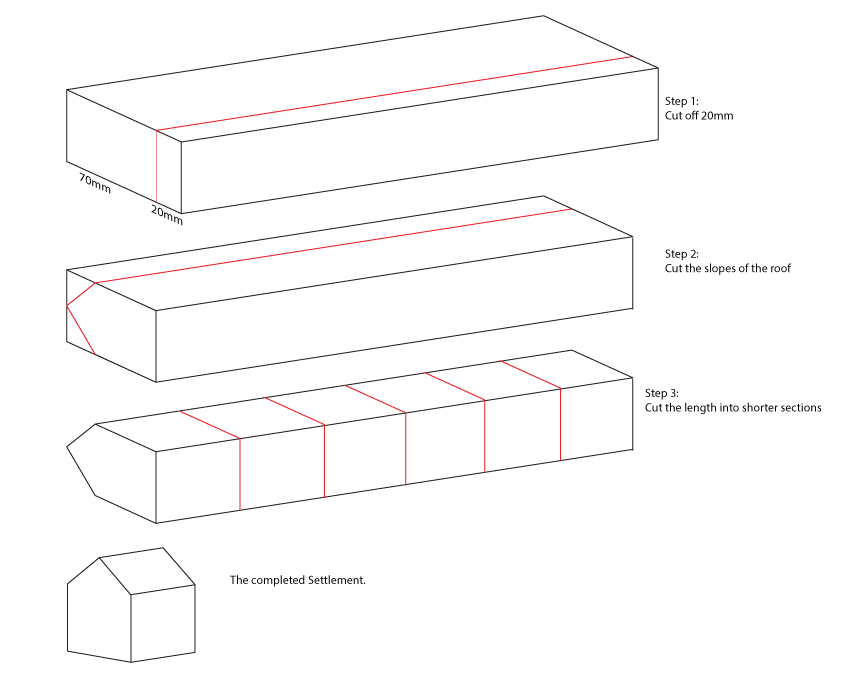
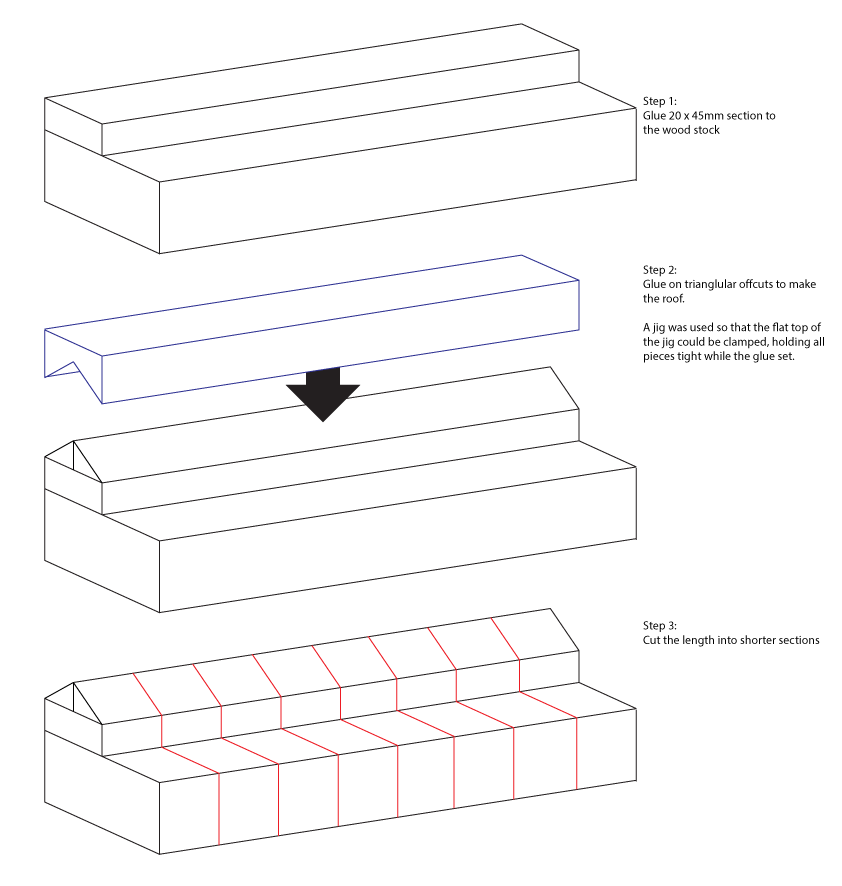
Roads and Buildings

39

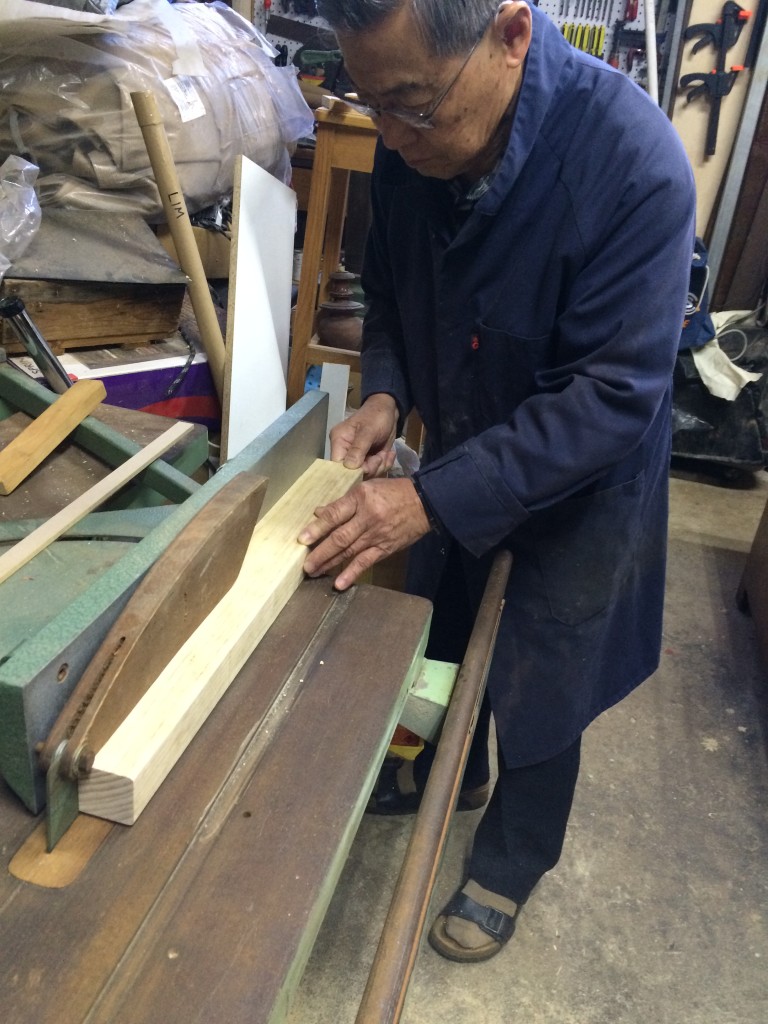
I spent a few days with my dad planning and making these.

Timber can be pretty expensive. Nice timber would have easily broken the bank, so I looked around at Bunnings and ended up grabbing a single 4.8m x 90mm x 45mm length of decking pine for around $20. I had it cut into 120cm and 60cm lengths to be able to fit into my car.

From these lengths, I hoped to yield 30 settlements, 24 cities and 90 roads.

I found working on these really interesting but unfortunately I forgot to take photos for most of the process! I’ll do my best to explain with some diagrams.

Settlement

City

Here’s my dad ripping a length of timber.

40

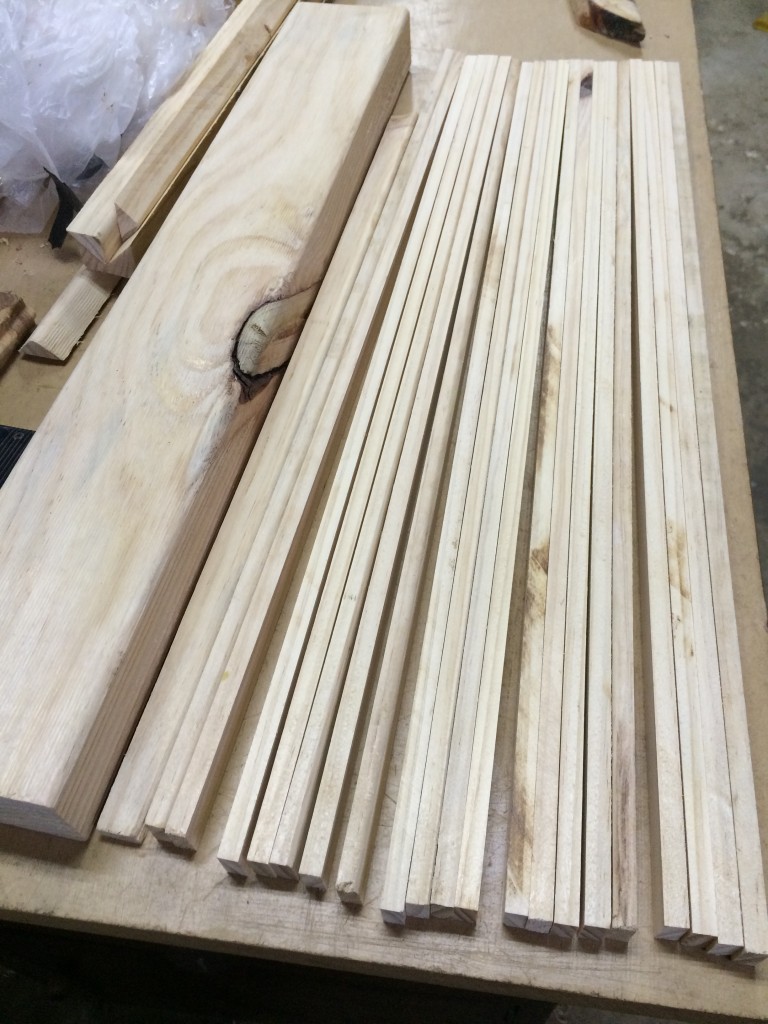
Here’s how many road-sized lengths of wood I got from a single 60cm length. I ended up with the 90 roads I needed and tons more to spare.
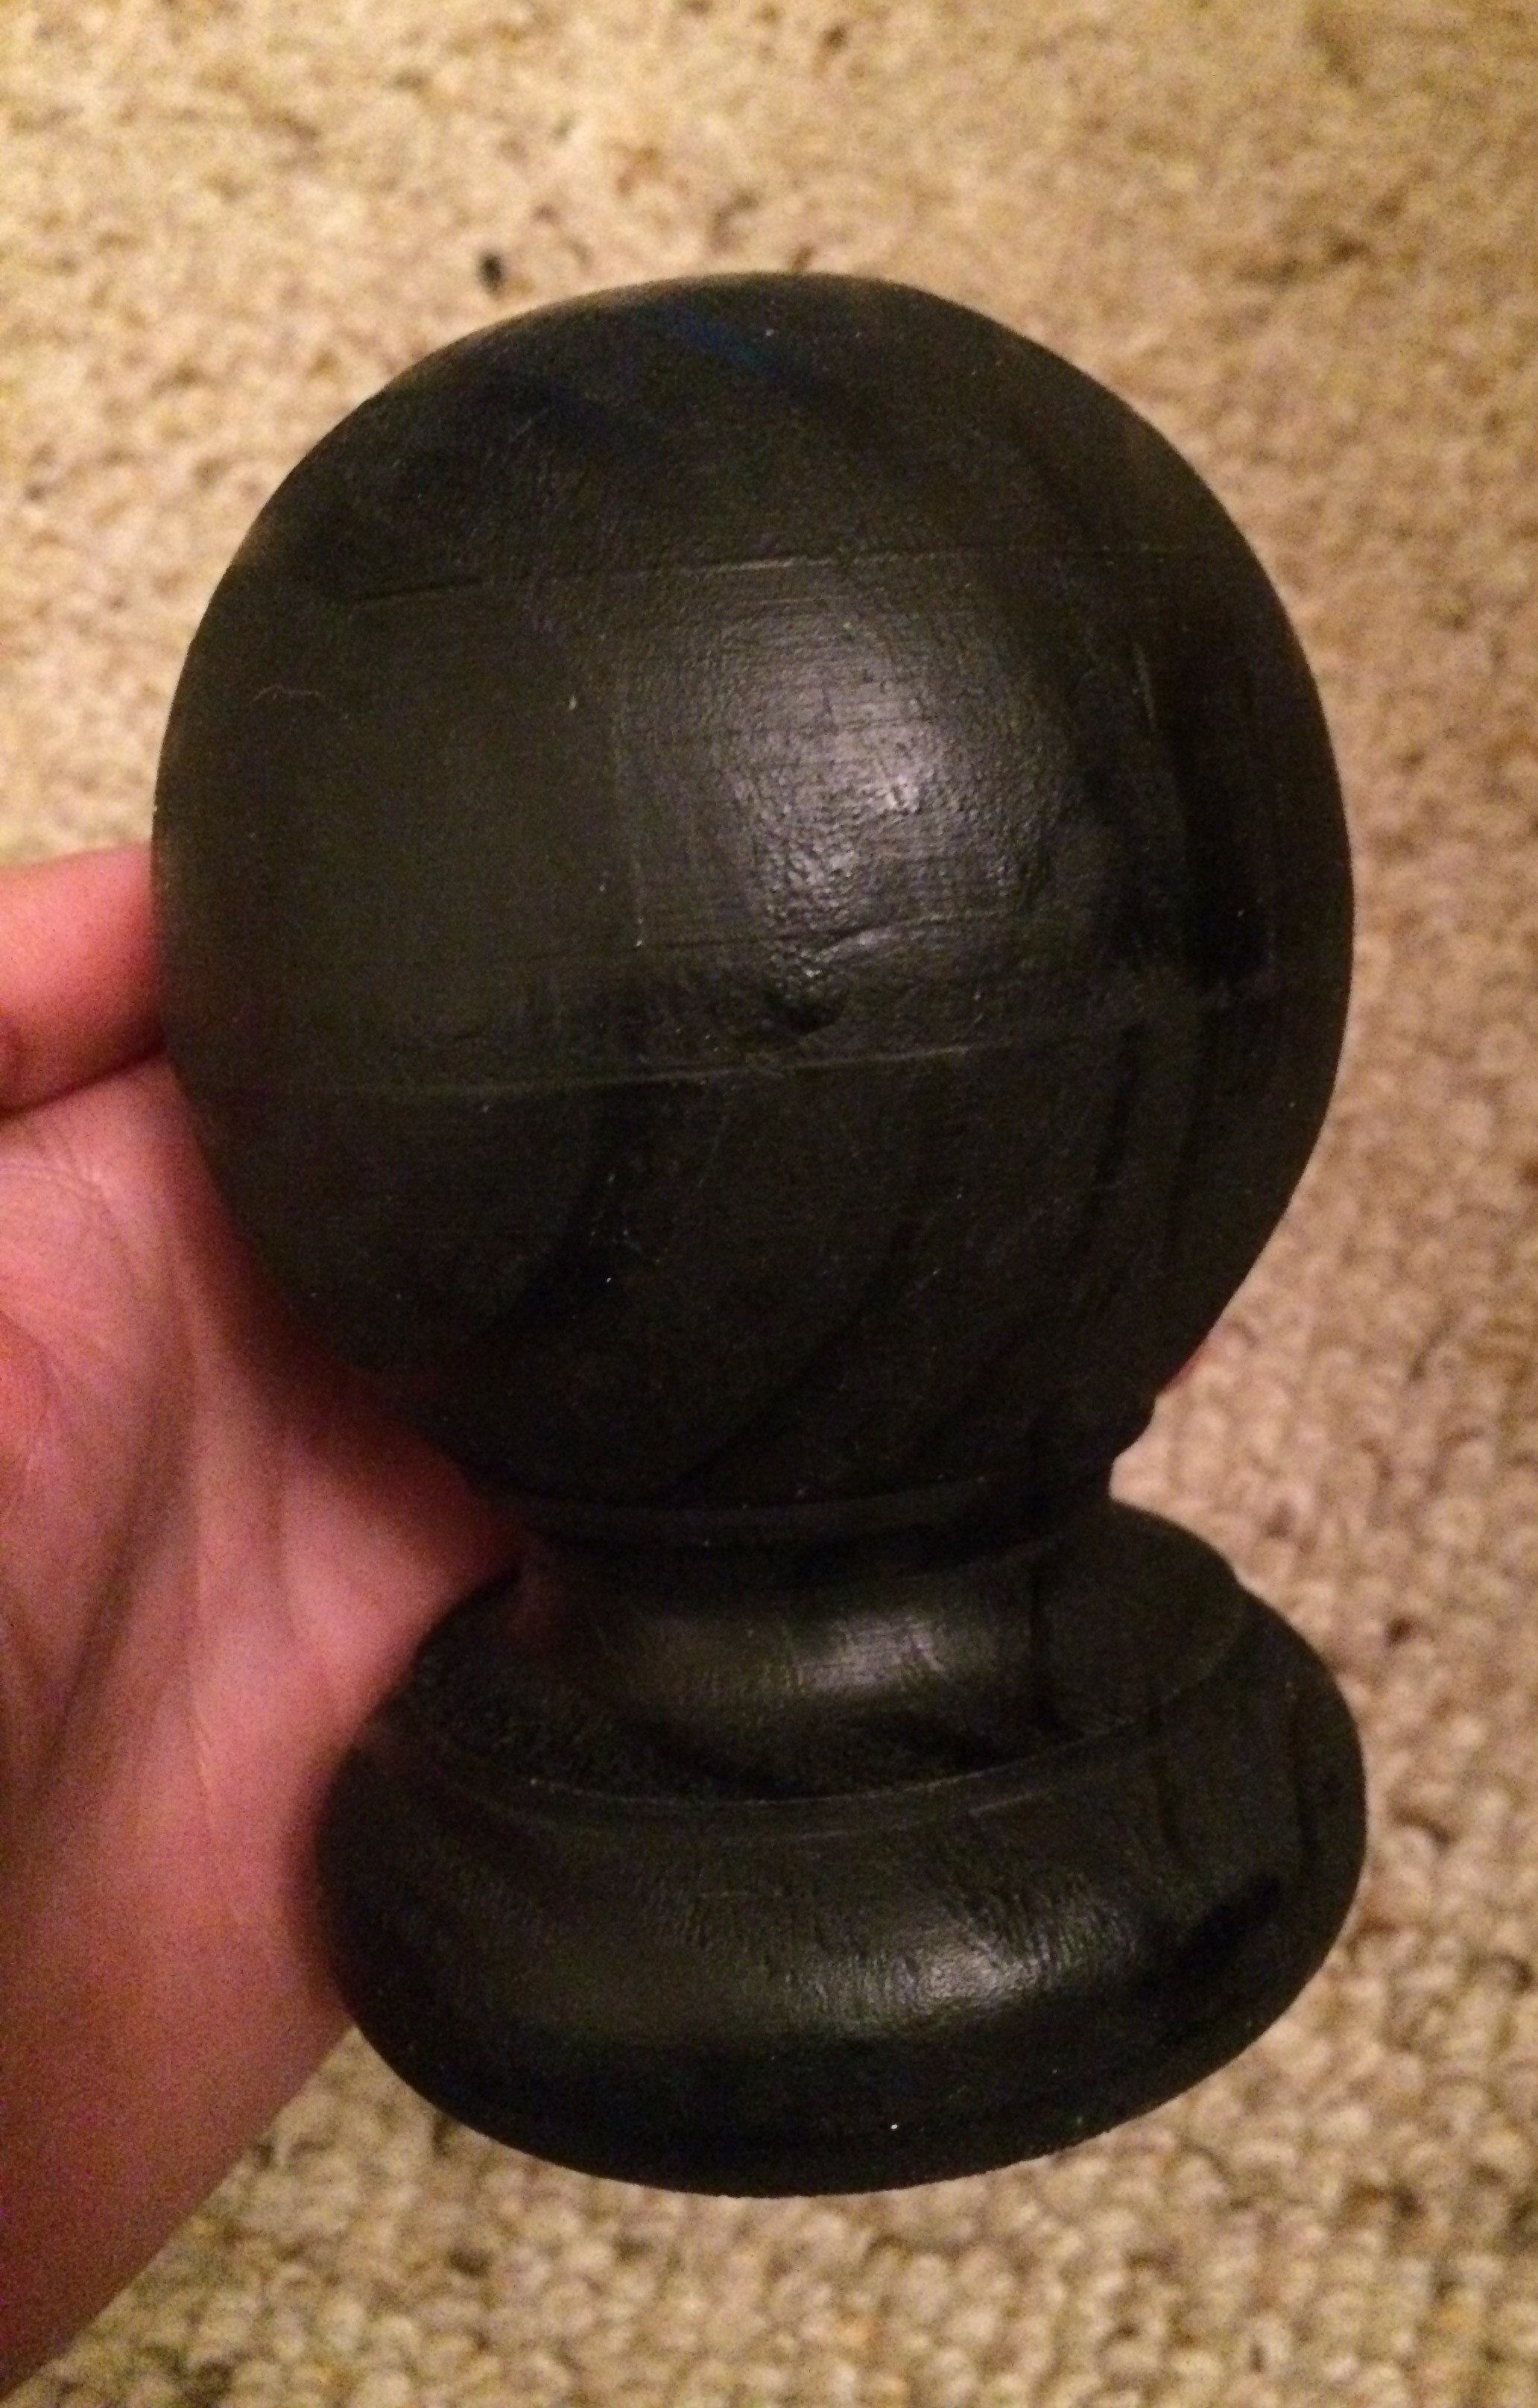
42

The Robber

The robber is just a fence-post capital with the little post cut off.

43

As with all of the other timber bits, it was finished with a coat of enamel spray paint.

Chits

The chits were laser etched and cut from 3mm MDF.

44

The little dots at the bottom of each chit represents the probability that the number will be rolled. Although it wouldn’t take too long to hand-create those circles, I had a a neat little inDesign script (that I first wrote for a Lords of Waterdeep re-theme) that saved me lots of time. The script expands a numeric value, X, paired with an image and instead turns that into an image repeated X times.

I initially forgot that I would need to paint the 6s and 8s red. Luckily I realised before removing the freshly-etched pieces from the machine. Without moving the pieces, I put masking tape over the relevant areas and re-etched the outlines of the numbers and the dots. I then removed the masking over the cut-out areas and painted them red before removing the rest of the masking.
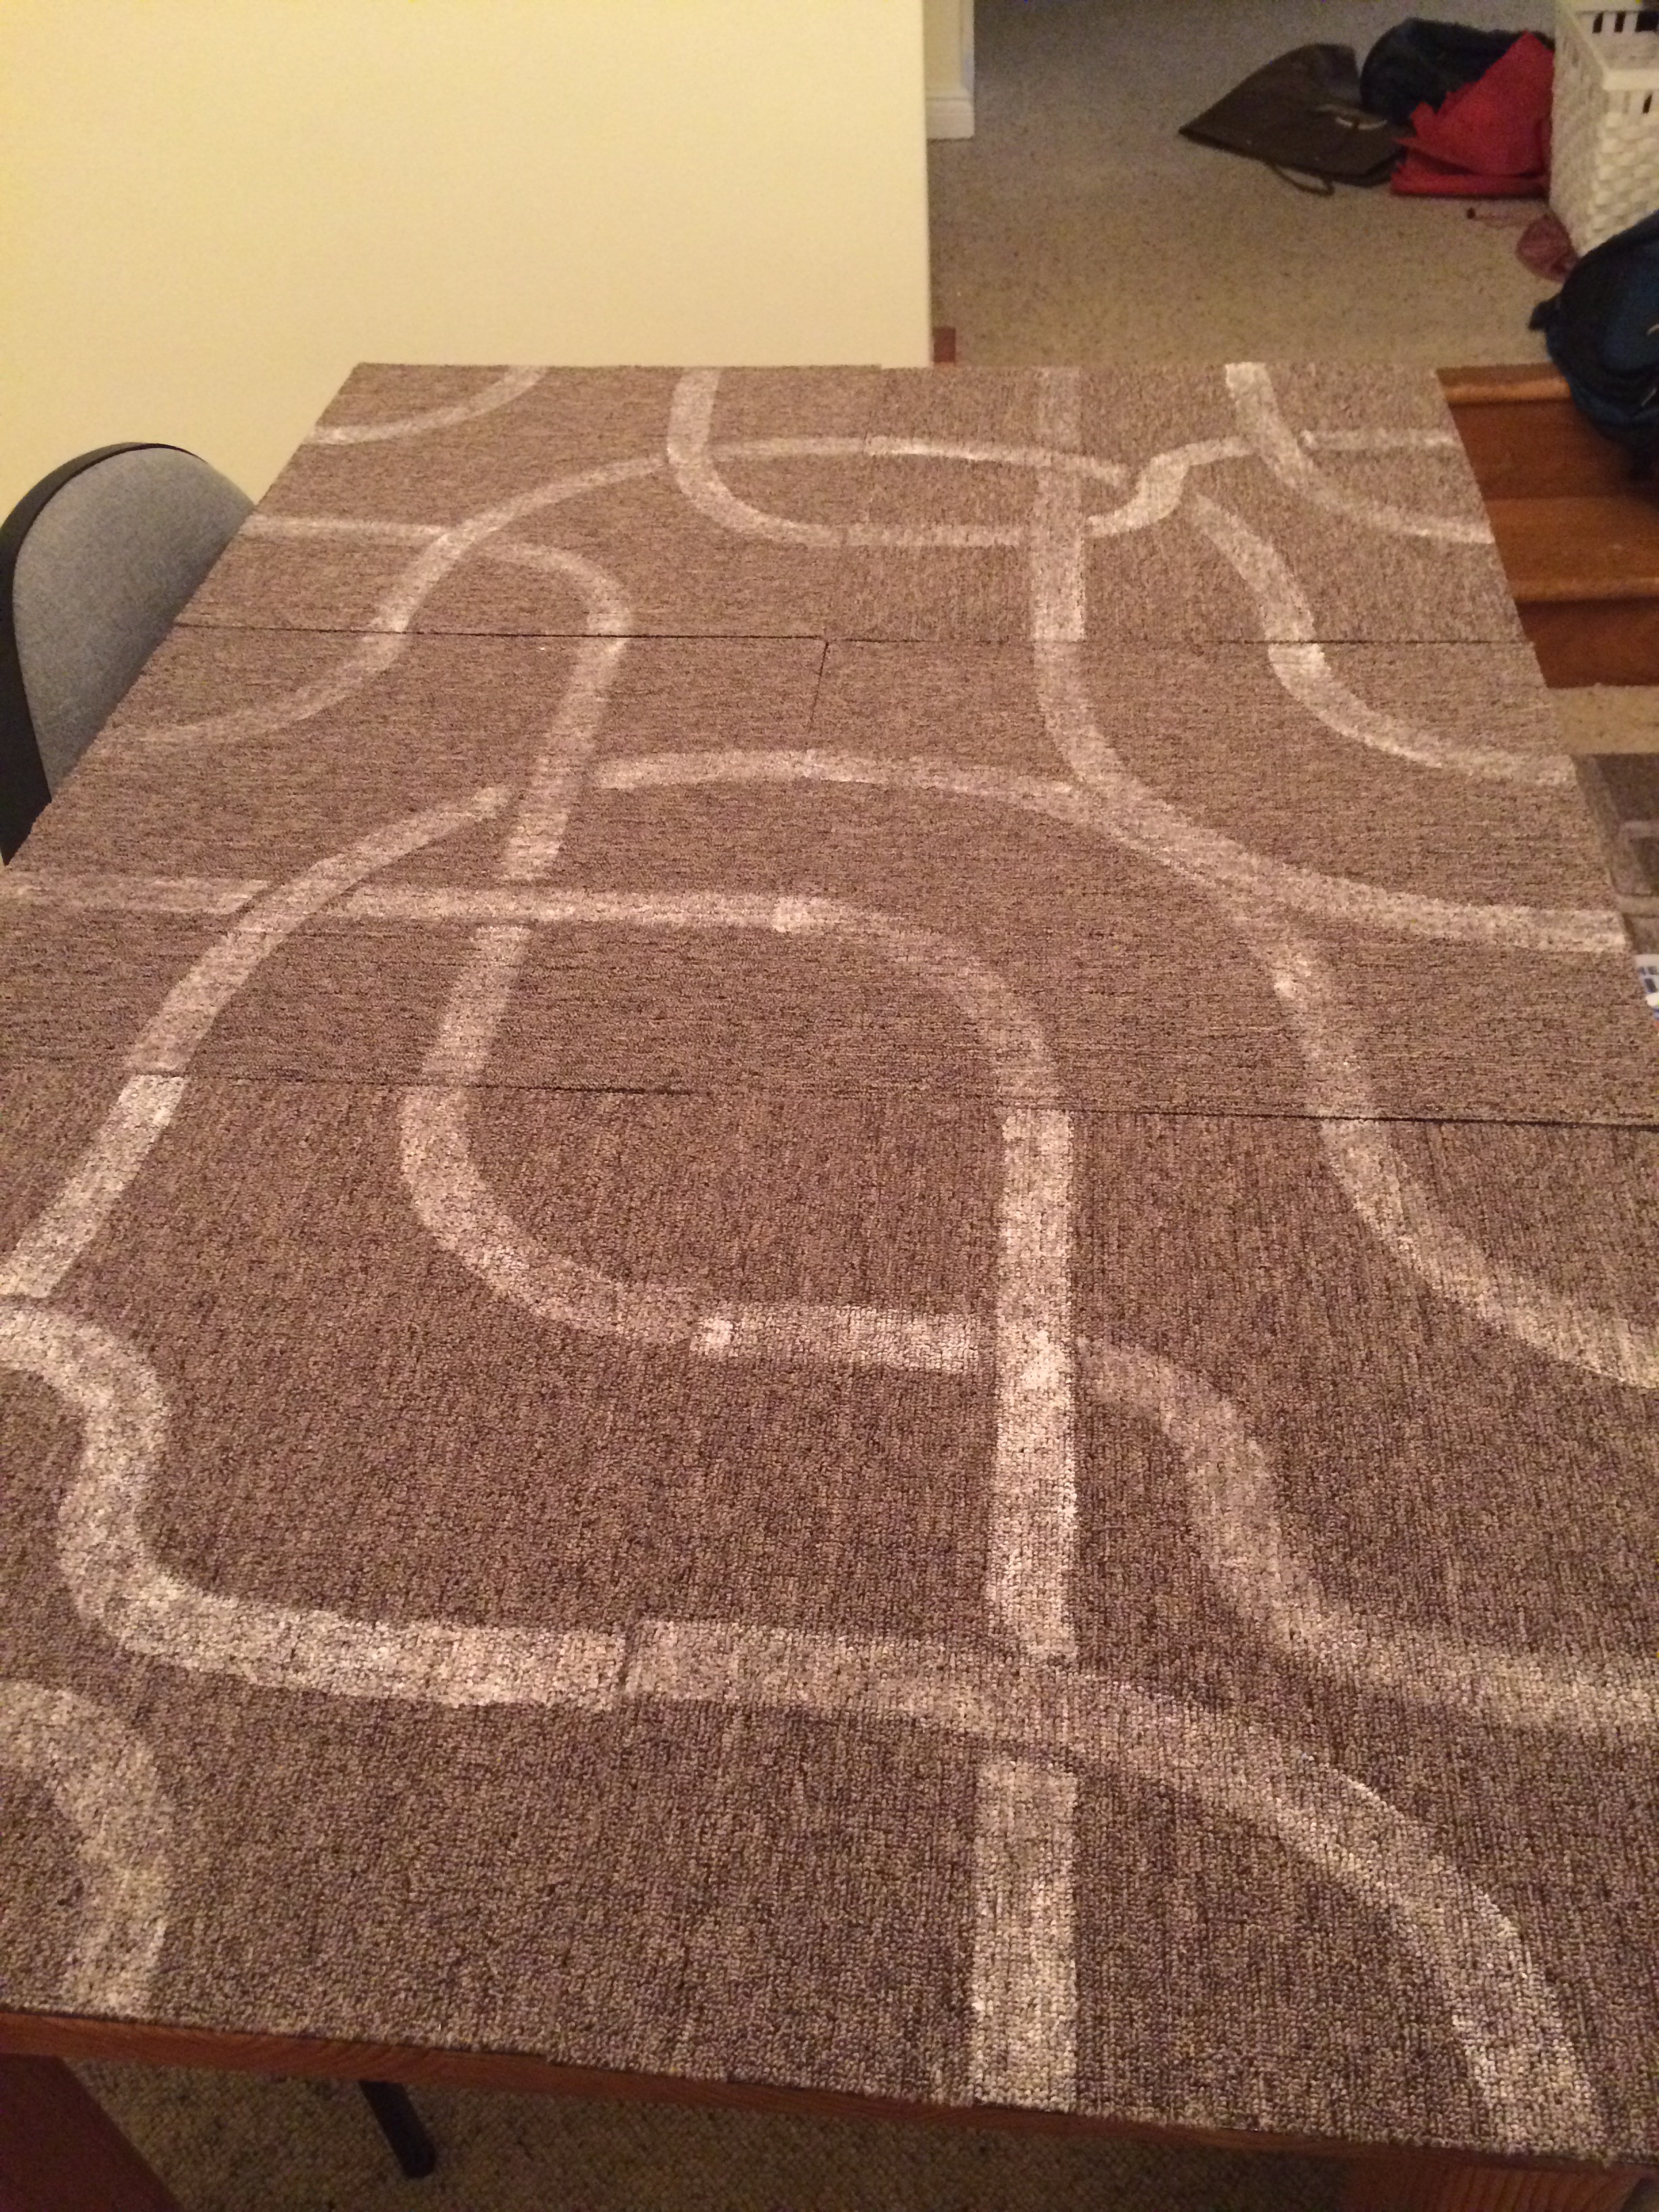
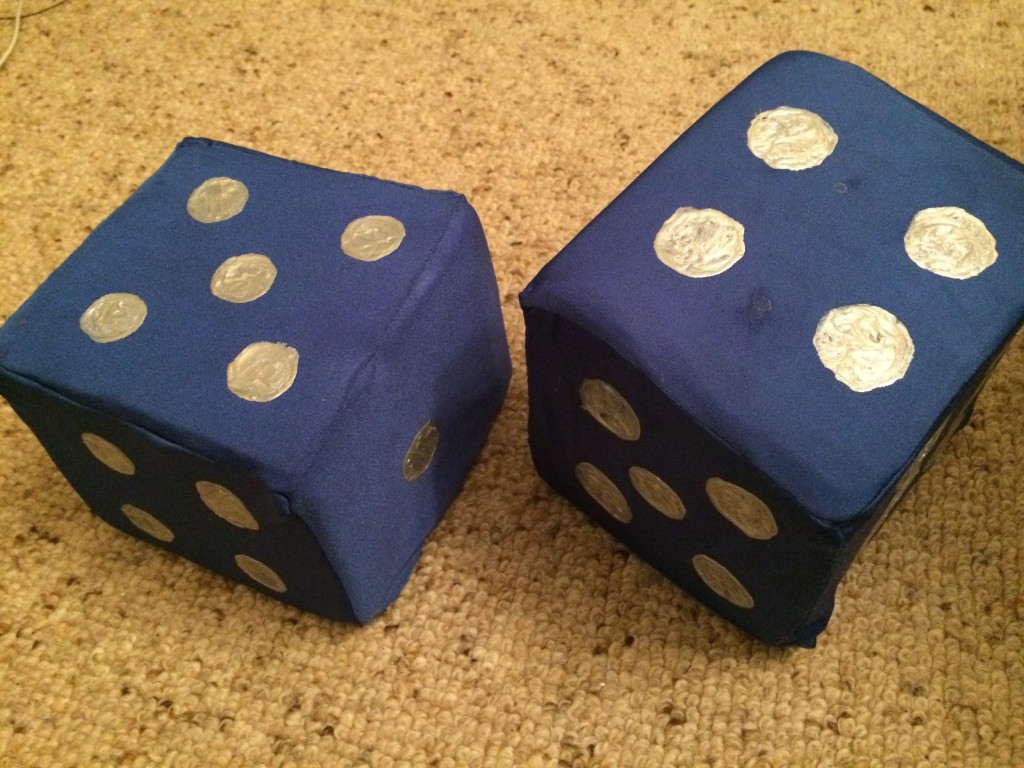
The Dice

The dice are made of blocks of foam covered in fabric. The foam was bought from a 30x30cm offcut – the guy at the store told me it was 15cm tall so we cut the blocks into 15x15cm squares. Turns out however that the offcut was actually around 12cm tall. I tried trimming the blocks when I got home using a serrated bread knife, but that ended poorly. As a result the dice aren’t perfect cubes.

I was short on time and my sewing skills are lacking. So I gave the foam and lycra that I’d planned to use to make the dice to my friend Laura and she worked through illness and gave me these. She even painted the dots on them! Thank you so much Laura!

42

Still to Come…

Obviously the unfinished quarry tiles could use some attention.

I’d like to add felt to the base of each of the buildings and the robber, to reduce the chances of scratching the painted surface of the hexes.

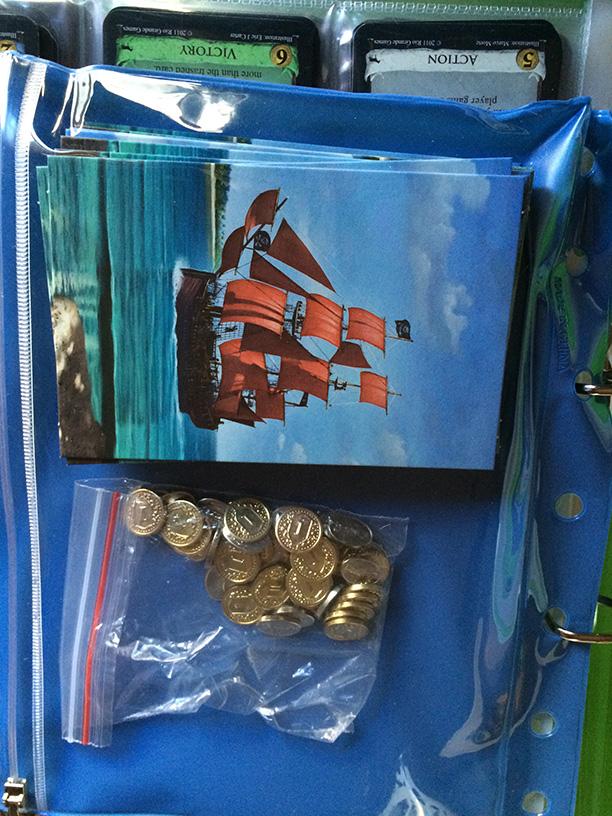
Currently I’m using a triangle to distinguish each port location and using the hexes from the regular-sized game to provide the actual trade-value information. I may yet make proper art for the ports directly on the triangles, but I’m unsure how I’ll do the art for the resources.

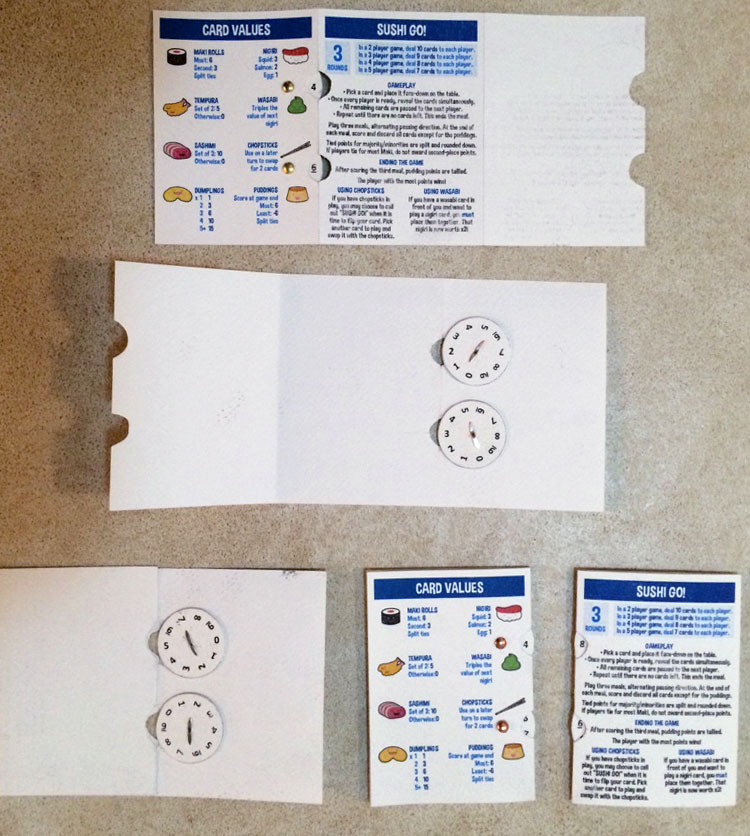
No, I’m not intending to super-size the cards. ; )


Thanks for joining me for a month of Blaugust posts, and thanks for reading through this build-log of giant Catan. At some point I’ll finish off giant Tsuro…

49

…and maybe even get to work on Takenoko… but that’s for another blog post, another time.


Posted in: Behind the Art, Crafts | Tagged: blaugust, board games, catan, giant catan, made by me, settlers of catan, tsuro

7 Wonders Box Insert

Posted on August 25, 2015 Leave a Comment

1 2 3 4

7 Wonders has been one of John’s favourite board games since we were introduced to it at our first PAX. We’ve since bought all expansions to date, and in order to travel around with them I’ve made these box inserts to accommodate the base game and the Leaders, Cities and Babel expansions.

I was initially inspired by a foamcore storage solution that Pichy first showed me. Once I knew that all of the components could fit in the original box I knew I could design something out of 3mm MDF – and I thought I could do it with room to spare!

My main goals for this design were the following:

  • Able to store all components for 7 Wonders and its current expansions in the original game box. Try to allow room for at least one more expansion.
  • Keep components from each set together. So (apart from reprints of money, military tokens) the Babel tokens shouldn’t get mixed in with the base set tokens.
  • Keep more commonly used components most accessible. We enjoy all of the expansions but we frequently find that we play without Babel when we introduce new players to the game. So we don’t want to dig through Babel stuff to get at the rest of the components.
  • Try to fit in the score sheets! We love the score sheets.

I first measured all the components and got a feel for the volume they would take up. I experimented a bit with laying out the inserts in illustrator first, but eventually did a bit of 3D modelling to see how it would all go together.

7wondersinsertmodel


This is just the first draft. I have already thought of some minor improvements to implement but I want to overhaul the layout of the trays so a more significant set of changes need to be made. At some point I will get my act together and work out what those changes will be.


Posted in: Lasering | Tagged: 7 Wonders, blaugust, board games, box inserts, made by me

Sushi Go! Score cards

Posted on August 19, 2015 2 Comments

sushigo_scorecards

We recently acquired a set of Sushi Go. It’s an excellent game that caught my eye when I was on a print-and-play kick. It appeared in many PnP lists due to a trial version of the cards being made available while they were trying to raise funding for the game.

One difference between the PnP game and published one is a lack of scoring mechanism included with the game. The PnP game tried to use a pair of cards to represent the player’s food tray moving along the score track. I understand why it wasn’t included in the final game – it was a somewhat clunky way to keep track of points. But Sushi Go is a game that needs to have points kept track of between rounds, so I decided to make scorecards so that we don’t always have to scramble for pen and paper whenever we play a game!

These are inspired by a similar set of score cards that I saw on Board Game Geek. The art is grabbed from this player aid card. The important part is the scoring wheels that can be rotated to reflect the player’s current score. The rules and scoring details are all just window dressing really.

If you would like to make your own, you can download my file here.

Print out two copies of the first page and one copy of the second page onto stiffish paper.

Cut the scoring wheel page between the second and third row of circles. Fold the paper along the lines and glue together to create the double-sided scoring wheels.

The paper folds into a sturdy card once folded over itself. I used watercolour paper so I didn’t even need to glue them. If you’re using lighter paper you may want to apply glue across all faces (watch out for the ‘glue-free zones’, my nod to the Midnight Quiz) so that everything holds together.

You can get small split pins (brads) from the scrapbooking section of an art supplies store.

sushigo_scorecards_wip

Okay, I think I’m now up to date for Blaugust! Just need to work out what I’ll be posting about tomorrow…

Posted in: Crafts | Tagged: blaugust, board games, made by me, player aid, score card, sushi go

Three-Dee Thursday #3: Dominion Storage

Posted on August 21, 2014 Leave a Comment

This one’s less an art project but still something I’m quite pleased to have designed and made.

John and I have been playing a lot of Dominion lately. We now own five of the sets – Intrigue, Seaside, Hinterlands, Dark Ages and Guilds.

These boxes take up a fair bit of space on our shelf!

1802

Due to the amount of space they take and how much fuss it can be to shuffle around all these boxes when we want to play, I decided to work out an alternative solution for storing all the game components.

Solution? Binders!

1801

Back in my Pokémon trading card days, whenever I was in a pinch and needed new storage for cards, my mum would make these sleeves out of ordinary A4 protector sleeves. They wouldn’t fit the Pokémon cards perfectly, but they would be good for sticking a bunch of duplicate cards in one slot, which most off-the-shelf card sleeve pages wouldn’t allow.

Multiple-cards-in-one-slot is exactly what I needed for Dominion, so I decided to make my own sleeves!

To seal the plastic together, I borrowed an old device of my mum’s – it’s a contraption with two heating elements that when pressed down heat plastic between them to melt the plastic and create a seal. It’s designed to seal up sandwich bags and the like, but also works on other plastics.

1805

I measured out the height of each card and made horizontal cuts along the sheet protector on the front of the sleeve. This gave me pockets for the cards. Then I sealed the sheets to make 9 pockets per sheet!

1806

For one sheet I sealed it in quarters – this way it can fit a larger stack of cards or even a stack of the mats used in Seaside

1804

But for other components I decided to use these zip-up sleeves.

1803

1810

Finally I printed out some labels with each of the card names. If I did this over again I think I might try and match the label to look like the name section of the card, and put the sticker up at the top of each pocket.

1808

1807

My first prototype used a normal document binder, but I was concerned that traveling with the cards would allow for cards to escape! So I got these zip-up binders instead. This way it keeps any potential escapees confined to safety.

1809


Posted in: Crafts | Tagged: board games, card games, dominion

Recent Posts

  • Cricut Hacks #2 – Template frames
  • Rainbow Eagles
  • Cricut “Print and Cut” Hack – print bigger
  • Reflections on Tableturf
  • “Pearl’s Palette” custom keycaps

Archives

  • April 2025
  • November 2024
  • August 2024
  • March 2024
  • November 2023
  • August 2023
  • June 2023
  • April 2023
  • January 2023
  • December 2022
  • October 2022
  • August 2022
  • May 2022
  • April 2022
  • November 2021
  • September 2021
  • August 2021
  • August 2020
  • September 2019
  • August 2019
  • August 2018
  • May 2018
  • September 2016
  • August 2016
  • October 2015
  • September 2015
  • August 2015
  • April 2015
  • February 2015
  • October 2014
  • August 2014
  • July 2014
  • April 2014
  • March 2014
  • February 2014
  • September 2013
  • August 2013
  • July 2013
  • April 2013
  • March 2013
  • January 2013
  • December 2012
  • October 2012
  • September 2012
  • August 2012
  • July 2012
  • May 2012
  • March 2012
  • January 2012
  • December 2011
  • November 2011
  • September 2011
  • August 2011
  • June 2011
  • May 2011
  • March 2011
  • January 2011
  • December 2010
  • November 2010
  • October 2010
  • September 2010
  • August 2010
  • April 2010
  • March 2010

Blogroll

  • Hallucinfection
  • Jp's Lab
  • Leaflocker
  • Telling Stories

Copyright © 2025 Chenonetta Creations.

Theme by themehall.com.