Chenonetta Creations

Find Me On...

  • deviantArt
  • Twitter
  • Mastodon
  • Instagram
  • Facebook
  • Bluesky
  • Home
  • About
  • Selected Works
  • Shop

fan art

Watercolour Wednesday: The Superfogeys

Posted on August 21, 2013 7 Comments

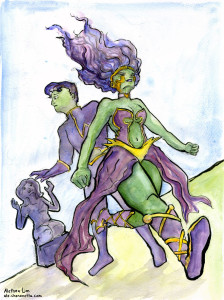
We’re going from green hair to green skin this week, and over the week I’ve learned that I should have drawn Trigona with three fingers. I make up for it today.

Today’s piece features Zurida, alien villain from The Superfogeys, a comic about superheros somewhat past their prime. She’s accompanied by her son, Percy, as they walk past [spoilers spoilers in fact the rest of this post is probably going to be spoilers].

Zurida

This art depicts a scene that I imagined occurring not long ago in the story (although after showing John my pencils, he questioned whether or not this might actually have happened, I simply retorted that I wanted to draw it so there)

I had a good time thinking about what might be running through Zurida’s head here. Is she proud of her handiwork? Is she just getting on with the task at hand with no time to be sentimental? Perhaps she feels a twinge of regret – not because she’s done wrong, but because she’s granted Michelle eternal youth, while she herself has grown old.

Speaking of old, I did put in a token effort to portray Zurida’s age, but it was all quite secondary to getting the perspective and foreshortening right.

Finally, I liked the juxtaposition provided by Percy’s presence. He has an innocence and dumbness about him, in this picture he definitely wants to linger a bit longer and let the cogs in his head move as he makes the connection between Michelle and his mother.


[edit] Argument settled. The whole time I thought Zurida had been running things out of the Society of Heroes, but no, duh, it was her palace.

Posted in: Comics, Watercolours | Tagged: brush pen, comics, fan art, watercolour

Three-Dee Thursday: Pokemon Gym Badges

Posted on August 18, 2013 Leave a Comment

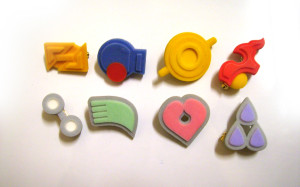
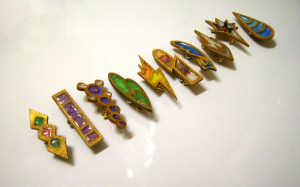
I designed these badges and had them 3D printed by Shapeways. The first set is printed in sandstone, and the other set was printed in alumide. For the alumide badges I painted them and then used liquid polymer clay to create the glassy filled-in areas.

gen3

gen5


I have also printed Johto and Sinnoh badges, however they require additional work to complete.

You can get your own Hoenn badges from my Shapeways store here: http://www.shapeways.com/model/1065186/pokemon-gym-badges-hoenn.html

If you’re in Australia, total price may work out cheaper if you buy directly from my Storenvy store: http://chenonetta.storenvy.com/products/2257809-pokemon-badges-hoenn

Contact me if you’re interested in a set of Unova badges.

Posted in: Crafts | Tagged: fan art, pokemon, video games

Squirtle

Posted on January 13, 2013 5 Comments

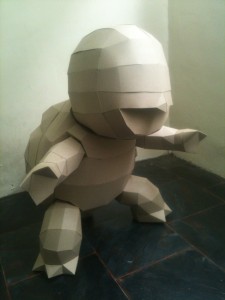
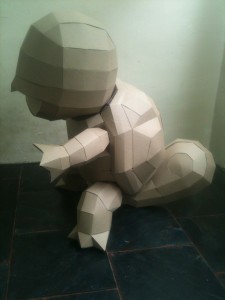
Whew! It’s about time for another one of these life-sized Pokemon. This one’s been waiting a while to be posted. I started on the templates on the drive to and from Manifest last year and have had it sitting mostly-assembled on my table for a few months now. I stalled in sticking the limbs to the body because I’d toyed with the idea of making them poseable, but I’ve finally given up on that idea and have just stuck them on.

IMG_0831 IMG_0832

As usual I’ve gotten my papercraft templates from pokemonpapercraft.net. Those guys do really awesome stuff!

Next papercraft: Tepig.

Posted in: Crafts | Tagged: fan art, papercraft, pokemon, video games

Ruby Slippers

Posted on October 18, 2012 Leave a Comment

Here’s some fan art for the marvelously fun and kitschy webcomic I Was Kidnapped By Lesbian Pirates From Outer Space! Lots of comics seem to be having planned breaks in the last week or so, and I was hoping to do fanart for other titles. I only got one done – I’m glad it was this one.

This was going to be a fan-comic to fit in with where the story was up to when it ended the last chapter. Then I realised my punchline had already been used in the comic, so I went on to just make that punchline into a nice painting.

Posted in: Comics, Watercolours | Tagged: comics, fan art, lesbian pirates, lpfos, watercolour, webcomics

Bulky Buddy Box

Posted on September 18, 2012 1 Comment

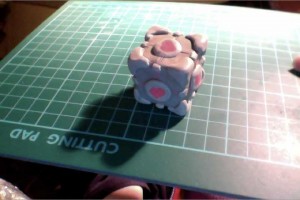
I’ve been talking about making a Weighted Companion Cube out of Sculpey since at least May last year.

Finally got around to it! Bad photo because I lost my phone last week 🙁

The main exercise here was to learn how to make canes, I made my heart cane based on this tutorial.

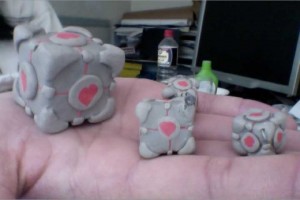
[edit] I made more! Each one I made was smaller than the last, until they got real teeny…

Posted in: Crafts | Tagged: fan art, video games

Giant NES Controller

Posted on August 30, 2012 Leave a Comment

The other major build which I initiated, but for which my father did most of the work for. All I did was some of the measuring and soldering. He completed this in less than three weeks, when I realised that the AVCon VG budget could fit the construction costs in.

Giant NES controllers aren’t so novel and rare these days, and they’re a pretty straightforward construction (says me who palmed off the actual work to her father). Here’s a list of the sites we used to as reference:

Instructables walkthrough

Sparkfun walkthrough

Giant NES controller Coffee Table

A version based on a GameCube controller by the Mario Marathon guys.

An explanation of how the controller transmits button-press data back to the NES

Some progress photos…

Here’s the MDF box with buttons in place.

I was thinking with the tight deadline that we’d just take it to AVCon unpainted was as there would not be time for painting. However my dad likes to do things right…

Unfortunately during painting he missed putting down one strip of tape to protect the gray from being painted over with the black. Spot the error!

Here’s my dad posing with his creation.


Here’s a look at the underside of the D-pad, with an ingenious improvised pivot to ensure that no more than one button can be pressed down at once.

During testing, we found that hitting the D-pad in a certain way would occasionally trigger the A-button. I concluded that we were getting invalid inputs, causing the IC to output the wrong data to the NES. I placed the blame on the D-pad and we spent a good while fiddling with the pivot and the button-holes, making sure the buttons weren’t jamming.

However, it wasn’t the D-pad’s fault at all! The vibrations across the controller were enough that they were causing the A-button to bounce in place and trigger the switch underneath. We used sponge rubber underneath each button to help the buttons stay properly suspended and to improve the feel of the button response.

Finally, here are some attendees on stage at AVCon, playing Super Mario on the controller.

Posted in: Crafts | Tagged: avcon, fan art, nes, video games

USB Key of Clow

Posted on August 27, 2012 Leave a Comment

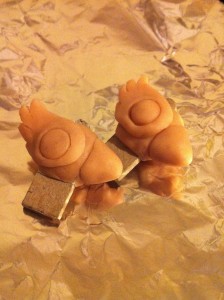
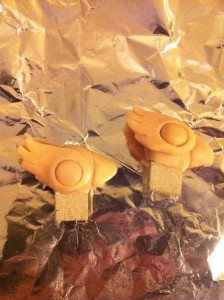
I made these tonight. The idea came from a couple of sources…

Some time back I saw this decorated USB drive on deviantArt and thought I might try something similar at some point. However I didn’t want to make a copy – I wanted to try something different. My initial ideas were to do something based on a butterfly’s wings. I then started worrying about how to disguise the USB drive and how to get a cap on…

Eventually this thought evolved into the idea to create a piece of fan art using a USB drive, and with my mind moving to  the Clow Key I was hoping to hide the USB connector in the beak. Looking up various USB drives and the sizes available I realised perhaps it would work better to point the drive downwards and have the connector as a stand in for the key part.

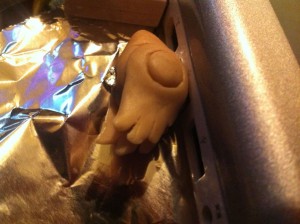
Anyhow, the USB drive I’m hoping to use is this one, which conveniently is about the width of some chipboard I have lying around. To model these keys I’ve partially wrapped each piece of chipboard with some alfoil and modeled things around that. The chipboard fits quite nicely into a USB port!

Once these are cured in the oven I’ll paint them and substitute the USB drive for the chipboard.

Posted in: Crafts | Tagged: anime, fan art

Tetris Tangrams

Posted on August 24, 2012 Leave a Comment

Sorry for the lateness on this one (not that anyone cares).

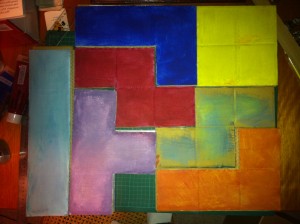
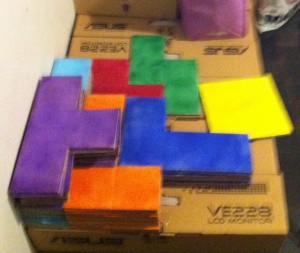
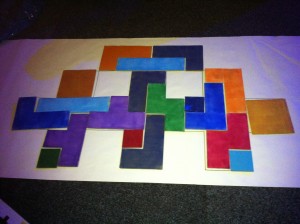
For AVCon this year I made a ton of cardboard Tetris pieces and puzzles to go with them. The inspiration for these puzzles comes from a game for the GameBoy called Daedalian Opus, though tangrams and the sort go back a long time. Both my housemate Alex and my mother mentioned playing with similar wooden-block puzzles as children.

Here are some photos.

The very first seven pieces.

Puzzle prototyping. Alex found a different solution from the one I’d been designing! He tried to write a program to discover all of the possible solutions but stalled.

Painted puzzle pieces, stacked and ready to go.

My workspace. Very messy!

A puzzle laid out at AVCon and solved by a clever attendee.

Posted in: Crafts | Tagged: avcon, fan art, video games

The Disco Banjo

Posted on August 3, 2012 Leave a Comment

The first of a couple of builds for which I collaborated with my father (ie, palmed off the hard work to).

The Concept

The concept for this comes, of course, from KoL. The epic weapon of the disco bandit is a banjo crafted out of a disco ball. Serendipitously, just as the idea to create the thing came to me, a fellow student at life-drawing classes showed me some photos of instruments made out of food tins. I started googling around and found that banjos made of cookie tins are actually quite widely made by artists and traveling musicians (the can itself is a great storage device) and there are many guides to making them around the place.

Eventually, my internet travels led me to a site explaining how to create a banjo out of a gourd, and this became the basis of the disco banjo.

The Making

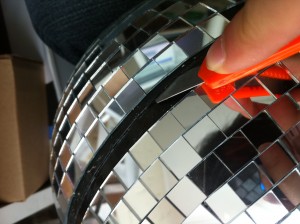
I bought a disco ball from Cheap-as-Chips and peeled off mirror sections until I found the seam along which the hemispheres of the ball were connected. Lots of photos from this stage, cos I had a lot of fun with it! Except when the thing first split open and noxious plasticy fumes filled my lungs.

Lifting off the first piece.

A stanley knife was sufficient to break into the plastic.

Leaving a bisected disco ball on a career-disco bandit’s keyboard is like leaving a severed horse head on someone’s pillow.

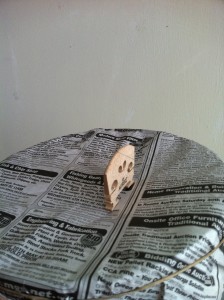
Testing the resonance of the ball using some fishing wire, a spare violin bridge and some newspaper.

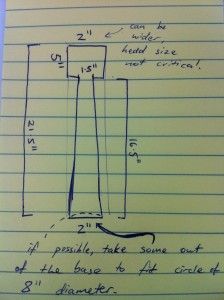
Once the disco ball was dealt with, I purchased a drum head, banjo strings and guitar pegs and drafted some timber guides for my father to do the woodwork.

Disco bongo. An 8″ drum head fits perfectly over the half-disco ball.

The neck.

A piece to go inside the banjo body in order to support the shape of the disco ball and provide a mounting point for the neck.

Preparing a hole for the timber to go through. I used a piece of paper of the same size/shape as the cross-section of the wood as my guide.

Sadly there are no more progress shots from here on as I passed everything over to my dad and he assembled the whole thing with expert craftsmanship.

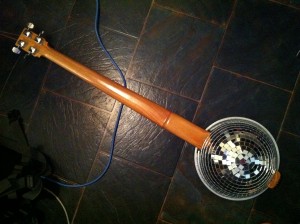
Suddenly, it’s done!

I used the many left over mirror sections to decorate the drum head.

Extra notes

The tailpiece is a separate piece of timber, screwed from the outside of the ball to the bracer piece on the inside. It also sits over the rim of the drum to hold things in place.

The banjo is fretless and tuned in fifths as I played ‘cello way back when.

Posted in: Behind the Art, Crafts, Music | Tagged: fan art, kingdom of loathing, kol, video games

Wedding Blogging (Guest Post #3 by Connell Wood)

Posted on August 16, 2011 3 Comments

Oops, didn’t have stuff ready for today. But luckily, Connell has put together an extra-special guest post this week! I feel really excited and privileged to be able to share this with you all.

So, today I thought I’d share with you the creation of the wedding cake for myself and my lovely wife Helena. We’ve been married 3 months already! Time flies when you have an awesome wife~

So, our wedding was very geeky in theme, but not to a degree that it overshadowed the importance of the day. But for the cake, we knew that traditional was not going to cut it. Looking online, we quickly fell in love with the many Mario cakes that people have made over the years. The idea we had was to make a custom wedding topper made to look like us, and place that on top of a cake where each tier had the appearance of a Mario level.

The initial design for the topper was Helena and I high fiving, which we thought would be a very cute idea. To account for our rather amusing height difference, Helena was to be standing on a Mario item box:
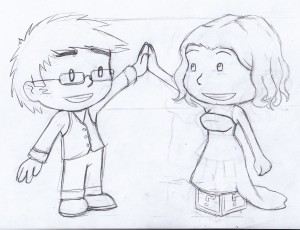
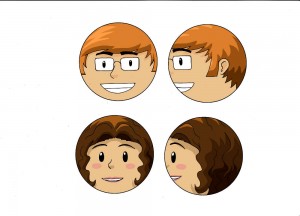
We have a friend who makes his own toys, and had hoped he’d be able to hook us up with someone who could make a specific resin toy of this design. Sadly, for size we wanted, it was going to be expensive and time consuming, and instead, we found a local cake topper designer who uses wooden pegs and makes custom clothing for each topper, which all looked incredibly cute. We sent her descriptions of our clothes (including Helena’s wedding dress, so I didn’t get to see the topper until the night of the wedding), and I designed faces to look closer to my art style than hers:
With this being made, we had to find a cakemaker who would be up to the challenge of making our cake. A local cakemaker Helena found showed some pretty amazing talent, and once we’d met her and tasted her cake (oh my god her cakes) we knew we had the right cake craftsperson.

So, I had to design the thing. I wanted each tier to be unique, and thought it would be cute if each level was as if they were connected via pipes, making the entire cake effectively one Mario level. Firstly came a basic planning stage, the cakemaker and I had to come to an agreement on what was feasible based on the limitations of icing. Here’s the sketch we started with:

Initially it was only two tiers, but the cakemaker recommended a third (who can say no to more cake?). With that, the top tier was also going to be a cliff rather than the sky and trees I settled on. While the top tier could have been made with a darker brown, it really wouldn’t have been as unique as I wanted.  From those decisions, an overall cake plan was determined:

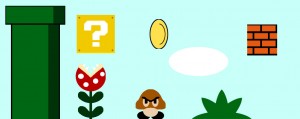
With that worked out, I searched for as many Mario images as I could find. I ended up chosing the look of New Super Mario Brothers, the colours in that game have an almost… sugary feel to them already (for want of a better, more correct phrase). The first step was to create the building blocks that I’d be needing for all the tiers: blocks, goombas, pipes, pirhana plants, and so on:
And once that was done, I started building Mario levels, which was actually kind of fun! I made sure to keep in as many nods to classic Mario level design as possible. The final designs are quite large, as I designed to scale, so they’re linked below.

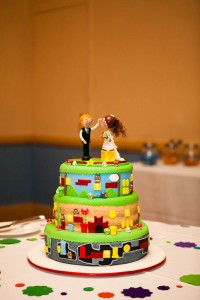
And with that, the planning was complete! And the result was completely and utterly worth it:
Video Link

In the end, the cake designer took some liberties in the design, but that was to be expected. I loved how the colours came out, and of course, the taste… As for the topper, I think it is so damned cute.

Helena and I still have the top tier with the topper on it kept in a case – the actual tier is Styrofoam, and the sugar icing will keep for a very, very long time. Best wedding cake ever? I think so.

Thanks Connell! I hope you’ll provide another post about the other awesome cakes that made an appearance on the night, too! Every table was graced with its own original cake and an accompanying story. Our table especially enjoyed our Pikmin themed cake, but I couldn’t resist sneaking over to the Tetris brownie table and playing some pretend Tetris… I mean, uh, congratulations to you and Helena!

Posted in: Behind the Art, Colour, Crafts | Tagged: cake, connell, connell wood, fan art, geek, mario, process, video games, wedding
« Previous 1 2 3 Next »

Recent Posts

  • Cricut Hacks #2 – Template frames
  • Rainbow Eagles
  • Cricut “Print and Cut” Hack – print bigger
  • Reflections on Tableturf
  • “Pearl’s Palette” custom keycaps

Archives

  • April 2025
  • November 2024
  • August 2024
  • March 2024
  • November 2023
  • August 2023
  • June 2023
  • April 2023
  • January 2023
  • December 2022
  • October 2022
  • August 2022
  • May 2022
  • April 2022
  • November 2021
  • September 2021
  • August 2021
  • August 2020
  • September 2019
  • August 2019
  • August 2018
  • May 2018
  • September 2016
  • August 2016
  • October 2015
  • September 2015
  • August 2015
  • April 2015
  • February 2015
  • October 2014
  • August 2014
  • July 2014
  • April 2014
  • March 2014
  • February 2014
  • September 2013
  • August 2013
  • July 2013
  • April 2013
  • March 2013
  • January 2013
  • December 2012
  • October 2012
  • September 2012
  • August 2012
  • July 2012
  • May 2012
  • March 2012
  • January 2012
  • December 2011
  • November 2011
  • September 2011
  • August 2011
  • June 2011
  • May 2011
  • March 2011
  • January 2011
  • December 2010
  • November 2010
  • October 2010
  • September 2010
  • August 2010
  • April 2010
  • March 2010

Blogroll

  • Hallucinfection
  • Jp's Lab
  • Leaflocker
  • Telling Stories

Copyright © 2025 Chenonetta Creations.

Theme by themehall.com.