Chenonetta Creations

Find Me On...

  • deviantArt
  • Twitter
  • Mastodon
  • Instagram
  • Facebook
  • Bluesky
  • Home
  • About
  • Selected Works
  • Shop

kol

Flameface: Process and Progress

Posted on August 11, 2012 Leave a Comment

With the KoL calendar contest deadline extended by a week, I had just one weekend to put together a new painting. Here’s some pics from the working process and some explanations of choices I made along the way.

Thinking in 3D

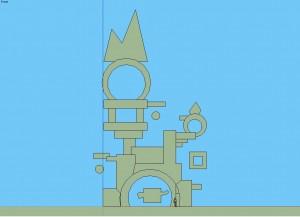
Once I knew that my piece was going to be based on the fire-fighting world event, I knew I had to illustrate Lord Flameface’s castle. And I needed to do so from an awesome angle, showing off the foreboding, smouldering fortress. Lord Flameface’s abode was a delightfully simple assortment of blocks so I knew I’d be onto a good thing if I created a model of the fortress in Google SketchUp first. I’d then use the 3D model to experiment with perspective and composition.

Straight-on view of the fortress model.

The camera angle chosen for the painting.

The Draft

Using my lightbox drafting table, I traced the SketchUp lines onto a sheet of watercolour paper for a test-run. Since this was my first watercolour piece in many months I wanted to get to grips with the paints again, as well as identify any potential problem areas in the image.

I initially planned to place an adventurer at the base of the fortress all kitted out in firefighting gear.

I learned that anywhere I wanted to put the flames down I’d need to leave the white of the paper to shine through. I fiddled with basic portrayals of depth by shading surfaces differently but felt that I’d need something extra for the final thing to make the fortress look hot and fiery.

The draft taught me a bunch of valuable things and particularly helped in setting the pace for the final painting. I realised that I’d have to be patient with use of the blank ink and not hurry with getting the smoky greys in otherwise I wouldn’t be able to paint effective flames.

Additional Elements

I identified some of the areas in the draft that I felt were really lacking and areas I wanted to portray better. I then googled images of fire and hot coals as reference and practised these elements on another spare sheet of watercolour.

Onto the Real Deal!

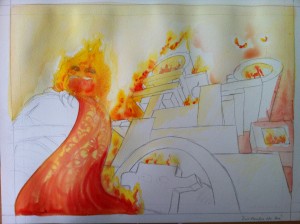
With the title for my painting decided, I opted to swap out the adventurer for Lord Flameface himself. On a new sheet of watercolour paper I marked out my margins and bleed margins, then sketched in Lord Flameface. I also traced in the fortress. Then, it was onto painting!

Underpainting in yellow.


Introducing Reds.

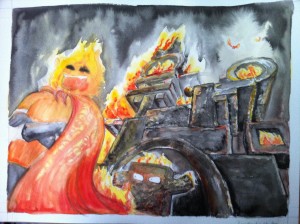
I used Chinese calligraphy ink for the black, allowing me to drop in a lot of pigment at once and let it bleed about on the page.
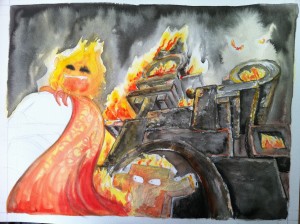
I let the sky dry before working on the fortress, to reduce the chance of the paint bleeding from the fortress into the sky. You can see the sky has dried a bit lighter than it was when the paint was first dropped in.


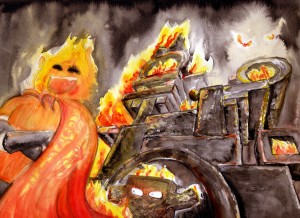
Final pass to finish off Lord Flameface and make changes to produce a cohesive image.

Finally, I scan the image and balance the colours a bit in Photoshop. The final result can be seen in Tuesday’s post.

Posted in: Watercolours, WIP | Tagged: fanart, kingdom of loathing, kol, watercolour

Lord Flameface Was Here

Posted on August 7, 2012 1 Comment

My entry into the 2013 KoL Calendar contest. My allocated month was June, so I chose to depict Lord Flameface from the June 2012 fire-fighting world event. Also, his fortress.

Saturday: All the bits that went into making this painting.

Posted in: Watercolours | Tagged: kingdom of loathing, kol, watercolour

The Disco Banjo

Posted on August 3, 2012 Leave a Comment

The first of a couple of builds for which I collaborated with my father (ie, palmed off the hard work to).

The Concept

The concept for this comes, of course, from KoL. The epic weapon of the disco bandit is a banjo crafted out of a disco ball. Serendipitously, just as the idea to create the thing came to me, a fellow student at life-drawing classes showed me some photos of instruments made out of food tins. I started googling around and found that banjos made of cookie tins are actually quite widely made by artists and traveling musicians (the can itself is a great storage device) and there are many guides to making them around the place.

Eventually, my internet travels led me to a site explaining how to create a banjo out of a gourd, and this became the basis of the disco banjo.

The Making

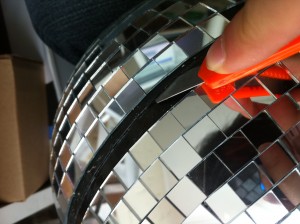
I bought a disco ball from Cheap-as-Chips and peeled off mirror sections until I found the seam along which the hemispheres of the ball were connected. Lots of photos from this stage, cos I had a lot of fun with it! Except when the thing first split open and noxious plasticy fumes filled my lungs.

Lifting off the first piece.

A stanley knife was sufficient to break into the plastic.

Leaving a bisected disco ball on a career-disco bandit’s keyboard is like leaving a severed horse head on someone’s pillow.

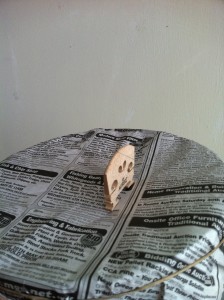
Testing the resonance of the ball using some fishing wire, a spare violin bridge and some newspaper.

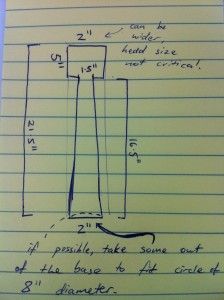
Once the disco ball was dealt with, I purchased a drum head, banjo strings and guitar pegs and drafted some timber guides for my father to do the woodwork.

Disco bongo. An 8″ drum head fits perfectly over the half-disco ball.

The neck.

A piece to go inside the banjo body in order to support the shape of the disco ball and provide a mounting point for the neck.

Preparing a hole for the timber to go through. I used a piece of paper of the same size/shape as the cross-section of the wood as my guide.

Sadly there are no more progress shots from here on as I passed everything over to my dad and he assembled the whole thing with expert craftsmanship.

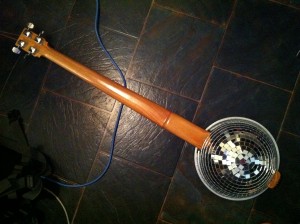
Suddenly, it’s done!

I used the many left over mirror sections to decorate the drum head.

Extra notes

The tailpiece is a separate piece of timber, screwed from the outside of the ball to the bracer piece on the inside. It also sits over the rim of the drum to hold things in place.

The banjo is fretless and tuned in fifths as I played ‘cello way back when.

Posted in: Behind the Art, Crafts, Music | Tagged: fan art, kingdom of loathing, kol, video games

Recent works.

Posted on March 10, 2011 Leave a Comment

Contests and requests – keeping me on my toes by stretching my normal artistic fare.

My entry into the AVCon 2011 T-shirt design comp:

I’ve started taking character illustration requests for the Kingdom of Loathing again:

A sample picture (this is my Disco Bandit character ‘Silks’ from my old comic)

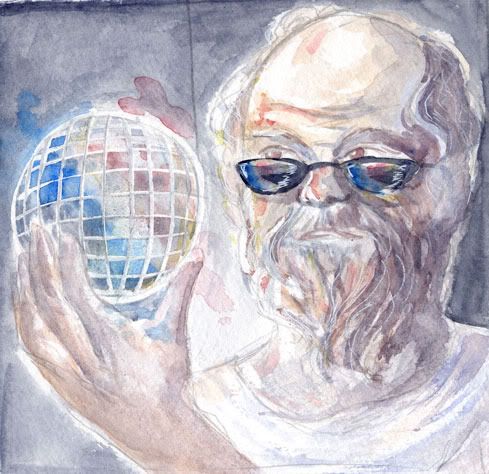
A painting for a player named ‘Brocrates’:

A painting for player ‘Ereinion’:

Posted in: Characters, Colour, Watercolours | Tagged: commission, contest, kingdom of loathing, kol

Recent Posts

  • Cricut Hacks #2 – Template frames
  • Rainbow Eagles
  • Cricut “Print and Cut” Hack – print bigger
  • Reflections on Tableturf
  • “Pearl’s Palette” custom keycaps

Archives

  • April 2025
  • November 2024
  • August 2024
  • March 2024
  • November 2023
  • August 2023
  • June 2023
  • April 2023
  • January 2023
  • December 2022
  • October 2022
  • August 2022
  • May 2022
  • April 2022
  • November 2021
  • September 2021
  • August 2021
  • August 2020
  • September 2019
  • August 2019
  • August 2018
  • May 2018
  • September 2016
  • August 2016
  • October 2015
  • September 2015
  • August 2015
  • April 2015
  • February 2015
  • October 2014
  • August 2014
  • July 2014
  • April 2014
  • March 2014
  • February 2014
  • September 2013
  • August 2013
  • July 2013
  • April 2013
  • March 2013
  • January 2013
  • December 2012
  • October 2012
  • September 2012
  • August 2012
  • July 2012
  • May 2012
  • March 2012
  • January 2012
  • December 2011
  • November 2011
  • September 2011
  • August 2011
  • June 2011
  • May 2011
  • March 2011
  • January 2011
  • December 2010
  • November 2010
  • October 2010
  • September 2010
  • August 2010
  • April 2010
  • March 2010

Blogroll

  • Hallucinfection
  • Jp's Lab
  • Leaflocker
  • Telling Stories

Copyright © 2025 Chenonetta Creations.

Theme by themehall.com.