Chenonetta Creations

Find Me On...

  • deviantArt
  • Twitter
  • Mastodon
  • Instagram
  • Facebook
  • Bluesky
  • Home
  • About
  • Selected Works
  • Shop

blaugust

Enveloping

Posted on August 8, 2016 Leave a Comment

Okay I had a nice weekend sans-Blaugust posts, and I’m still undecided about whether I’ll be making catchup posts.

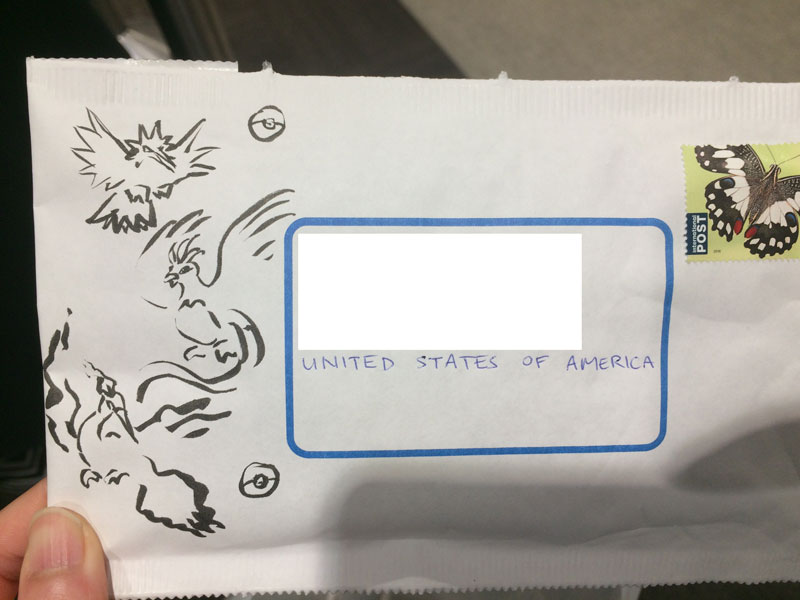
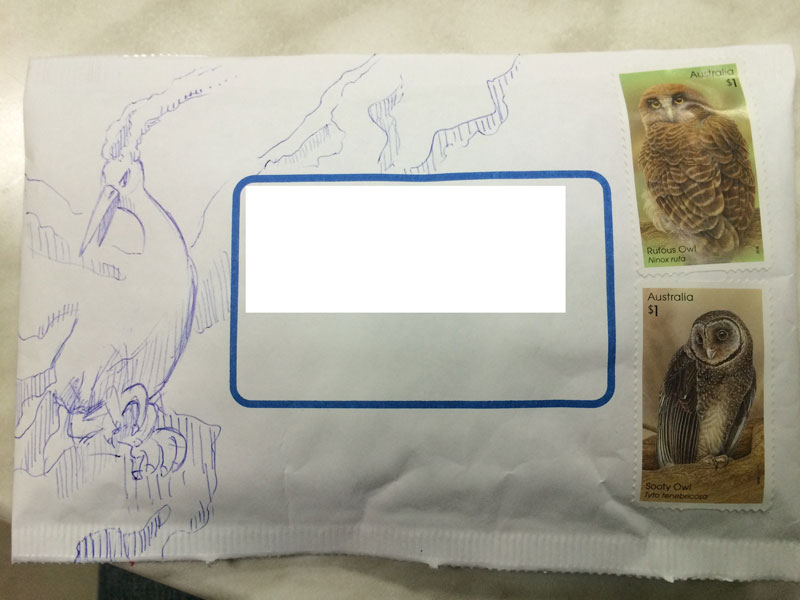
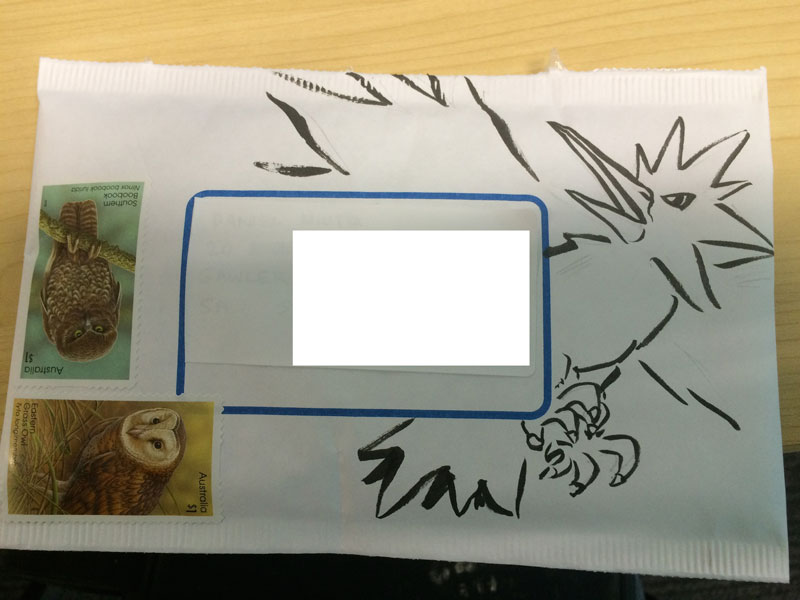
In the meantime, I better get back to posting before I lose all motivation! I mentioned last week that I opened an Etsy store. Well one of the fun parts of having an Etsy store is sending out letters. Scribbling a thing on each letter I’ve sent out has been a good little exercise. However I’ve found it pretty nerve-wracking as I haven’t planned the drawings at all.

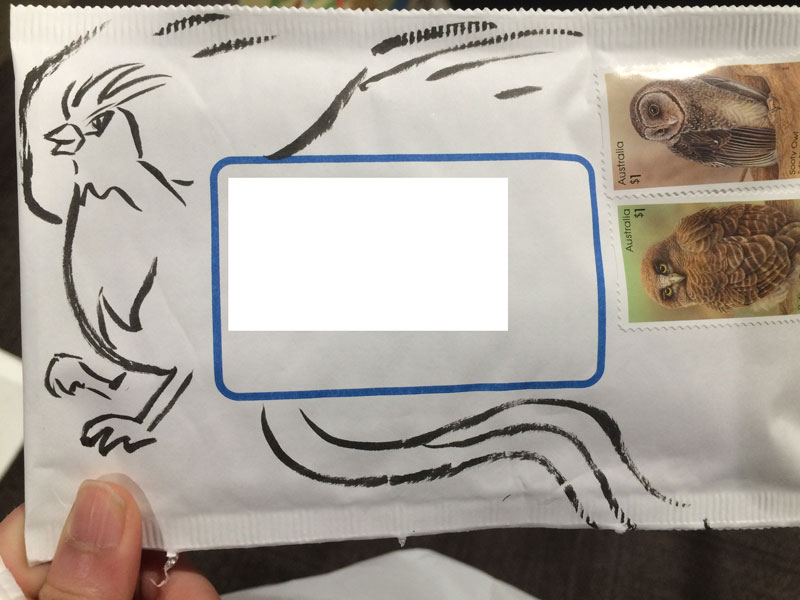
For first envelope, I decided to utilise the top right area for Zapdos’ head. Then I realised that’s where the stamps needed to go. So I rewrote the address upside down and put the stamps in the new “top right” of the envelope.

2654

Lesson learned. I avoided that mistake with the following envelopes.

2659

2660

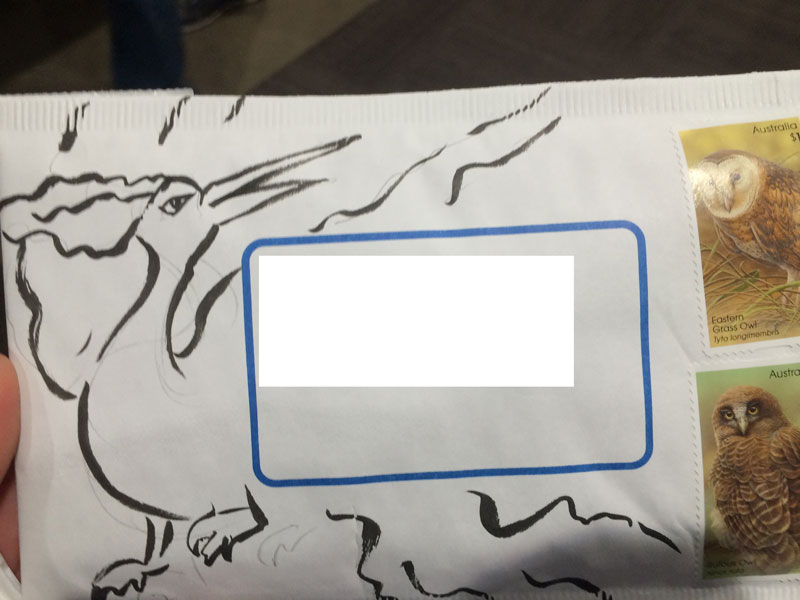
For the legendary trio I ried for a cute little design, I don’t think the brush pen was the best choice to convey such small little figures.

2658

I drew this Moltres envelope while waiting for lunch. The biro was much less scary to work with. I don’t normally do shading/hatching like this but I think it worked out okay.

2663


Posted in: Line Drawings | Tagged: articuno, blaugust, envelope, letter, moltres, pokemon, pokemon go, zapdos

Tutorial: How to create paint splatters in Adobe Illustrator

Posted on August 5, 2016 Leave a Comment

howtosplat

Past-me graciously supplied current-me with all of the partial steps of a tutorial. All I had to do was fill out the text. It’s not the most beautifully formatted tutorial, but I think it gets most of the main points across. Happy splatting!

Posted in: Digital | Tagged: blaugust, illustrator, splat, tutorial, vector

Watercolour Splatoon 3DS XL Cover Plates

Posted on August 4, 2016 1 Comment

18

Apparently I haven’t yet posted about these here!

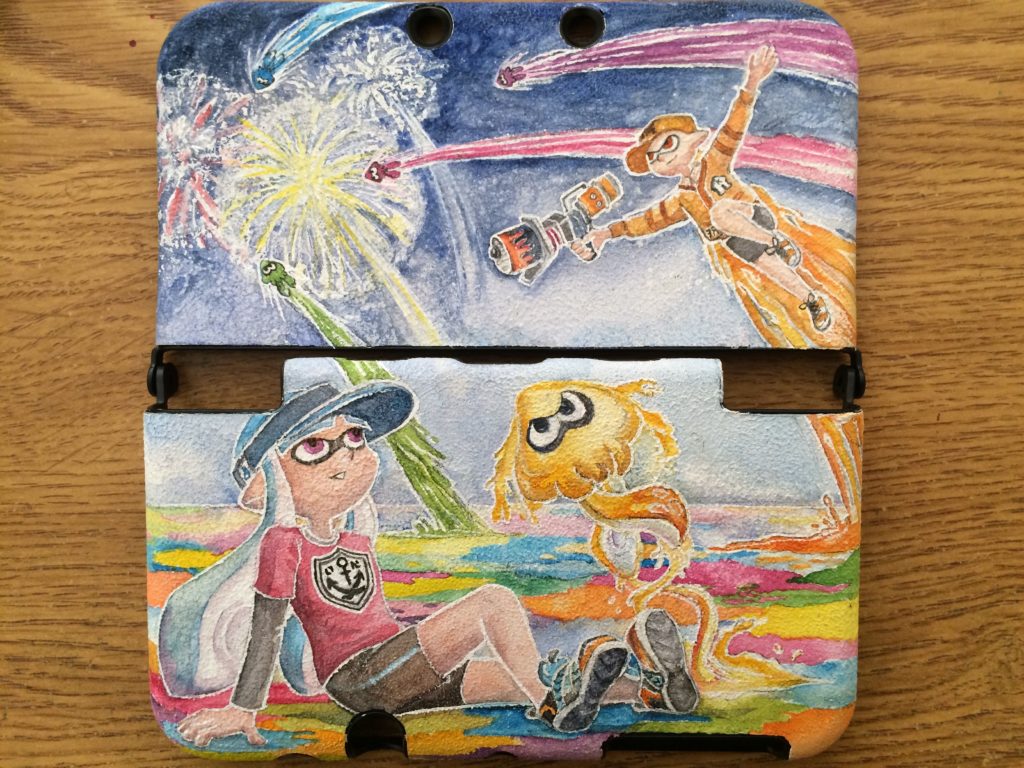
I painted these cover plates as a personal project after a commission fell through. I had been wanting to create a Splatoon themed cover plate for a long time but it took a while to come up with an idea and composition that I liked.

concept

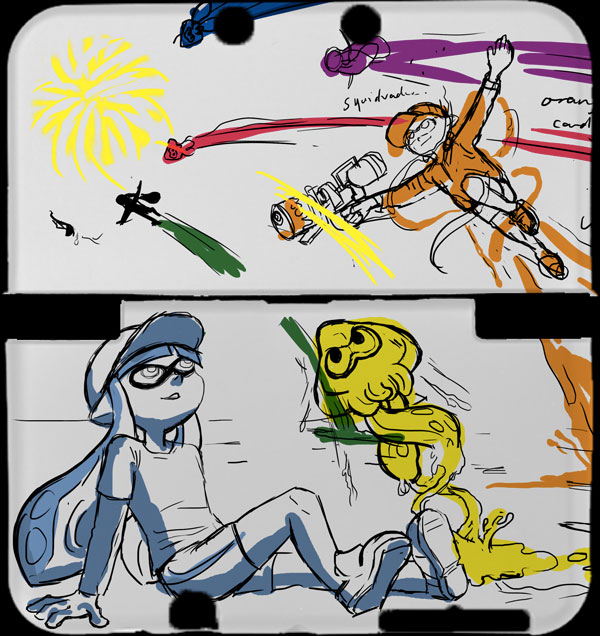
Here’s the initial concept sketch. As always when I create cover plate designs I try to ensure the top and bottom plates are appealing designs in their own right, as well as working together to create a scene.

conceptcolour

After getting the lineart worked out, I put in some basic colours. I had an idea of a rainbow of ink lines. I then had the idea to add some fireworks in the top panel. Don’t worry, they’re not exploding squids!

1

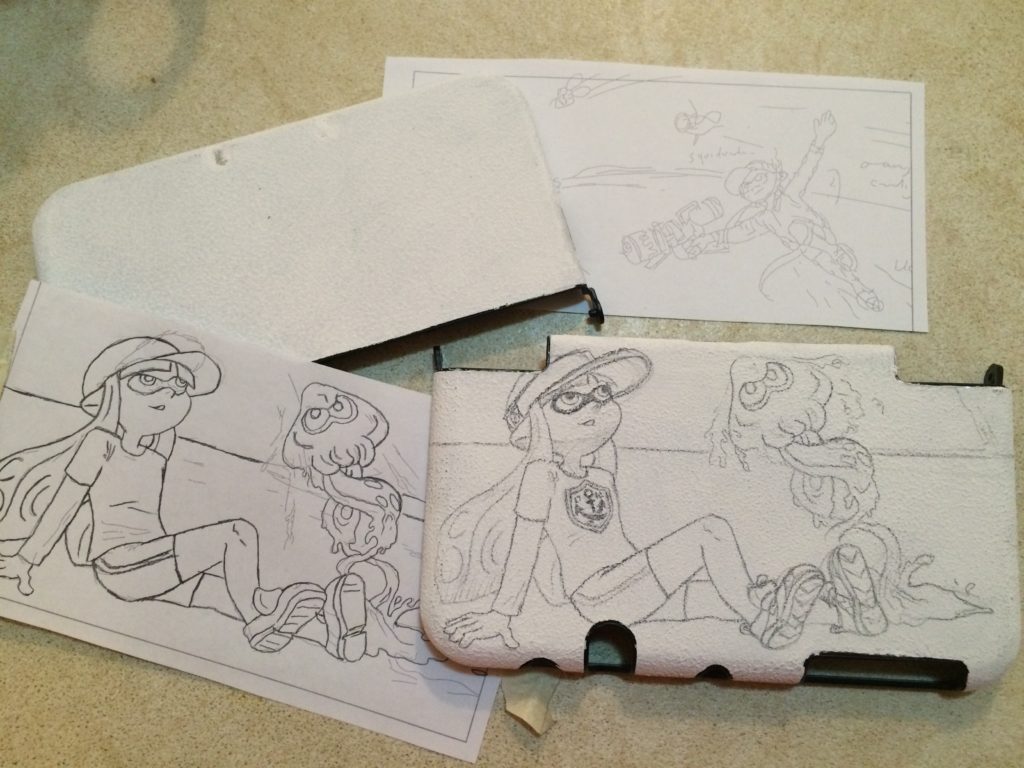
I then print out the lines and transfer them to the cover plates. Here’s the various steps of the process.

Top left: blank cover plate
Top right: printed lineart. I scribble over the back of the piece of paper with pencil so that the graphite can be transferred
Bottom left: lineart which has been traced over while stuck in place on the cover plate
Bottom right: the transferred image, traced over with pencil a second time to better define the linework.

Now onto painting!

3

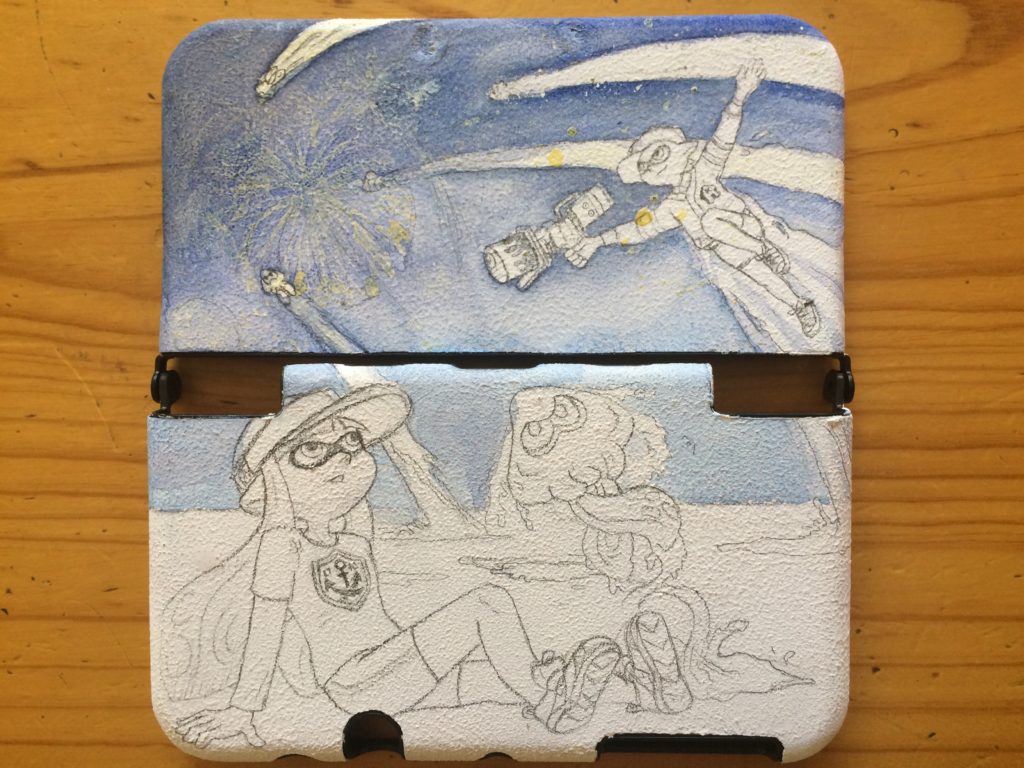
Starting to apply the washes of colour. The yellow splotches that are visible on the top plate are globs of masking fluid. The masking fluid protects the white of the surface as I paint over it. Masking fluid has also been applied to the fireworks.

4

The masking fluid has been removed and the firework colours have been added.

6

More work on the fireworks, some white added to the ink trails to define the movement of the jumping squids.

9

Putting in colours on the bottom plate. I decided for an eclectic background with lots of ink patches.

10

Adding skintones. More white highlighting on the inkling on the top plate.

11

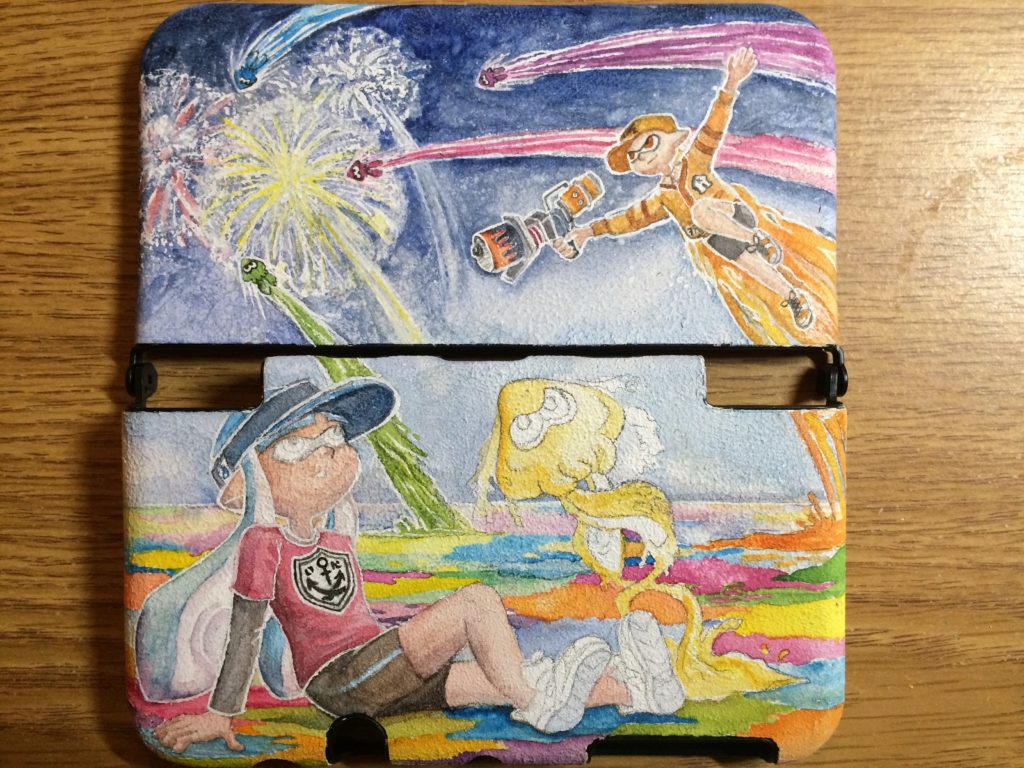
Almost done! Just some extra highlights to add.

Here are some glamour shots of the cover plates being modeled on my not-new 3DS XL.

1312

Posted in: Uncategorized | Tagged: 3ds, blaugust, cover plates, fireworks, new 3ds, process, splatoon, squid jump, watercolor, watercolour

Insert Title Here

Posted on August 3, 2016 Leave a Comment

Today I was going to write a post-mortem of the Splatoon LANs I ran at AVCon this year, but after coming home from work I fell asleep on the floor and have slept almost all evening.

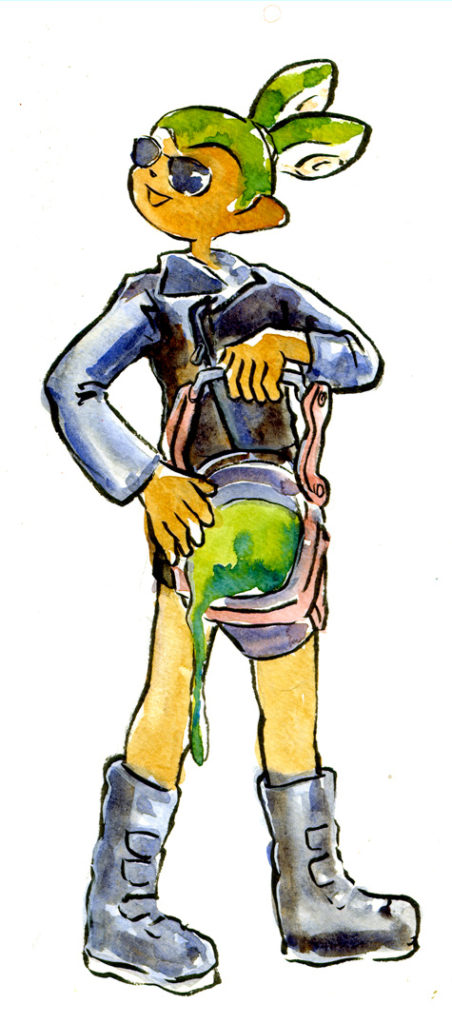
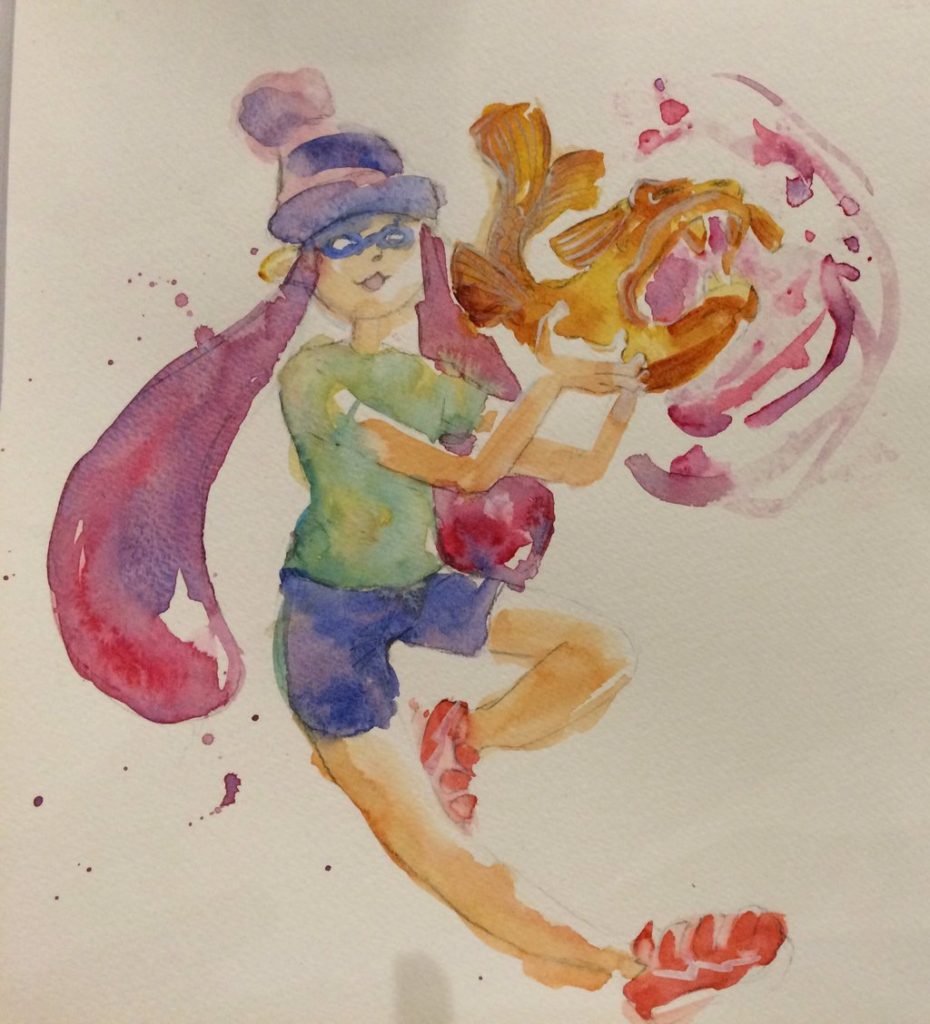
So instead it’s squid art! There’s going to be a lot of Splatoon art this month, as I have portraits that are due for competition winners and old art that I need to scan.

vgcrainmaker

vgcbucket

These squids were drawn while I was at the Pokémon Regionals back in May.

I actually inked them after putting down the paint. Here’s a photo from before the inking was done.

RainmakerNolines

Posted in: Watercolours | Tagged: blaugust, bucket, rainmaker, slosher, splatoon, watercolor, watercolour

Through Mists

Posted on August 2, 2016 Leave a Comment

I spent the night trying to get my scanner to work with my laptop. Since upgrading past OSX Snow Leopard (quite a few years ago now), the Epson-provided scanner software stopped working for me. Epson provided drivers to work with the inbuilt Image Capture software, but I discovered that the RGB channels would be misaligned. Finding this unsatisfactory, I experimented with different drivers and software, and somehow broke the Image Capture compatibility – although the software recognised the scanner it would sit indefinitely waiting for the scanner to respond.

A few days ago I noticed Epson had released new drivers so I was hopeful that they would work. Unfortunately, that proved not to be the case. I dug through all the old driver files, manually deleted as much as I could find, reset all printer/scanner settings (that’s quite sad actually as I have a bunch of printer presets lost now), reinstalled the full 2GB bundle of drivers for all Epson products, purged VueScan from my system, turned my computer off and on again and finally, somehow, the scanner is back to mostly working in the buggy way it did three years ago.

Having to fix the channels in Photoshop is less inconvenient than having to boot up an entirely separate machine just to scan documents, so I guess I’ll live with it for now. Not being able to easily scan documents is one of the reasons why I’ve been less prolific outside of Facebook/Twitter, where I’ve been taking photos of my finished pieces with some “artfully” thrown in paintbrushes and pencils to embellish the scene. So hopefully with an easier access to scanning I can share a bit more art here.

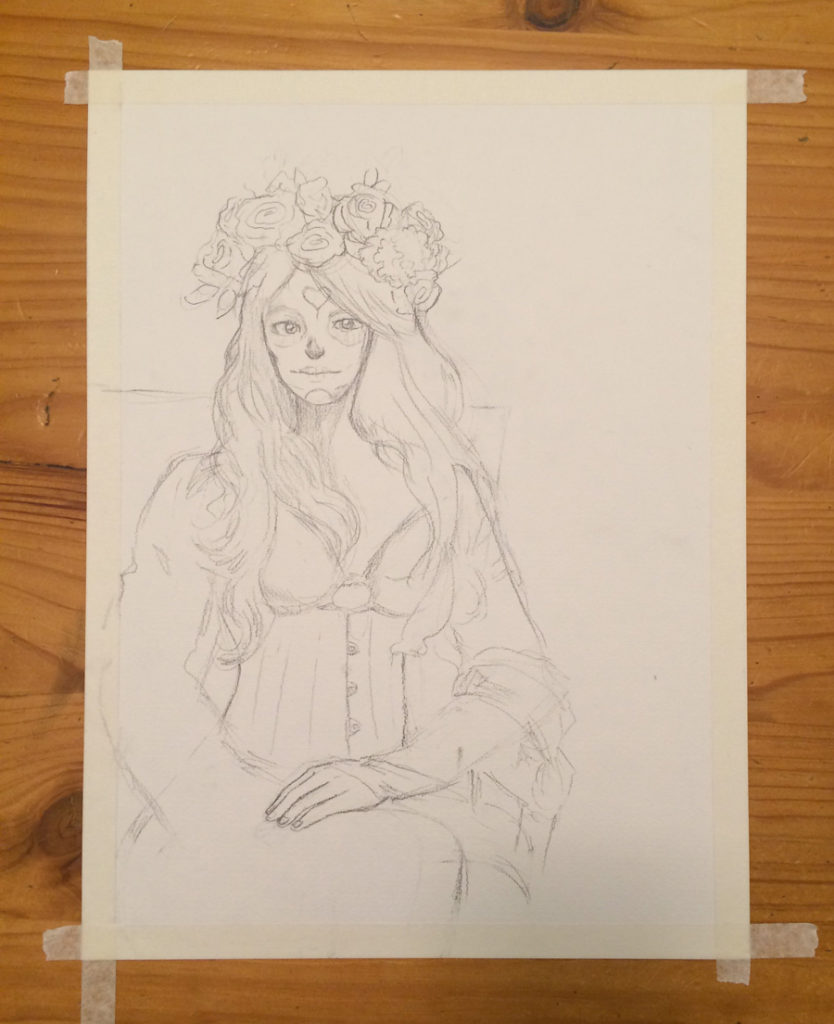
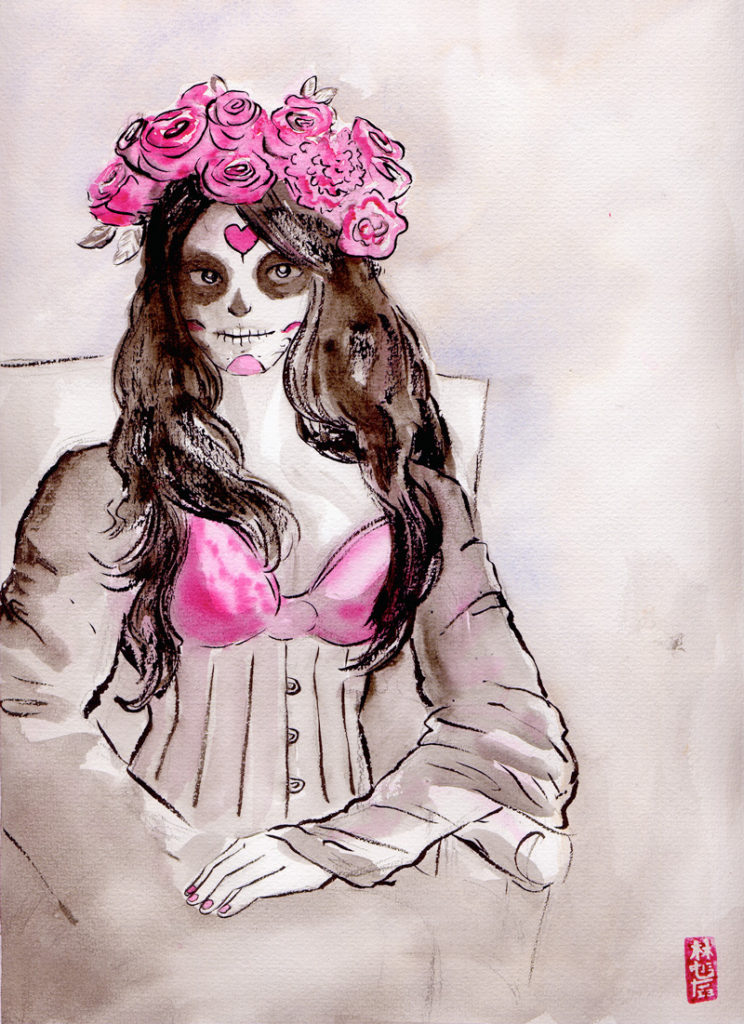
Anyway I can’t go another blog post without posting a bit of art, so here’s a painting inspired by a photo of a friend. The original photo included a lot of fog and interesting lighting effects, in the end this painting kind of took its own path.

throughfogdraft

Shown above is a photo of the WIP, taken just before I started painting. I initially struggled to draw this as a realistic rendering, but ultimately decided to just draw a figure posed the same as the reference photo instead.

When it came time to painting it I was almost going to go for full colour but early into the painting process the pink started to emerge as a highlight colour throughout the piece so I refrained from including other colours.

Final

Posted in: Watercolours | Tagged: blaugust, calavera, ink, portrait, watercolor, watercolour

And now it’s time for… the Challenge

Posted on August 1, 2016 Leave a Comment

Blaugust 2016 is starting and I’m probably the least prepared that I’ve ever been for it. Considering that I’ve needed utmost coordination to be able to pull off Blaugusts in the past, this makes me rather uncertain about how I’ll be managing for this one.

As I look back on my posts from Blaugust 2015, I can see that a lot of what I’ve been doing in the last year has been an extension of what I achieved back then. A lot has changed for me personally and professionally in the time between Blaugusts and I guess now’s as good a time as any to reflect on it all. That’s right, once again Blaugust is encouraging me to explore new grounds as I make an actual diary-like post on my blog.

Work

In November last year my work transitioned over to a new employer, a single-application focused company which was started in Adelaide but is now headquartered in San Francisco. It’s been a great experience, though sometimes challenging working in a remote capacity to most of the team. Our local office has since doubled in size and it’s nice to have more people around than just the three of us.

I work a lot now on front-end web stuff. I like it, but I hate all browsers.

Laser Cutting

I receive jobs every now and then to cut jobs on my laser cutter from a friend that runs a 3D-printing based business. There’s a mix of clients being directed towards me as well as cutting components for pieces he is assembling or incorporating into other works. At the end of uni semesters a deluge of architecture students are sent my way, needing assistance completing their university assignments.

When I first bought the laser cutter I entertained thoughts of spinning it into a fulltime source of income. I’ve actually got a rough balance sheet that shows I’ve covered the costs of the machine with the various cutting work done on it as well as art stuffs I’ve been selling over the past two years. This feels like a huge achievement, and I’m very proud of managing it so quickly. However fitting in the time to do the jobs alongside the day job has been exhausting. I do not see a path to transitioning to doing such stuff full time, and nor am I sure anymore that I would actually want to.

Art

Doing more work on the laser cutter has come at the cost of pursuing much of my watercolour work. Actually I guess I’d been lax even prior to getting the machine. I struggle to find the motivation to sit down and create sometimes, other times I struggle to brainstorm things to paint.

But I do feel that even if it’s a slow pace, I’m still learning and expanding my watercolour skills. I’m not dissatisfied with how things are progressing.

Chenonetta Creations

Slowly over the last year I’ve been defining out what my little artistic niche in the world is. It is only natural that I’ve been putting together laser cutting and watercolour techniques to create what I hope are unique works of art that reflect my skills and personality as an artist. Along with this, I’ve been slowly expanding out my spheres of social media presence, the biggest being the creation of a Facebook page for my art. The immediacy of feedback on Facebook has been great, and the proximity of the potential audience (ie all of my existing friends on Facebook) has allowed me to get much needed boosts to my ego.

I was a little worried initially that any feedback I got on Facebook might feel a bit hollow, and that it would just be friends humouring me. Well maybe you are all just humouring me but it definitely doesn’t feel hollow. I feel more connected to my fellow artists, and I have a deep appreciation for the friends that encourage me in my artistic pursuits. You all inspire me very much, and it makes the creative process more fun. Facebook is also extremely easy to post to so I can get the immediate gratification of making something and putting it out there for the world to see.

I wanted to deviate from fandom works and instead pursue more original designs, but fandom is just such an easy audience to cater too, especially when I can share a common love of a franchise with people. Nerds, geeks, gamers and otaku are my people, so it’s easy to attend events like Supanova and AVCon and have common ground with other fans and potential customers. Small craft fairs are probably cheaper to attend but I don’t have experience with them or a significant enough backlog of items to take to them. That’s something that I’d like to change over the next year.

In the last week I’ve tried putting my stuff up on Etsy. Perhaps I’ll make a post about that as a separate Blaugust topic.

AVCon

I spent much of this year’s AVCon away from the gaming hall. I had a great time in Artists’ Alley. Last year I thought I did quite successfully, this year I did far better than I could possibly have dreamed. This was in large part due to the Pokémon Go craze! Once again game-release timing was in my favour. In a way it makes me a little sad to think that fandom works will outshine my original art, but I guess I just need to keep working on my personal works until they can shine on their own merits.

For the first time in a while I think I can see a point where I will eventually be able to phase out my involvement in the AVCon Games Team and not feel guilty about leaving it behind. There are so many good people working on it, and there will be many more to come. Their passion, enthusiasm and grit is amazing and it gives me confidence that we’ll find more people with those same qualities for the next generation of AVCon and beyond.

Home

John and I got married at the end of 2015! We were in America on holiday after I visited the new work office so it seemed like an opportune thing to do. We had a nice ceremony in the States with my sister’s family witnessing our marriage. Back home we had a larger celebration with friends and family in a relaxed atmosphere.

We are coming up on two years in the new house and its been treating us well. I have the garage set up as my workshop, with the laser machine, my giant light table and a series of shelves and work desks taking up residence in there. There’s no hope of fitting a car in! We’ve also hosted numerous people in the past year and a bit – visitors for AVCon and SXC and my sister and two of my nieces have all taken up temporary residence in the cosy back rooms of our house.

Just a couple of days ago, we moved the gaming stations from the front of the house to the study. Once we do a bit more tidying there I think we’ll have a nice little nook for gaming.

Gaming

Splatoon continues to see lots of play. We joined a competitive Splatoon league – we participated in the first season with friends then in the second season with a competitive squad called Hayley’s Comets. We started running monthly tournaments under the name Oceanink Offensive and I’ve even started streaming on Twitch! Being part of a new gaming community has been a lot of fun. It’s been a while since I’ve made new online friends and the people I’ve connected with while playing Splatoon have been awesome.

Splatoon has eaten a lot of the time that I used to have “free” in the evenings. I’m not sure I used to use the time any better in the past, but the chunks that go towards playing the game are quite noticable. I feel that as long as I’m getting other things done it’s not problematic, but because I do have so many interests it does mean that I’m giving up some activities to pursue gaming.

Day 1 Done

Okay that’s enough rambling. I wouldn’t be surprised if there are more words here than the entirety of last year’s Blaugust (ok, we’d probably have to exclude Giant Catan in that estimate). I have no idea what’s in store for tomorrow, but maybe it’ll even include some pictures!

Posted in: Behind the Art | Tagged: blaugust, life

Giant Catan

Posted on August 31, 2015 5 Comments

Let’s finish Blaugust with a bang. This post was initially going to be a week’s worth of posts, then I felt that was a cop-out so decided I should make it all one post. Then I kept putting off the post because it felt too big to tackle. With the end of the month rapidly approaching, it’s time to bite the bullet.

I built a set of Catan. (The game formerly known as Settlers of Catan)
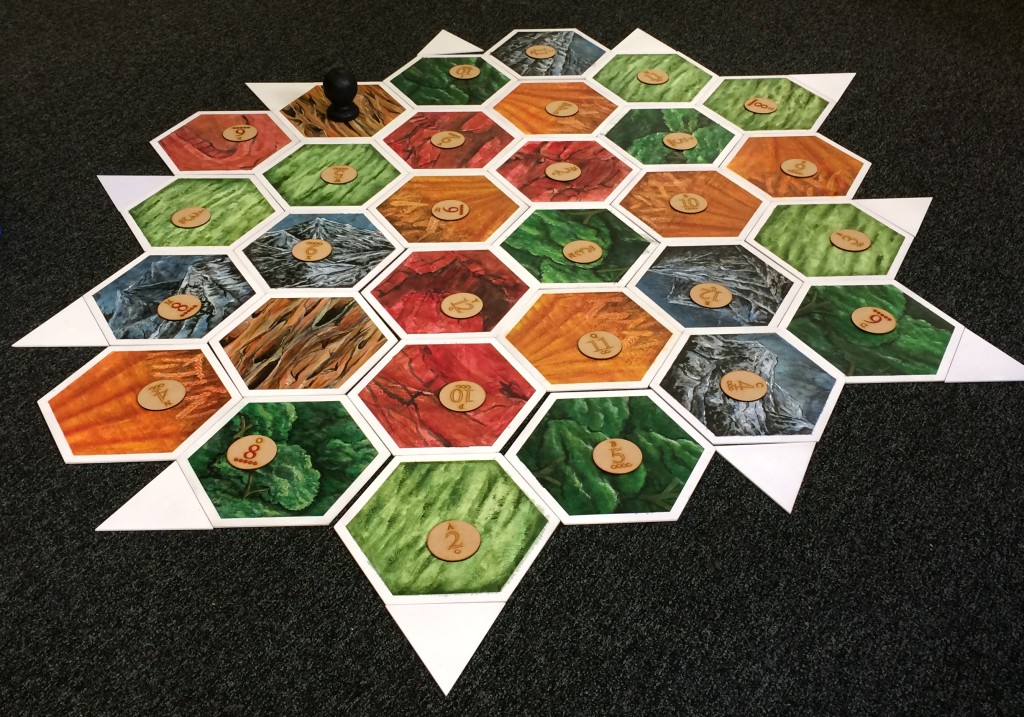
44

In case it’s not obvious from that photo, I built a giant set of Catan.

48

Here’s how.

Cutting The Hexes

I started this project back in November of last year. While I am personally not a huge fan of Catan, it’s an iconic board game that served as introduction to the hobby for many people. It’s also quite aesthetically pleasing, so I planned that if at some point I failed to complete the project or if there was no interest in playing the game I would still have a series of nice-looking tiles that could be used for display.

I started by cutting the hexes from 3mm MDF. From a 1200mm x 900mm board, I initially thought that I’d be able to get 11 hexes per board, cutting them like so:
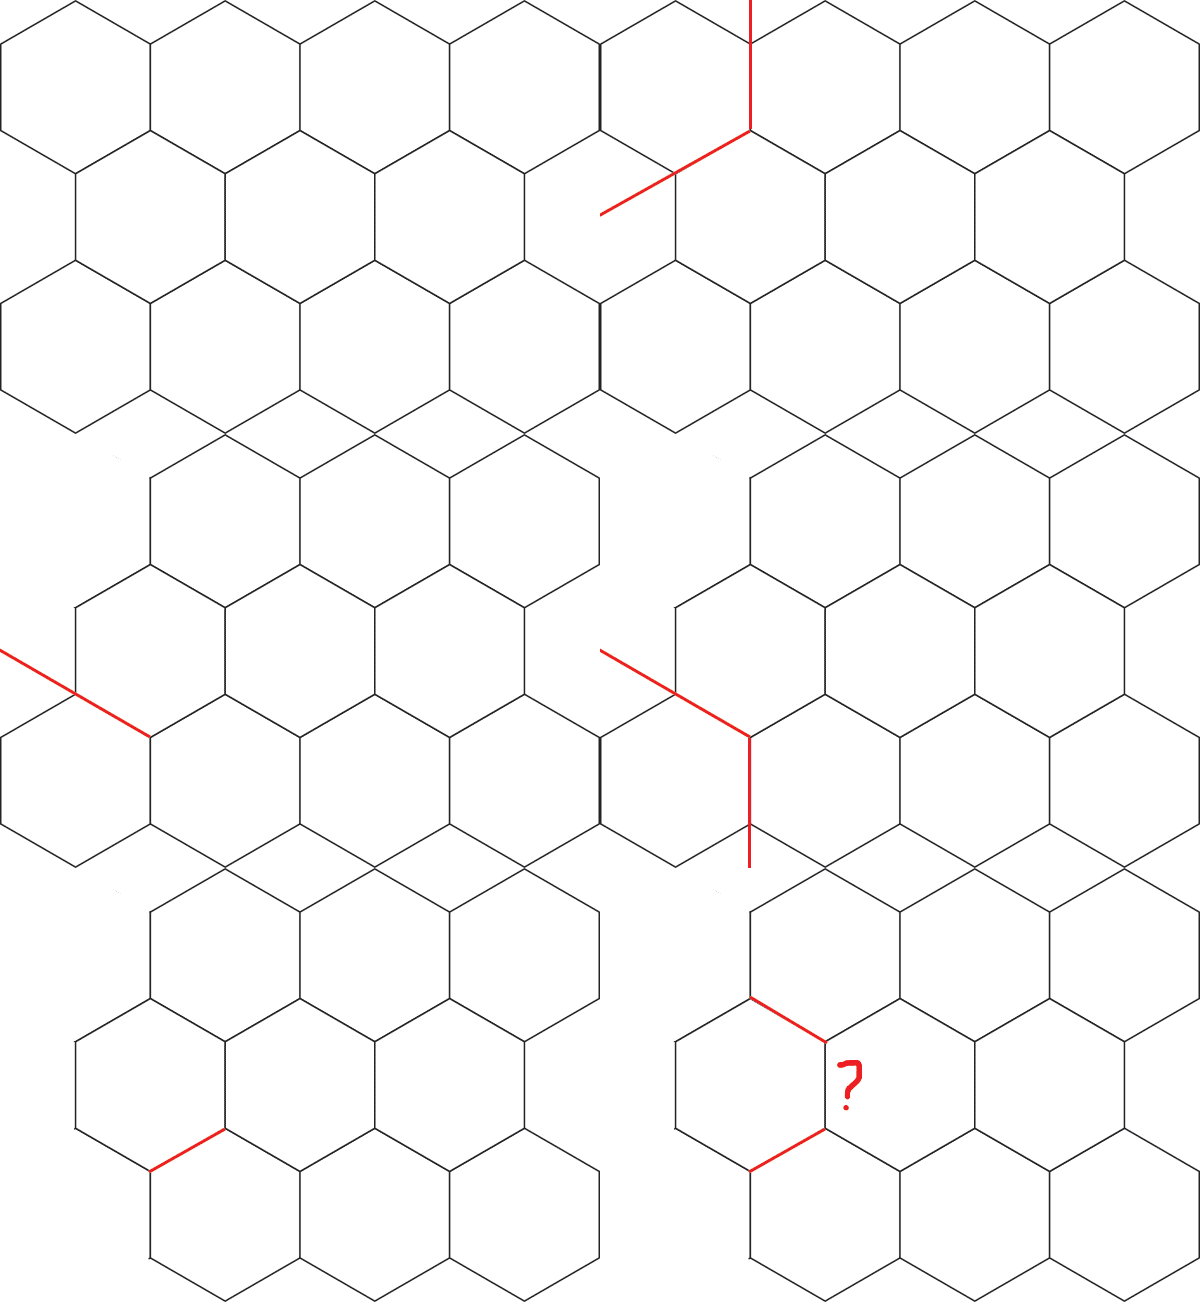
CuttingHexes

As you can see from the animation, I was not sure how to release the third piece from the group. I asked my dad for help cutting the pieces out using his table saw and mitre saw. He suggested that if we were to cut all of the hexes in bulk it would be easier to do the following:
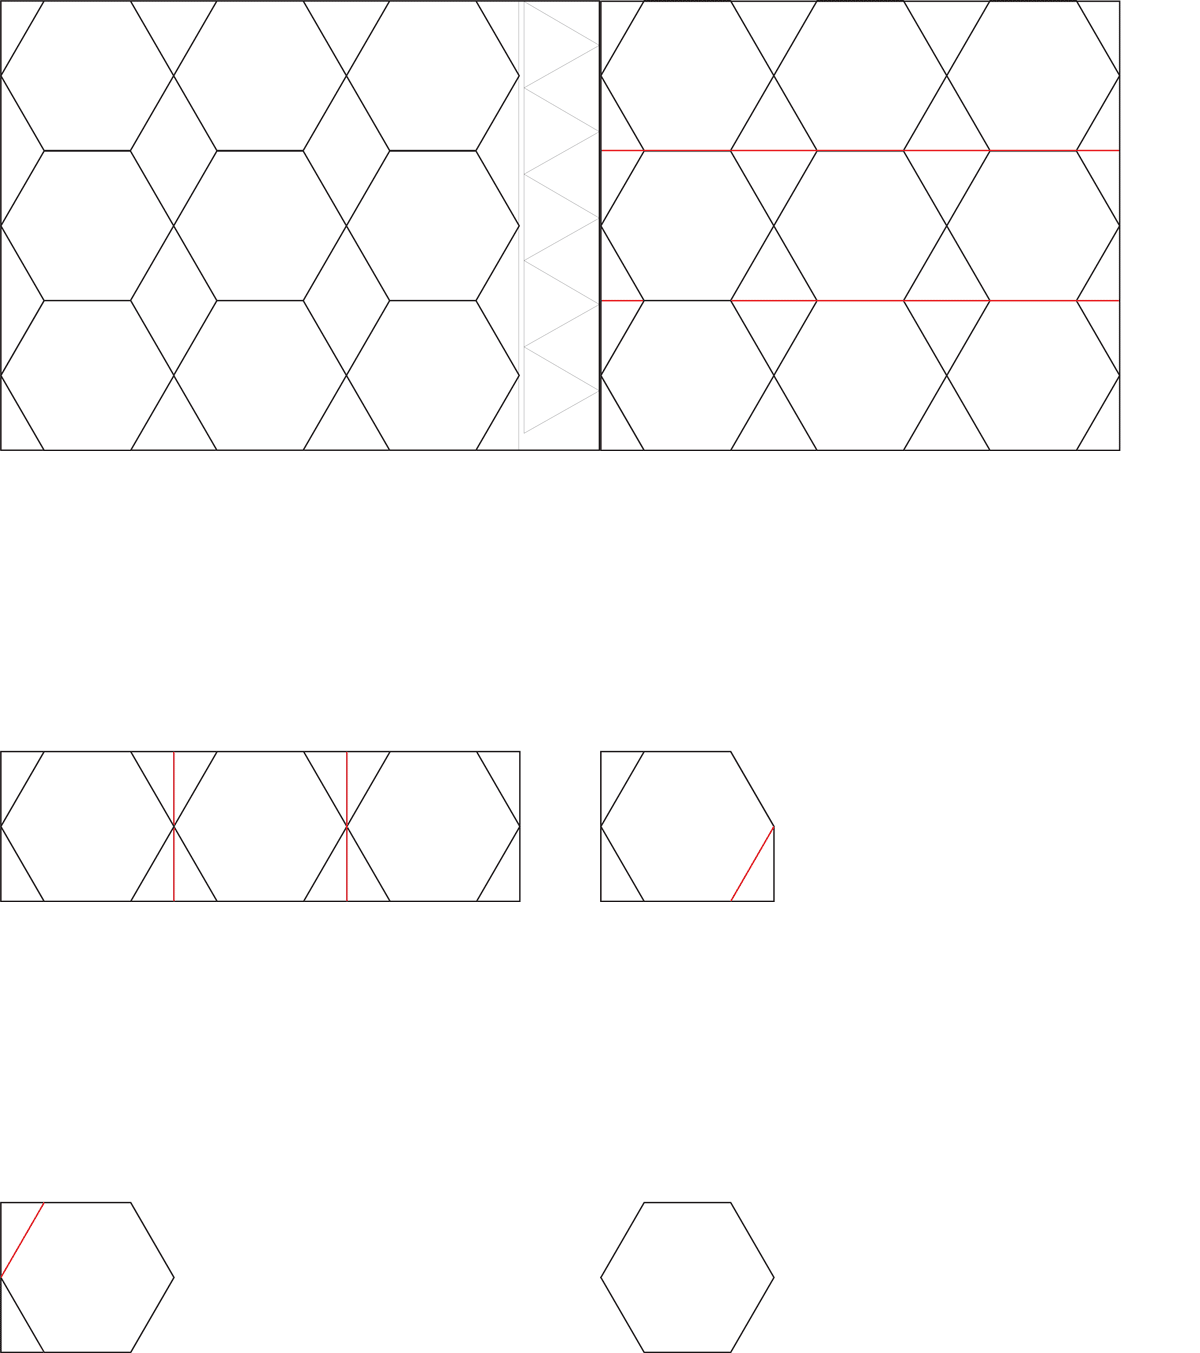
realcuttinghexes

Each board was sized to the width of three hexes. The strip off the end was used to make the port triangles.

From those strips, rectangles were made. The corners of each rectangle were then taken off to make the hexes.

By doing things this way we minimised the times we needed to change the settings on the saws and better ensured that the pieces would be uniform. However we ended up with a little more waste as we were only able to yield 9 hexes per board. There are lots of the right-angled triangles left over, but I have ended up using the scrap material for laser-cutting all of my small pins and brooches.

Here’s the cut hexes and ports after they were primed in white.

5

Painting the Hexes

Desert Tiles

There are 30 tiles, and I planned to hand-paint them all. Most tiles have five or six of the same design (fields for wheat, forest for wood, quarries for brick, mountains for ore and pasture for sheep) however the Desert tiles are only repeated twice. I figured they’d be a good start for testing the painting process out.

I established a style that used a mix of acrylic paints and a black water-based ink. To protect the borders, I masked off the sides of the tiles with masking tape.

3

After doing these first couple of tiles I also decided to use newspaper on the back to protect the back of the tiles
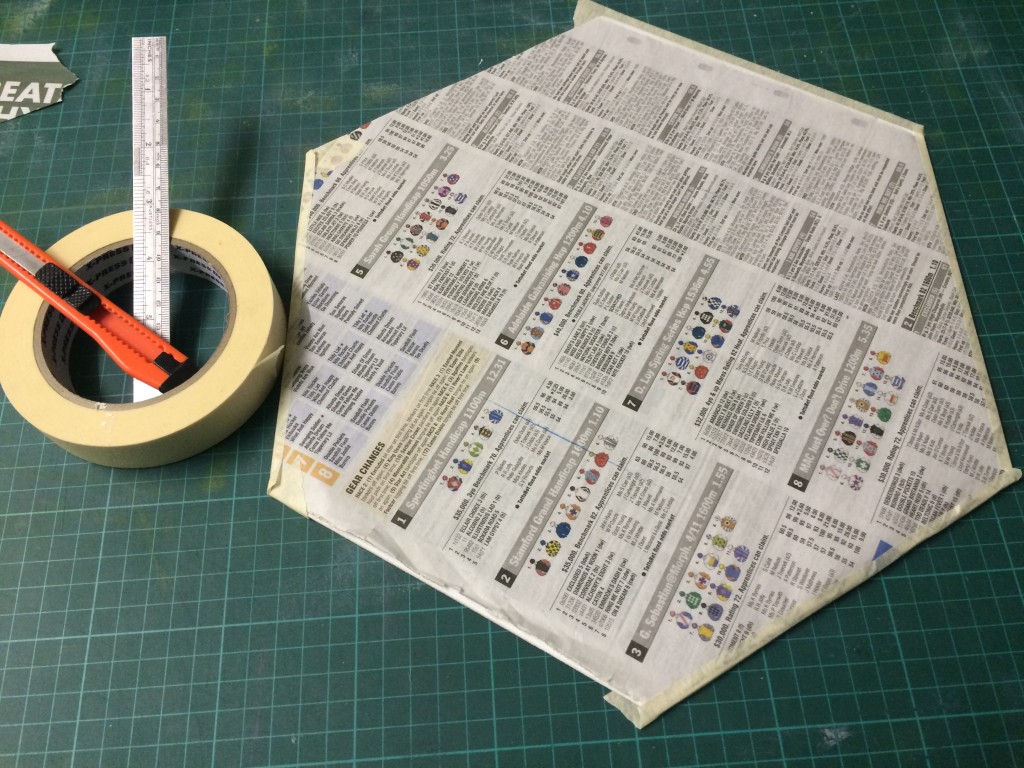
4

At the time, I was hoping to create a double-sided game with Catan on one side and Takenoko on the other. I think I will end up creating a separate set of hexes for Takenoko.

1

I am very pleased with these tiles. They are recognisable but still have my personal flair to them. A bit of satin spray varnish serves to protect the tiles against light scuffing.

I was so chuffed with the art on these I was tempted to turn one of them into a clock…

Forest Tiles

After declaring the desert tiles a success, I moved onto the forest tiles.

I painted all of the forest tiles green at once to ensure they had a consistent colour throughout.

6

I then spent almost a month on the first forest tile, experimenting with using washes of ink to establish the forms of the trees.

8

Once the forms were in place, I sponged on green, yellow and white paint to represent the foliage. Balancing the highlights and blacks proved to be tricky. This tile took so long because I kept trying to layer things on, and I ended up going around in circles. Finally I decided the tile had enough time spent on it and I finished it off with some brown on the trunks and declared it done.

9

Disappointingly, once un-masked it turned out that the edges were not sufficiently protected from the paint. A little bit of sandpaper and touch-up paint fixed this, but the paint bleeding proved to be a nuisance throughout the project and when I ended up against the clock most of the tiles didn’t get this touch-up treatment.
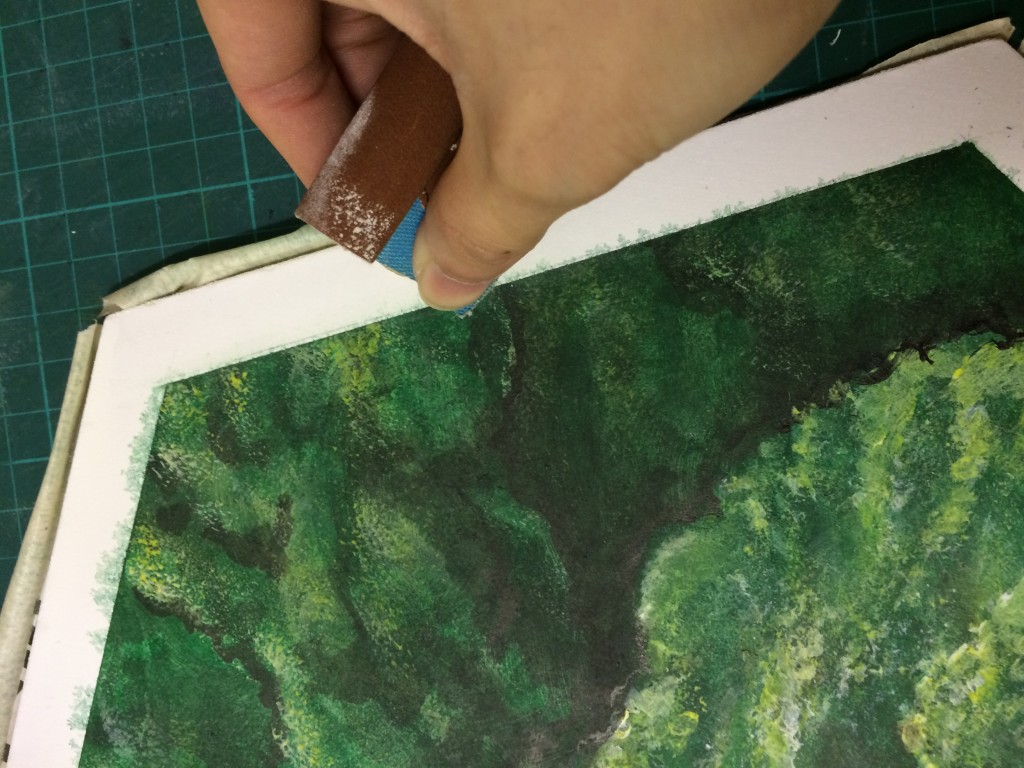
11

It took another three months for me to complete the rest of the forest tiles.

Pasture Tiles

Filled with despair about how slowly progress was being made on the hexes, I decided to tackle the pasture tiles. I knew that they would be quite simple to execute.

I brushed on a light mix of green and while the paint was still wet I used the plastic handle of the sponge to scrape out blades of grass.
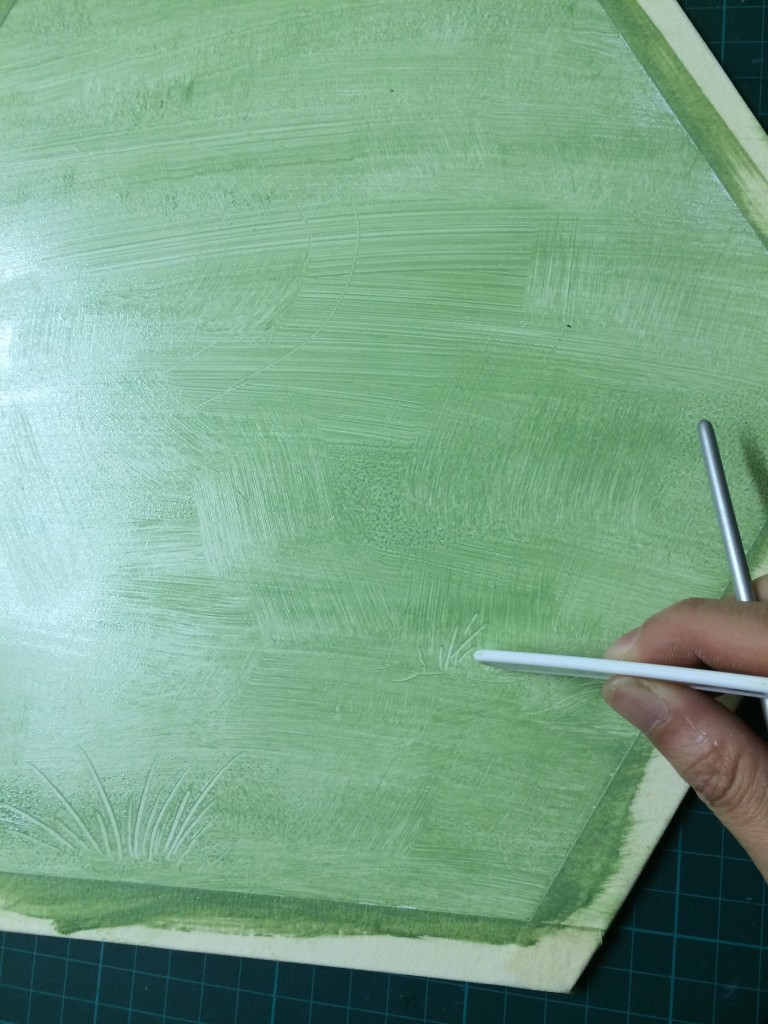
12

Once the grass was in place I sponged in darker patches to create interesting patterns, scraping out a few more blades of grass as I went.

13

All six of the tiles were completed over two days. I had some momentum back.

16

Mountain Tiles

I launched straight into the mountain tiles, after having the idea of using glad wrap to create some of the rocky texture.

Each tile was painted with a mix of greys and blues and the glad wrap was laid into the still-wet paint.
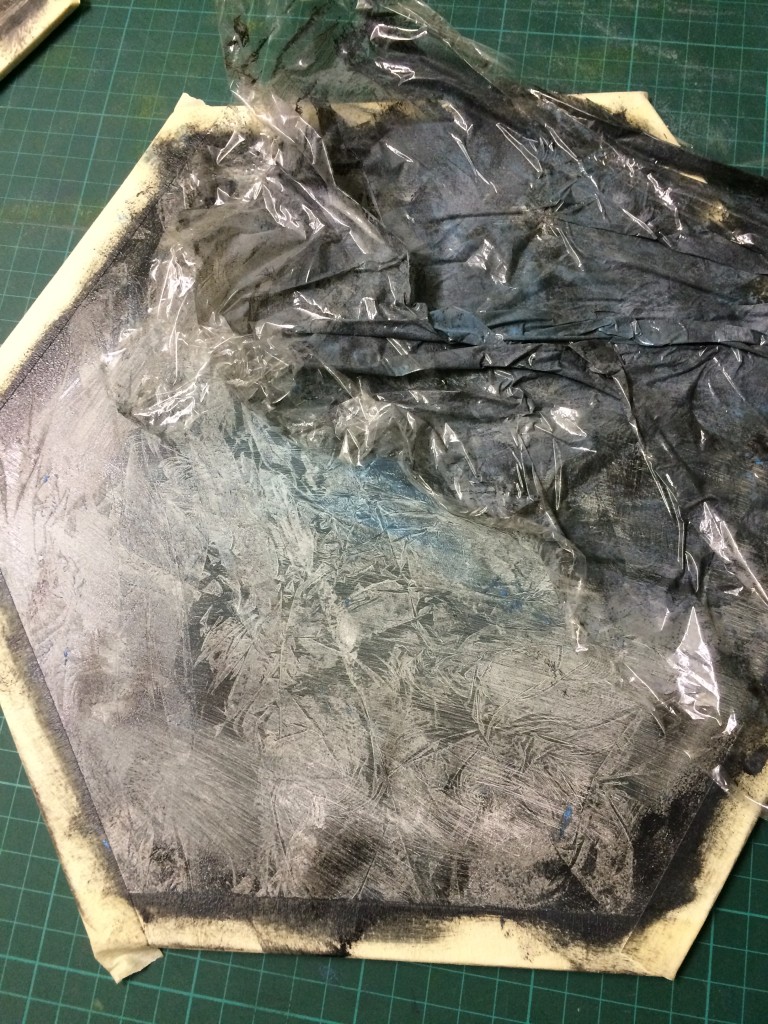
18

On lifting the glad-wrap, all sorts of crazed-like textures are created.
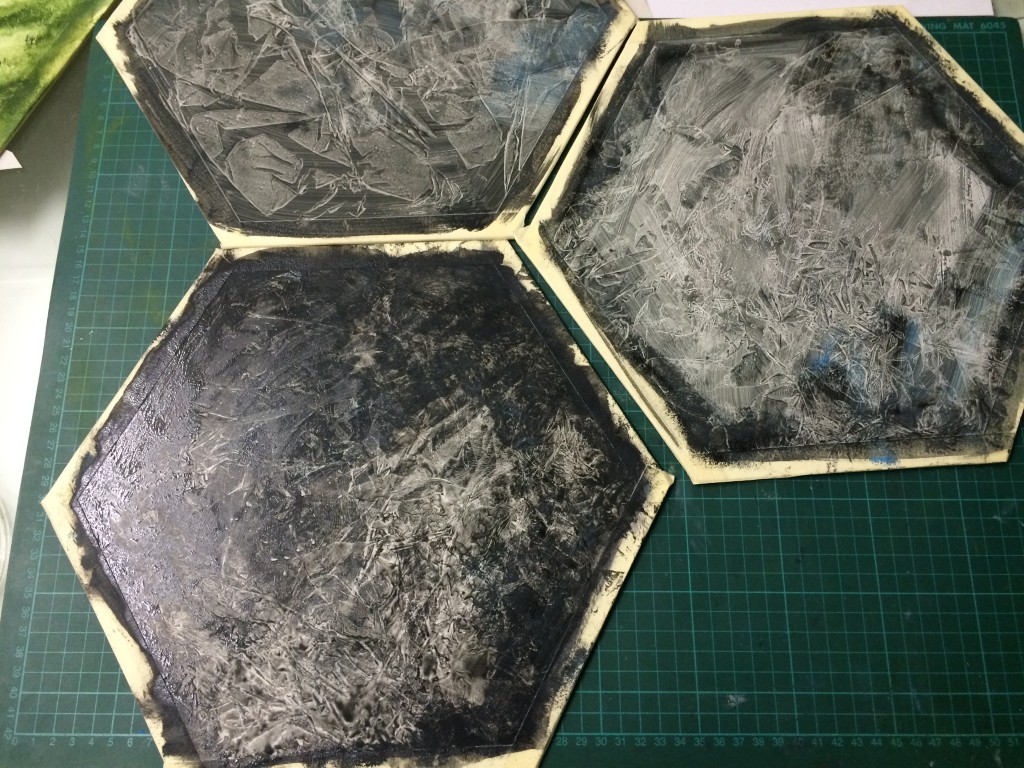
19

After letting the textured layer dry, I painted in white cliff faces. I tried to pick out shapes in the textures to guide what shapes the mountain tops would take.

21

The tiles were finished off with greys, blacks and blues.
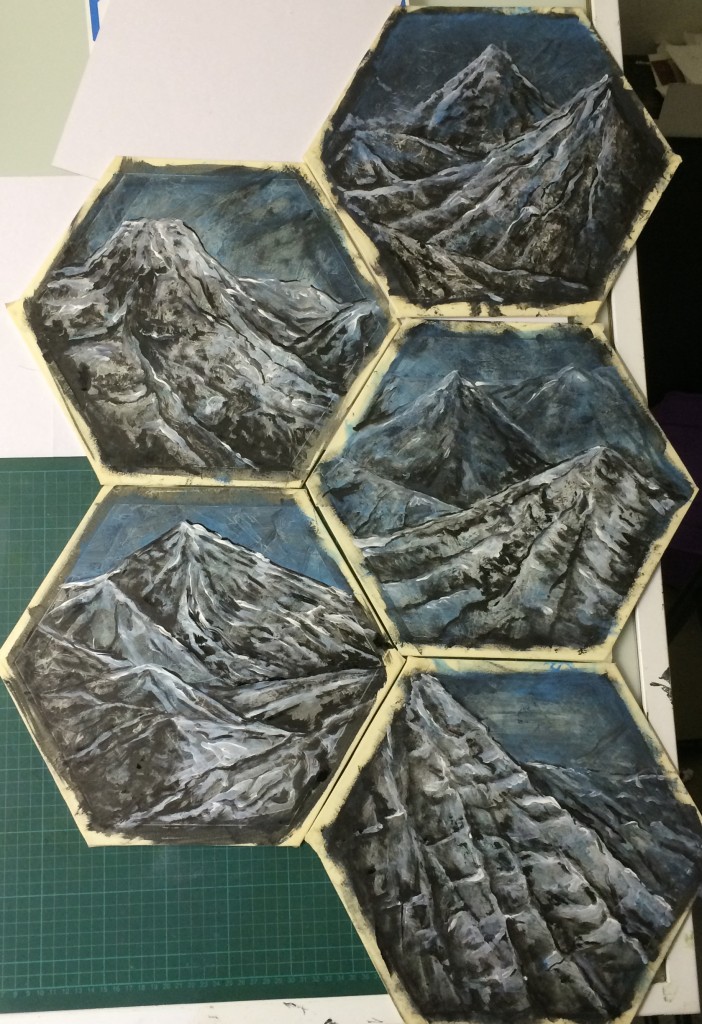
23

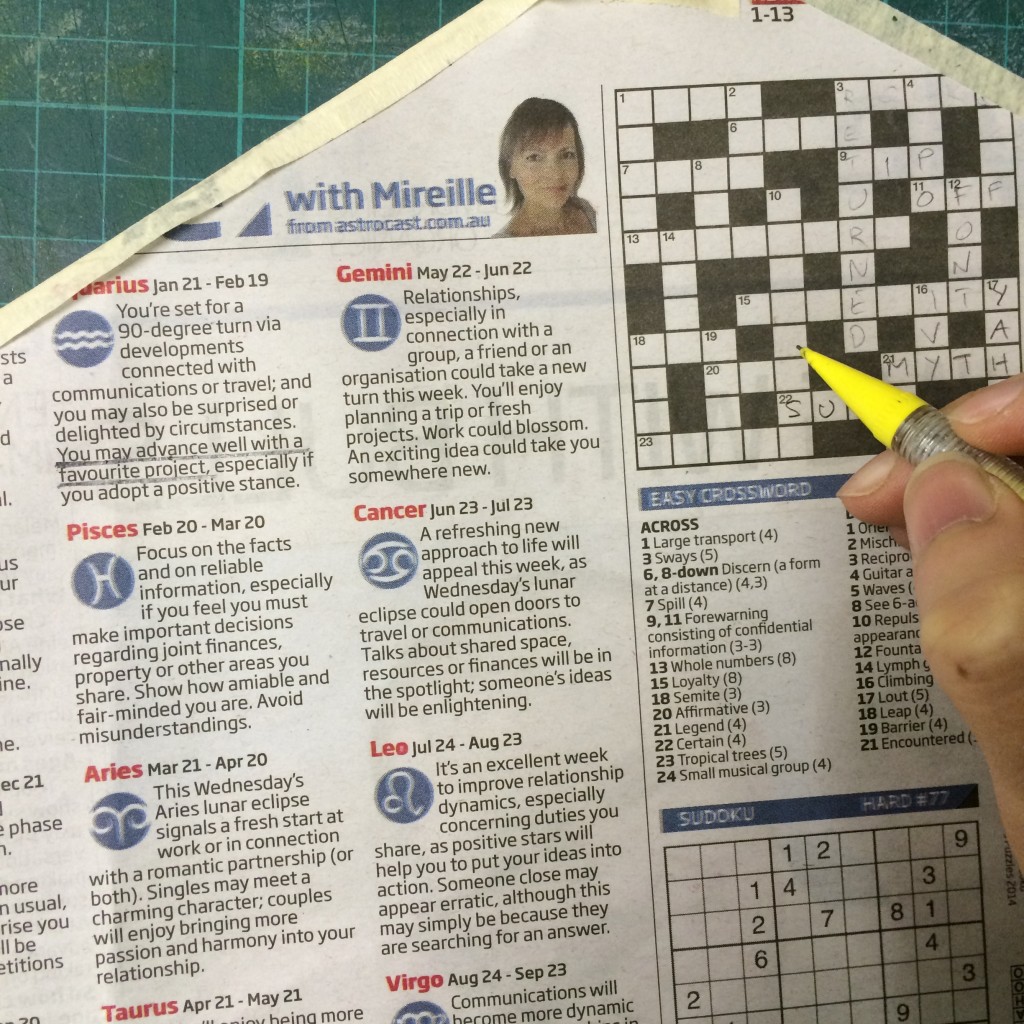
PS always save the crosswords.

24

Field Tiles

I had a lot of trouble deciding what these tiles would show on them. The colour would easily make them distinct from the other tiles, but how was I meant to represent the fields of grain without going mad from painting hundreds of wheat stalks? This idea popped into my head at work and I quickly scribbled it down.
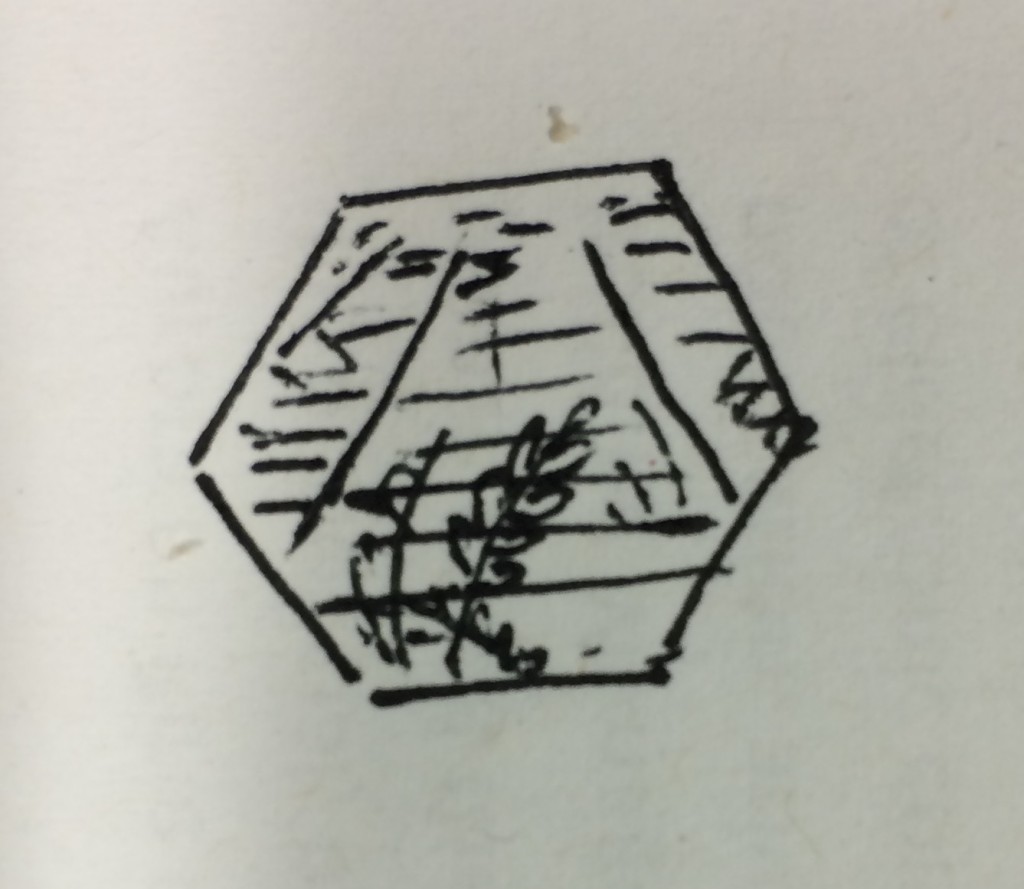
17

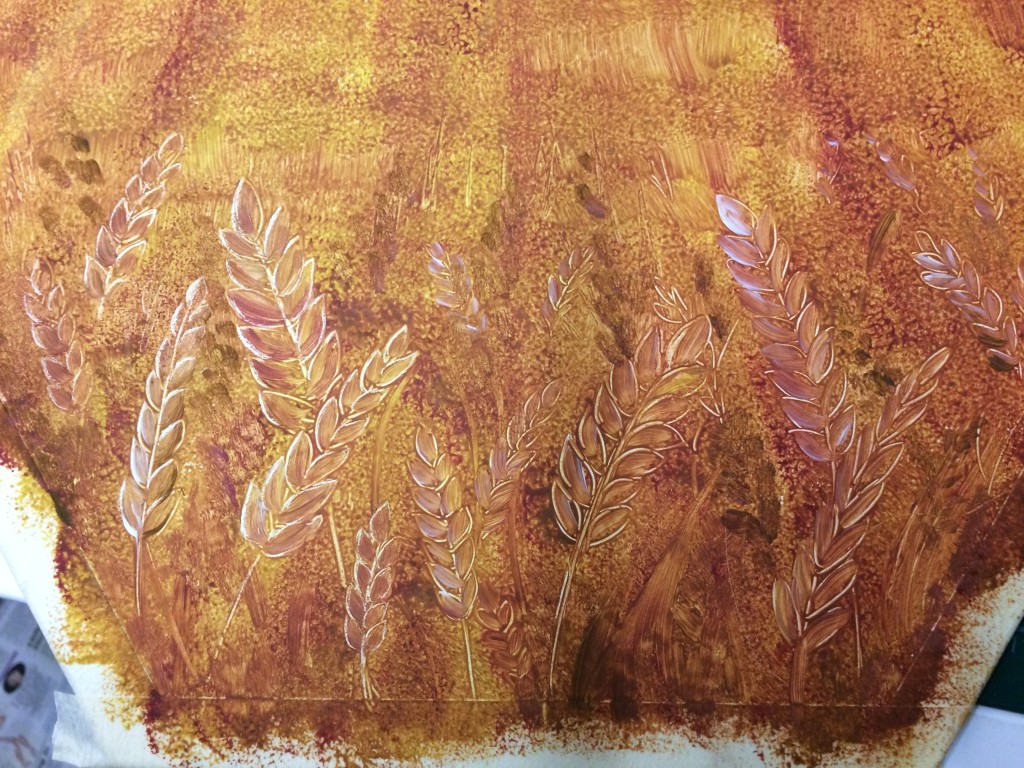
The background fields were sponged in with a few colours, Vertical brush strokes gave a hint at the stalks while the occasional horizontal interruptions to the receding rows of grain implied heads of wheat. While the paint was still wet, I used the back of a paintbrush to scrape out the shapes of some wheat stalks. I also brushed in a little white into the top sides of the stalks and some brown into the bottom sides.
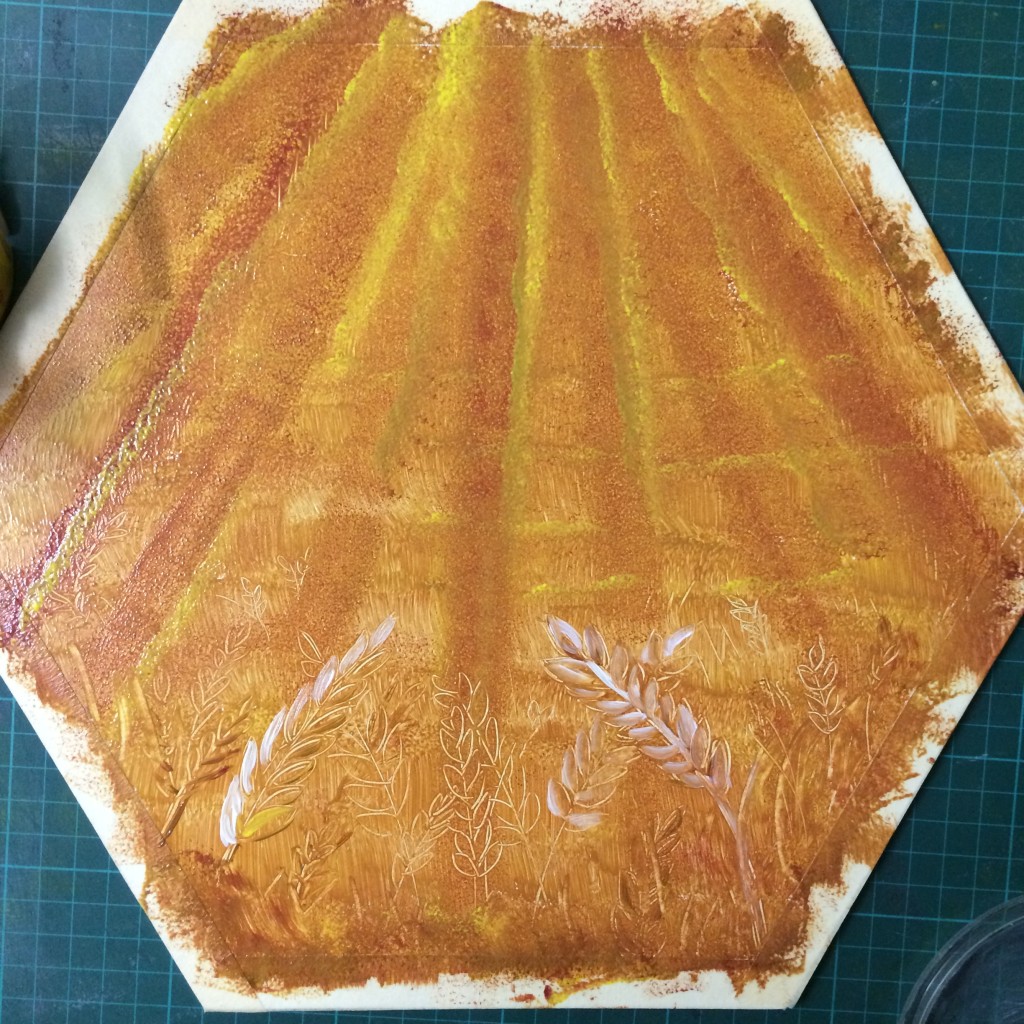
29

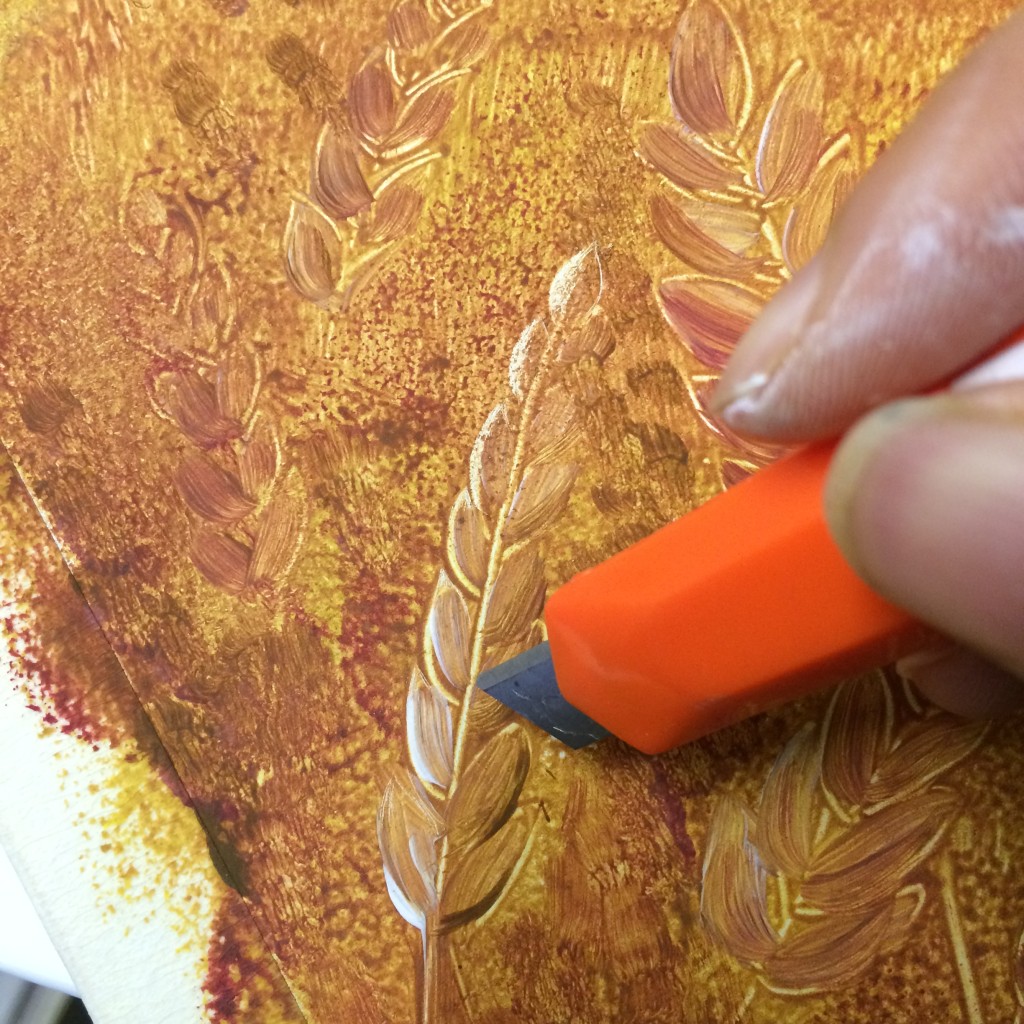
Once the paint was dry, I used a blade to scrape back even more of the paint.
31


32

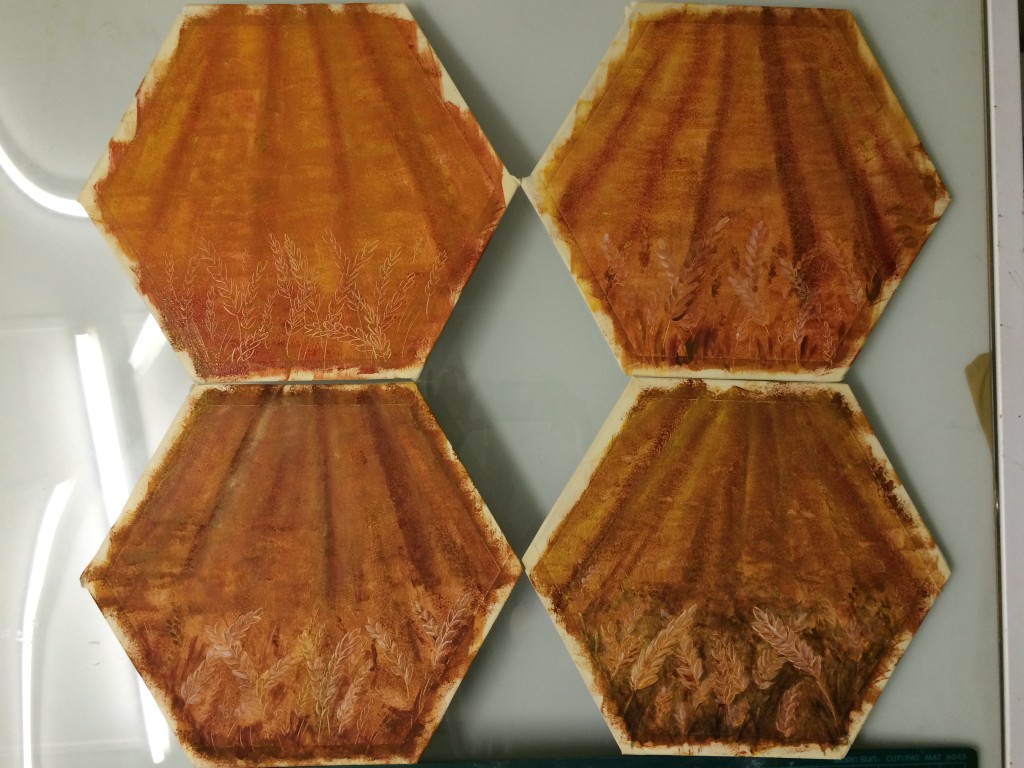
Finally, some additional depth was added with darker paints and ink. This set of tiles show the progression from initial painting to final detailing.
34

Quarry Tiles

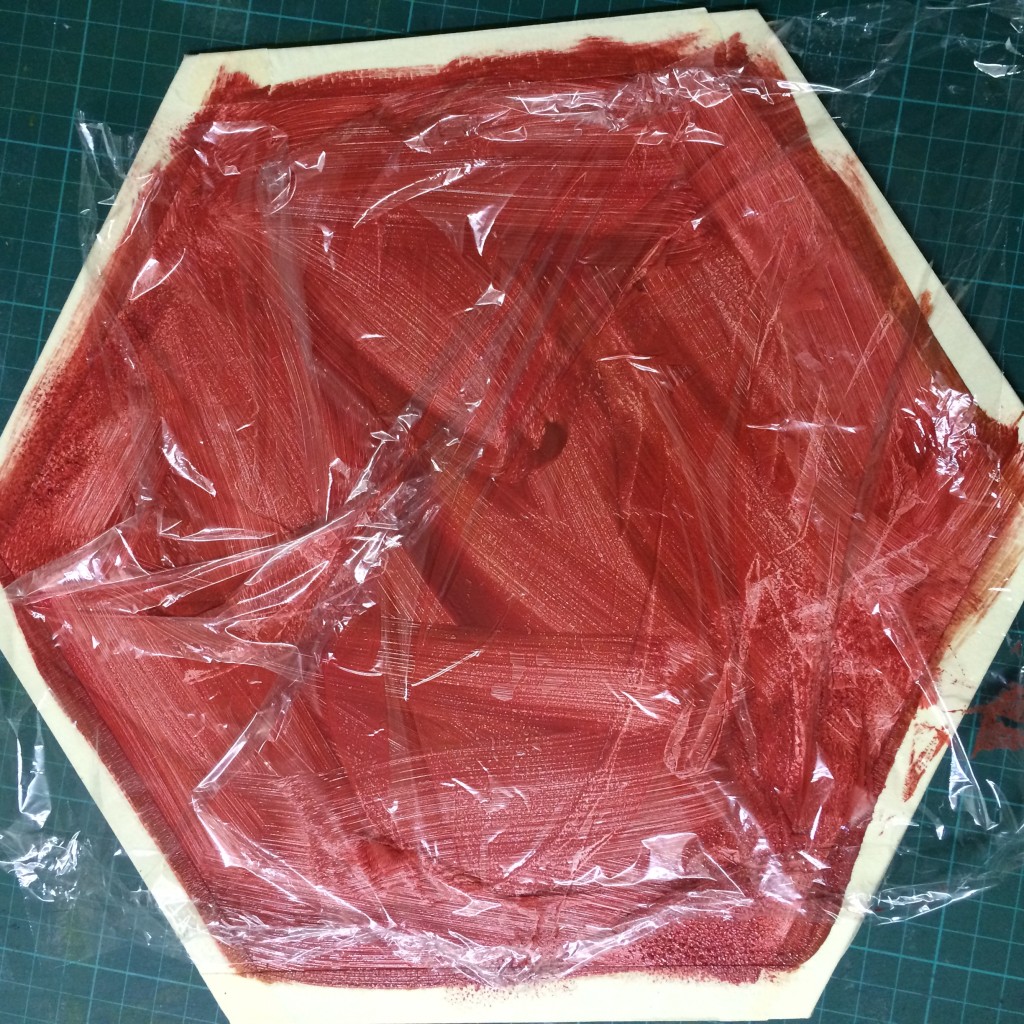
These guys are technically incomplete. I used up all my steam on completing the pastures, mountains and fields in a four day period. While I was painting those tiles, I got started on creating the texture with glad-wrap in the same way as the mountains.
27

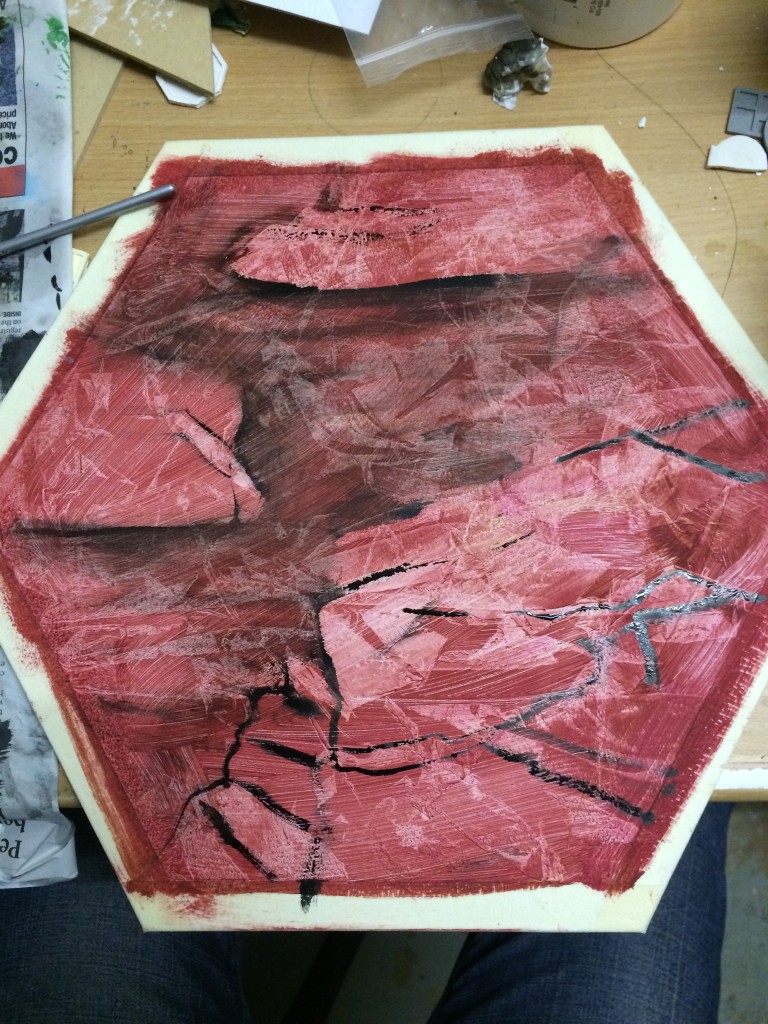
I only got as far as adding some vague hilly shapes with black ink.
38

I’ve now gotten stuck thinking about how to finish them off. From a distance they look great – the red colour makes them stand out, but I’m not sure how to paint them up without interfering with how the awesome bold red appears from a distance.

Roads and Buildings
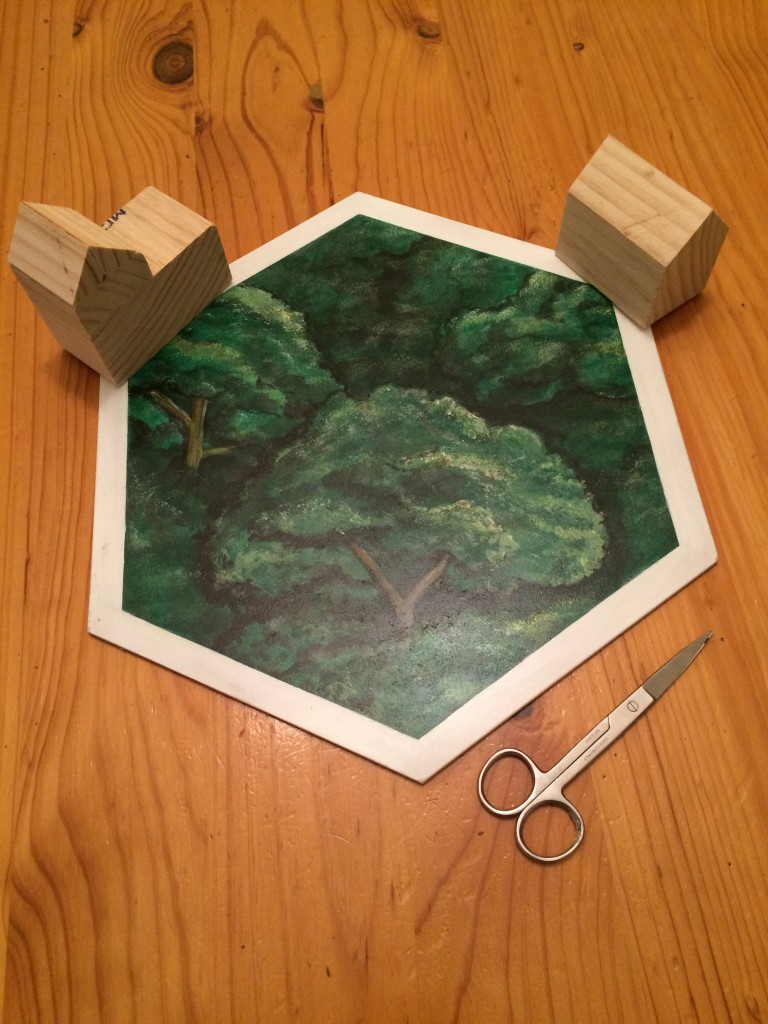
39

I spent a few days with my dad planning and making these.

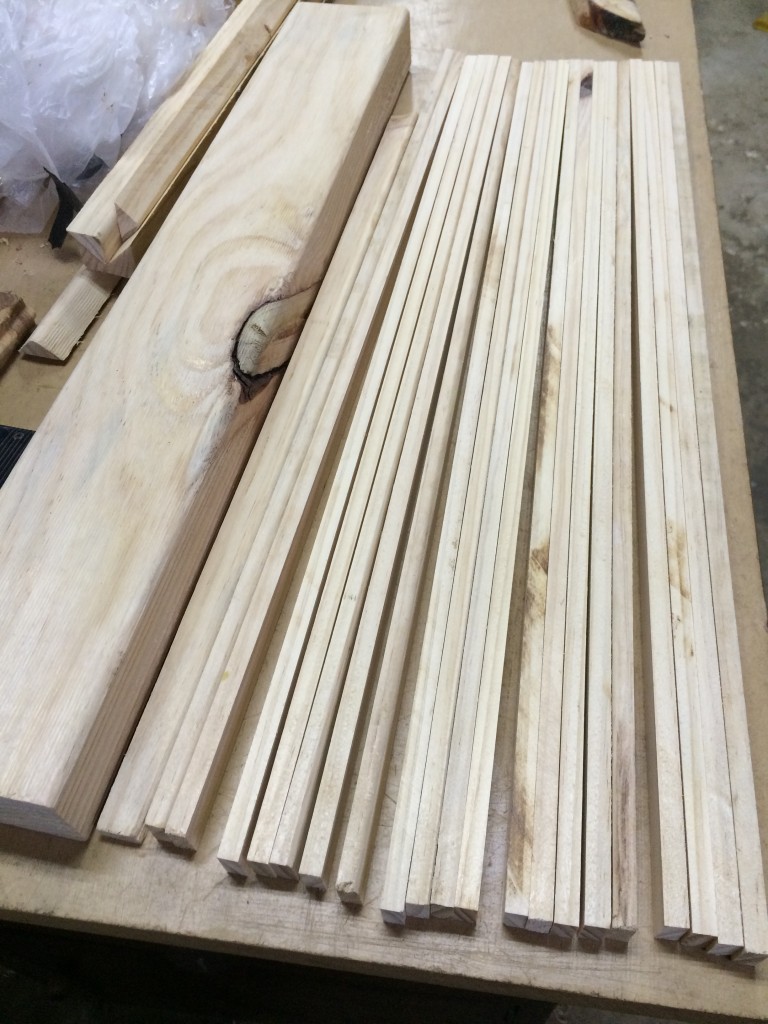
Timber can be pretty expensive. Nice timber would have easily broken the bank, so I looked around at Bunnings and ended up grabbing a single 4.8m x 90mm x 45mm length of decking pine for around $20. I had it cut into 120cm and 60cm lengths to be able to fit into my car.

From these lengths, I hoped to yield 30 settlements, 24 cities and 90 roads.

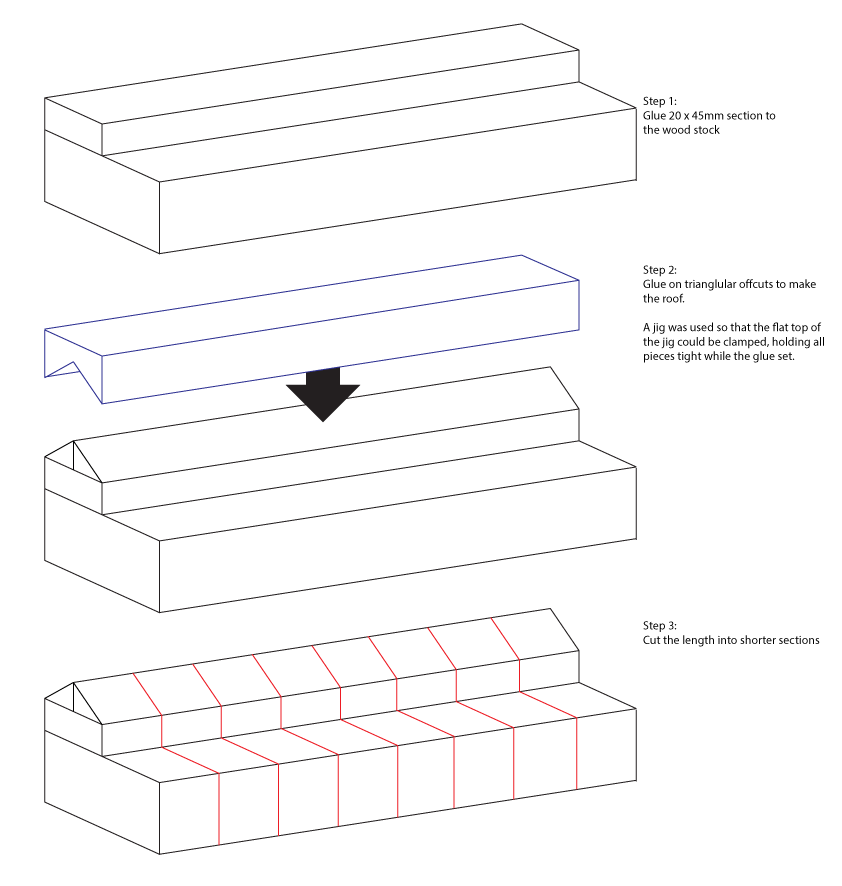
I found working on these really interesting but unfortunately I forgot to take photos for most of the process! I’ll do my best to explain with some diagrams.
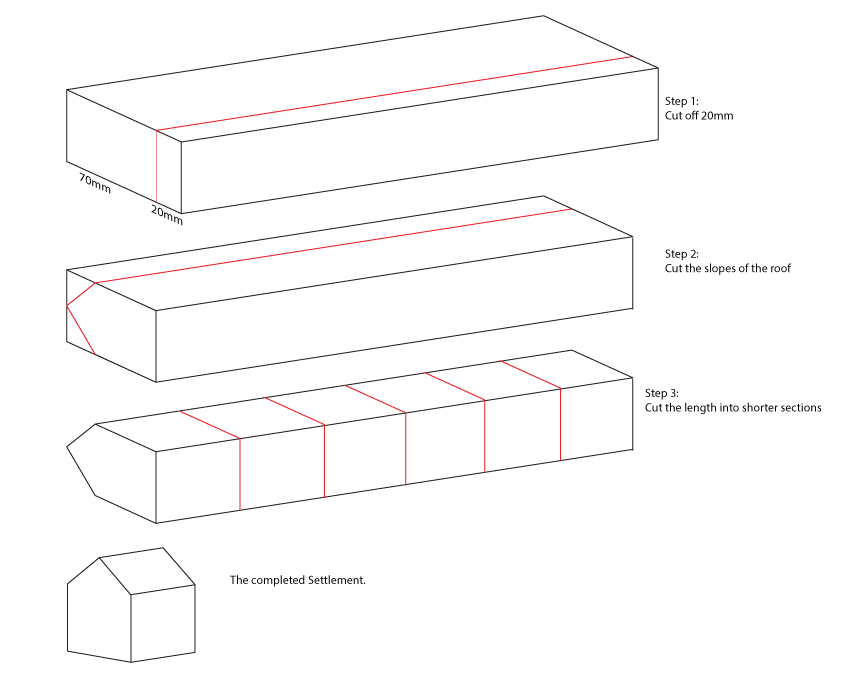
Settlement

City

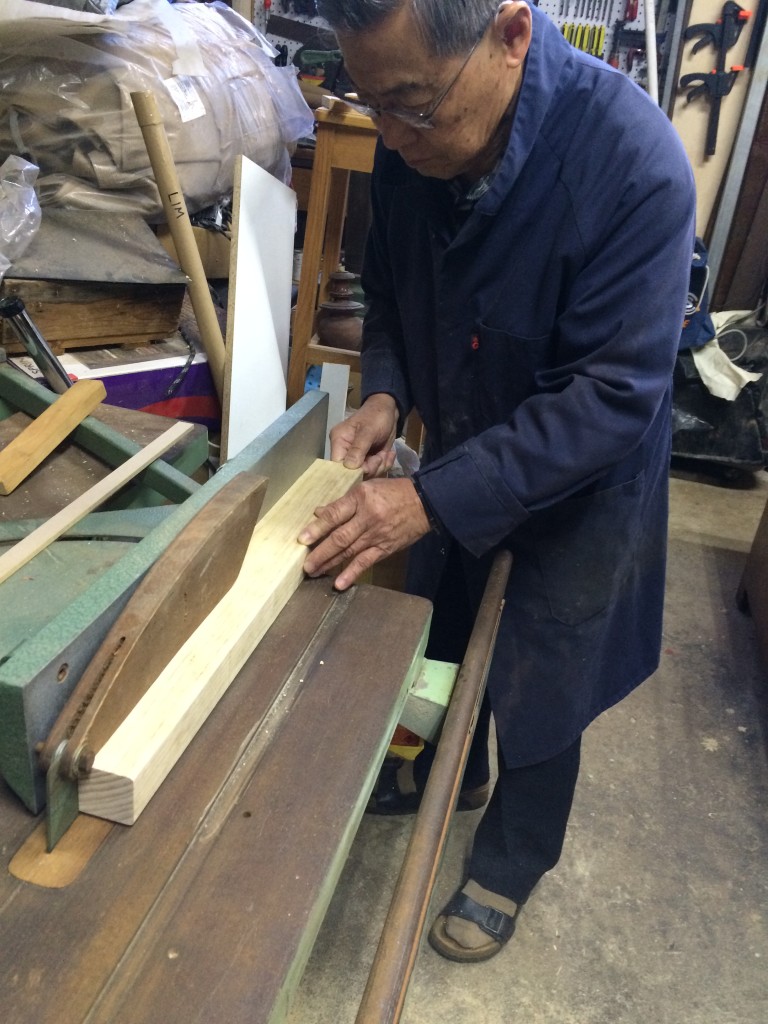
Here’s my dad ripping a length of timber.
40

Here’s how many road-sized lengths of wood I got from a single 60cm length. I ended up with the 90 roads I needed and tons more to spare.
42

The Robber

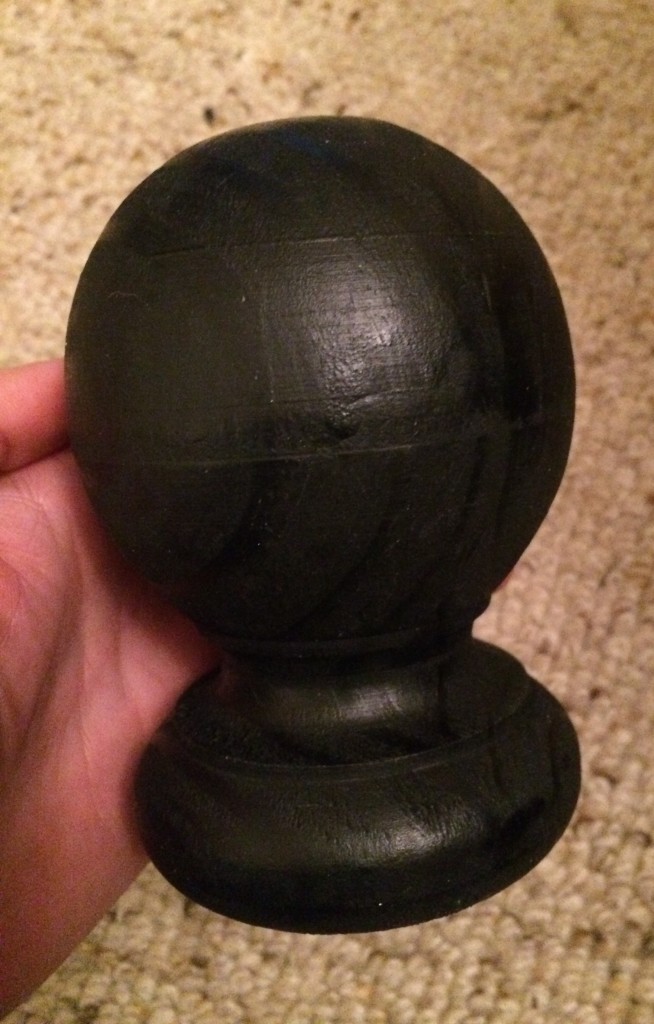
The robber is just a fence-post capital with the little post cut off.
43

As with all of the other timber bits, it was finished with a coat of enamel spray paint.

Chits

The chits were laser etched and cut from 3mm MDF.

44

The little dots at the bottom of each chit represents the probability that the number will be rolled. Although it wouldn’t take too long to hand-create those circles, I had a a neat little inDesign script (that I first wrote for a Lords of Waterdeep re-theme) that saved me lots of time. The script expands a numeric value, X, paired with an image and instead turns that into an image repeated X times.

I initially forgot that I would need to paint the 6s and 8s red. Luckily I realised before removing the freshly-etched pieces from the machine. Without moving the pieces, I put masking tape over the relevant areas and re-etched the outlines of the numbers and the dots. I then removed the masking over the cut-out areas and painted them red before removing the rest of the masking.

The Dice

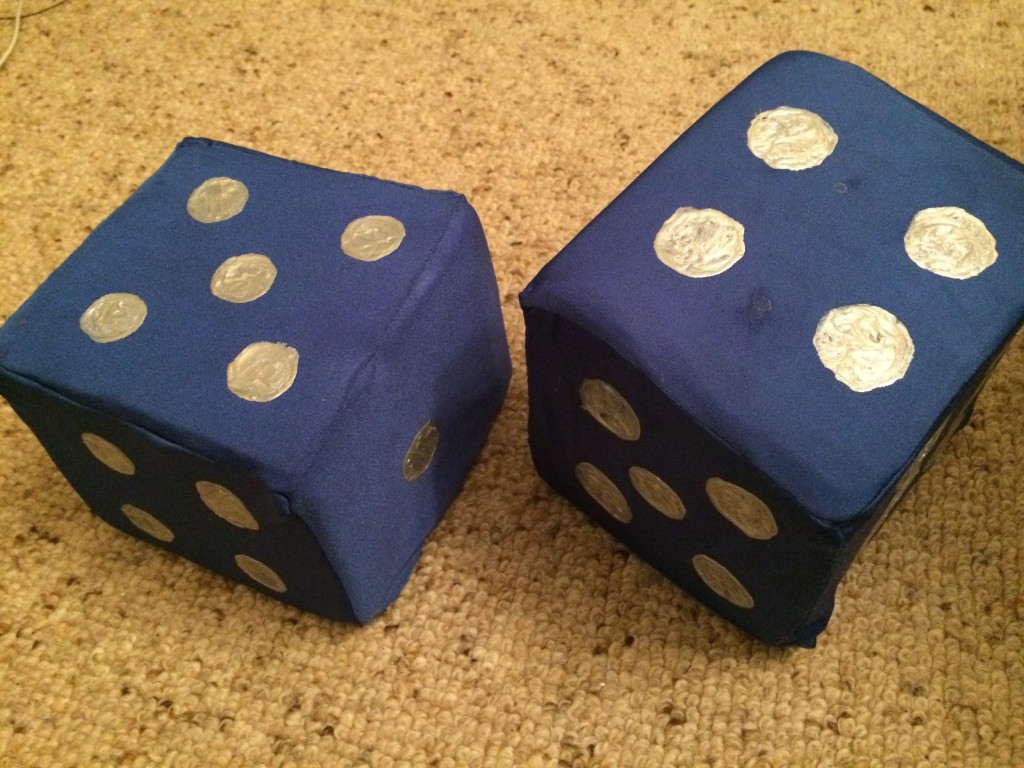
The dice are made of blocks of foam covered in fabric. The foam was bought from a 30x30cm offcut – the guy at the store told me it was 15cm tall so we cut the blocks into 15x15cm squares. Turns out however that the offcut was actually around 12cm tall. I tried trimming the blocks when I got home using a serrated bread knife, but that ended poorly. As a result the dice aren’t perfect cubes.

I was short on time and my sewing skills are lacking. So I gave the foam and lycra that I’d planned to use to make the dice to my friend Laura and she worked through illness and gave me these. She even painted the dots on them! Thank you so much Laura!
42

Still to Come…

Obviously the unfinished quarry tiles could use some attention.

I’d like to add felt to the base of each of the buildings and the robber, to reduce the chances of scratching the painted surface of the hexes.

Currently I’m using a triangle to distinguish each port location and using the hexes from the regular-sized game to provide the actual trade-value information. I may yet make proper art for the ports directly on the triangles, but I’m unsure how I’ll do the art for the resources.

No, I’m not intending to super-size the cards. ; )


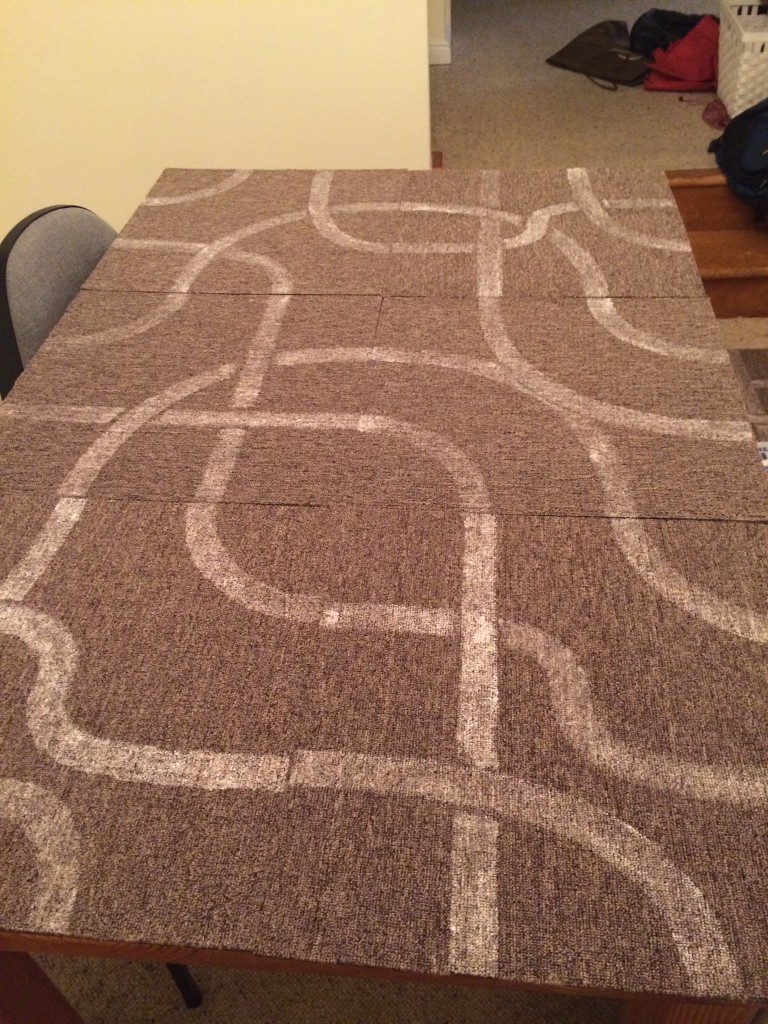
Thanks for joining me for a month of Blaugust posts, and thanks for reading through this build-log of giant Catan. At some point I’ll finish off giant Tsuro…
49

…and maybe even get to work on Takenoko… but that’s for another blog post, another time.
 

Posted in: Behind the Art, Crafts | Tagged: blaugust, board games, catan, giant catan, made by me, settlers of catan, tsuro

Digimon 3DS Cover Plates

Posted on August 31, 2015 Leave a Comment

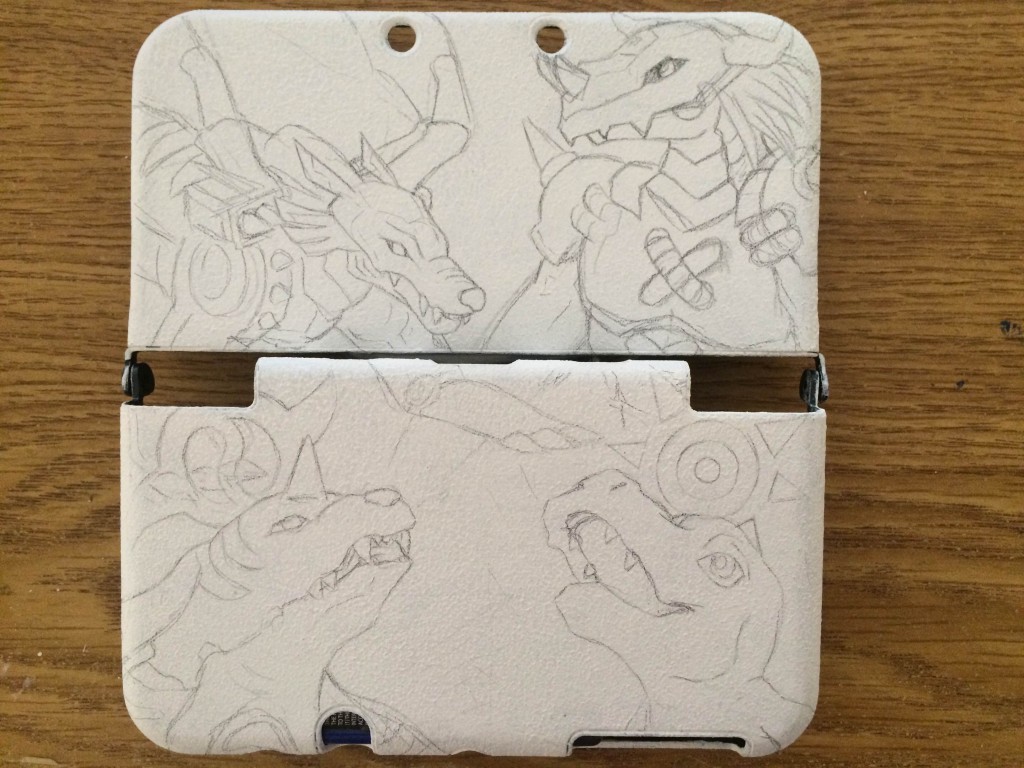
IMG_2638

You may remember the watercolour 3DS cover plates that I posted a while ago. While at AVCon I had them displayed at my art table. Lots of people were interested in having their own custom plates created, but they didn’t own the new 3DS.

So I had a look around and found some cover shells that I could prime and paint. Here’s one of my commissions in progress, custom cover shells for the new 3DS XL. The client asked for a design featuring Agumon, Gabumon and their warp evolutions. I initially had the rookie classes appearing on the top plate, then I realised it would make more sense to put their Mega forms in the background. It meant I could fit the crests in there too.

Next step is to get the paint on these! A little nerve-wracking, to be honest, but the primed watercolour-ground surface tends to be quite forgiving.

My commission queue is currently full, but if you would like your own customised 3DS cover plate you can email me at ale@chenonetta.com for more details!

Posted in: Watercolours, WIP | Tagged: 3ds, agumon, blaugust, cover plate, digimon, digimon adventures, gabumon, made by me, metalgarurumon, wargreymon, warp evolve, watercolour

AVCon 2015 Trophies

Posted on August 31, 2015 Leave a Comment

By my count, I am two blog posts behind for the month so I will be aiming to put up three today to catch up. Here is the first.

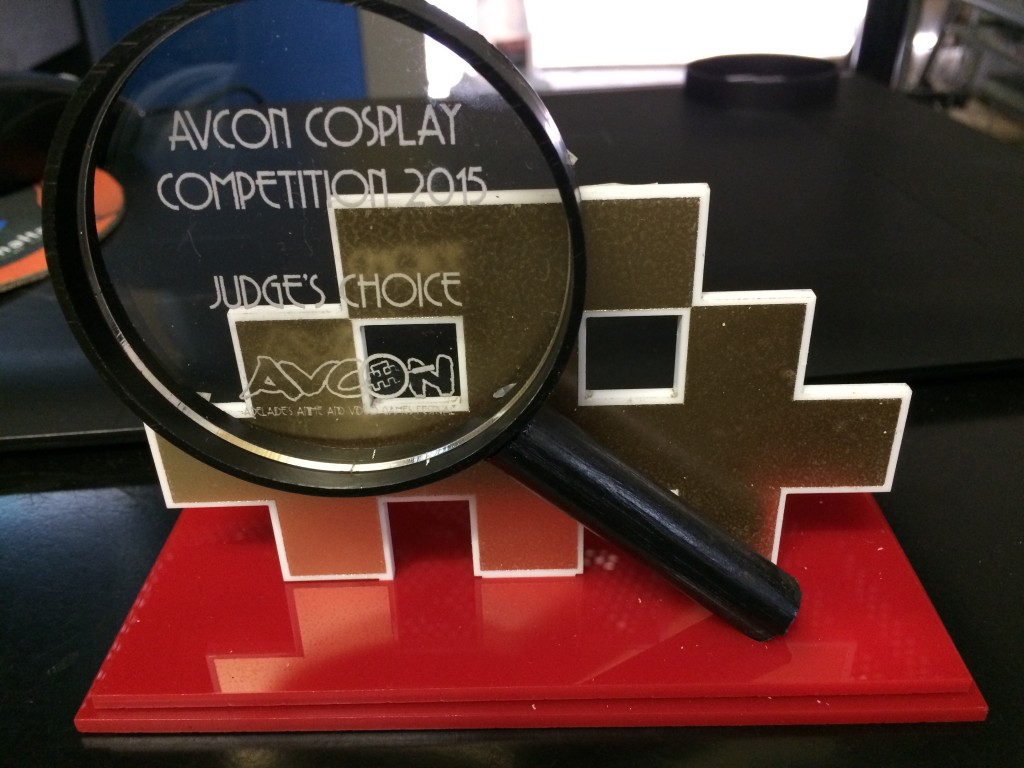
2

Once again this year I was given the opportunity to design the trophies that would be given away at AVCon. Since this year’s theme was Detective Agency I decided to use the magnifying glass motif in the design.

As usual, I first designed the model in Blender. I rendered a mockup of the design and sent it off for approval.

mockup

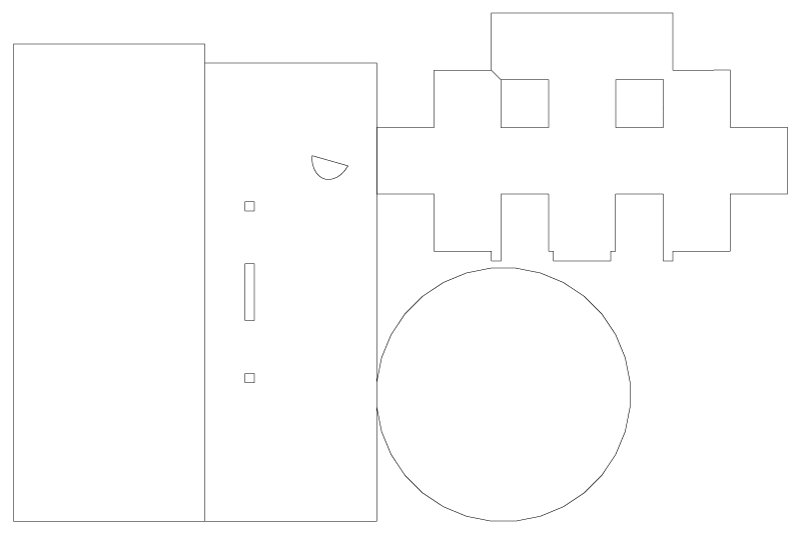
From Blender, I export the planes of the pieces that will need cutting. In the case of this year’s trophy, the most important part was to get the positioning and dimensions of the indent in the base that would accommodate the handle of the magnifying glass.

vectorssample

The heads of the magnifying glasses are made from rings cut off a length of PVC pipe. They were then spray painted black. The handles are made from sections of dowel, also spray painted black. My dad help me cut both the PVC and the dowel to length.

The faces of the Invaders were spray painted gold. When cutting the white acrylic, I left the paper on to protect the surface. I etched a light line around the areas that would be gold. I experimented with painting them in two ways – painting directly onto the plastic and painting onto paper that would be left on. The plastic finish was nicer but more prone to scratching. After spray painting the face of the invader, the paper on the white edge was lifted to reveal the white border. I had some issues with gold paint on the edges of the invaders so I lost a lot of time sanding/scraping that off.

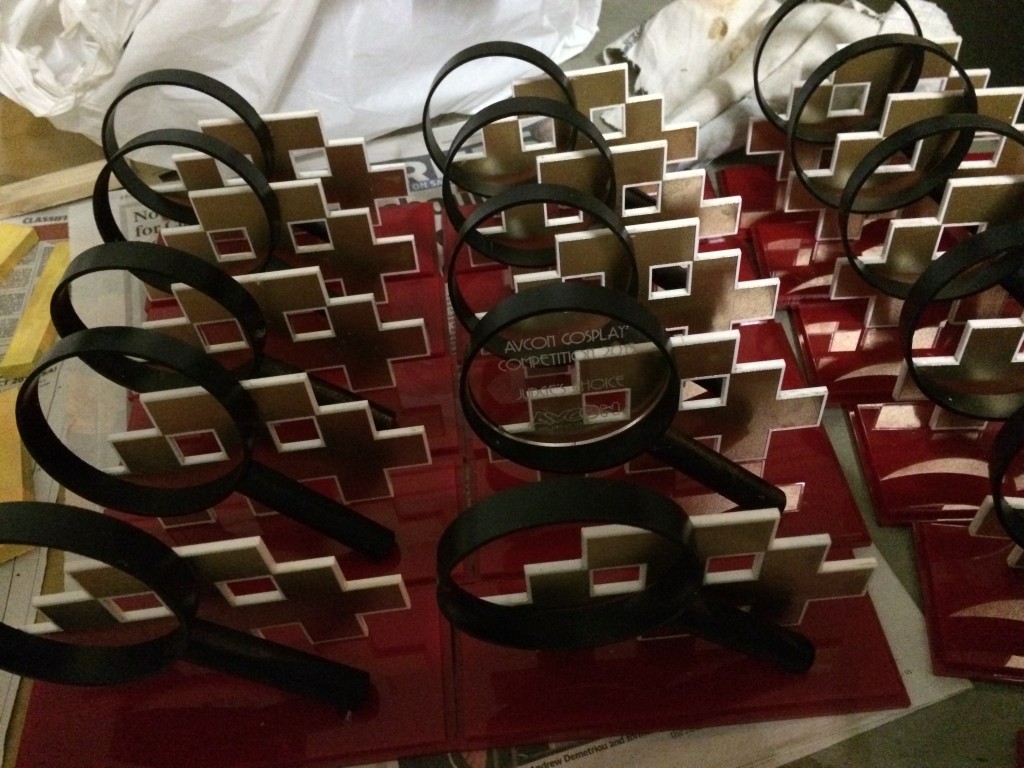
4

I had to make 46 trophies in total! They took me a lot of time, and I ended up also recruiting people to help me do menial tasks at the end like peeling paper off acrylic. I learned that my design was perhaps a little too ambitious, as the suspended pieces required glue to hold them into place – glue that didn’t quite hold under duress for many of the trophies 🙁

Anyway, while I love the way that the trophies turned out this year if I were to do this again I think I would try and do a design that depends solely on acrylic, so that I can use Weld-On for all the gluing. Weld-On acts as a solvent so the pieces end up kind of melting and bonding together. It would reduce the likelihood of glued sections failing.

Posted in: Lasering | Tagged: avcon, blaugust, made by me

Horned Owl

Posted on August 30, 2015 Leave a Comment

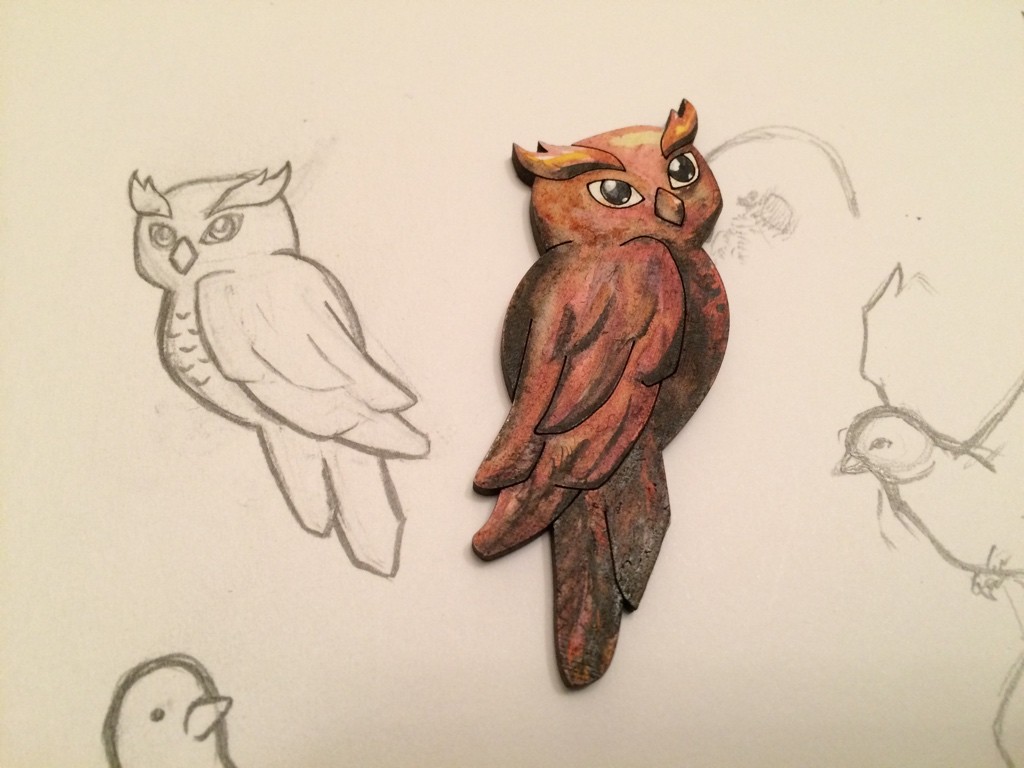
fr_32_size1024

Having a little bit of trouble with the colours on these tonight, as the lights in our living room are now emitting a rather yellow glow. Its having quite an effect on the colours I’m perceiving as I paint. In the end I decided to chuck a lot of black in there to make some very contrasting shadows.

Posted in: Lasering, Watercolours | Tagged: bird, blaugust, brooch, made by me, owl, watercolour
« Previous 1 2 3 4 5 6 7 8 9 10 11 Next »

Recent Posts

  • Double-Walled Frame Box
  • Show TickTick countdowns above your todo list
  • Cricut Hacks #2 – Template frames
  • Rainbow Eagles
  • Cricut “Print and Cut” Hack – print bigger

Archives

  • July 2025
  • April 2025
  • November 2024
  • August 2024
  • March 2024
  • November 2023
  • August 2023
  • June 2023
  • April 2023
  • January 2023
  • December 2022
  • October 2022
  • August 2022
  • May 2022
  • April 2022
  • November 2021
  • September 2021
  • August 2021
  • August 2020
  • September 2019
  • August 2019
  • August 2018
  • May 2018
  • September 2016
  • August 2016
  • October 2015
  • September 2015
  • August 2015
  • April 2015
  • February 2015
  • October 2014
  • August 2014
  • July 2014
  • April 2014
  • March 2014
  • February 2014
  • September 2013
  • August 2013
  • July 2013
  • April 2013
  • March 2013
  • January 2013
  • December 2012
  • October 2012
  • September 2012
  • August 2012
  • July 2012
  • May 2012
  • March 2012
  • January 2012
  • December 2011
  • November 2011
  • September 2011
  • August 2011
  • June 2011
  • May 2011
  • March 2011
  • January 2011
  • December 2010
  • November 2010
  • October 2010
  • September 2010
  • August 2010
  • April 2010
  • March 2010

Blogroll

  • Hallucinfection
  • Jp's Lab
  • Leaflocker
  • Telling Stories

Copyright © 2025 Chenonetta Creations.

Theme by themehall.com.