Proairesis

Find Me On…

  • Facebook
  • tumblr
  • deviantArt
  • Storenvy
  • Home
  • About

video games

Giant NES Controller

Posted on August 30, 2012 Leave a Comment

The other major build which I initiated, but for which my father did most of the work for. All I did was some of the measuring and soldering. He completed this in less than three weeks, when I realised that the AVCon VG budget could fit the construction costs in.

Giant NES controllers aren’t so novel and rare these days, and they’re a pretty straightforward construction (says me who palmed off the actual work to her father). Here’s a list of the sites we used to as reference:

Instructables walkthrough

Sparkfun walkthrough

Giant NES controller Coffee Table

A version based on a GameCube controller by the Mario Marathon guys.

An explanation of how the controller transmits button-press data back to the NES

Some progress photos…

Here’s the MDF box with buttons in place.

I was thinking with the tight deadline that we’d just take it to AVCon unpainted was as there would not be time for painting. However my dad likes to do things right…

Unfortunately during painting he missed putting down one strip of tape to protect the gray from being painted over with the black. Spot the error!

Here’s my dad posing with his creation.


Here’s a look at the underside of the D-pad, with an ingenious improvised pivot to ensure that no more than one button can be pressed down at once.

During testing, we found that hitting the D-pad in a certain way would occasionally trigger the A-button. I concluded that we were getting invalid inputs, causing the IC to output the wrong data to the NES. I placed the blame on the D-pad and we spent a good while fiddling with the pivot and the button-holes, making sure the buttons weren’t jamming.

However, it wasn’t the D-pad’s fault at all! The vibrations across the controller were enough that they were causing the A-button to bounce in place and trigger the switch underneath. We used sponge rubber underneath each button to help the buttons stay properly suspended and to improve the feel of the button response.

Finally, here are some attendees on stage at AVCon, playing Super Mario on the controller.

Posted in: Crafts | Tagged: avcon, fan art, nes, video games

Tetris Tangrams

Posted on August 24, 2012 Leave a Comment

Sorry for the lateness on this one (not that anyone cares).

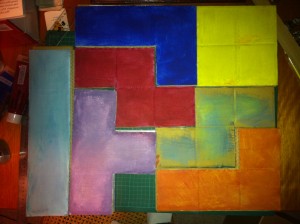
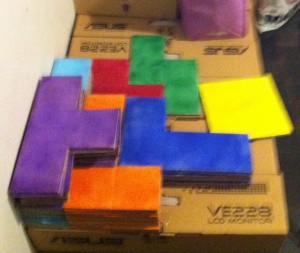
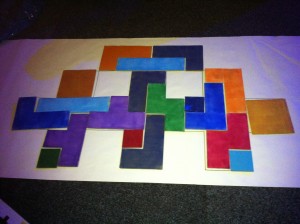
For AVCon this year I made a ton of cardboard Tetris pieces and puzzles to go with them. The inspiration for these puzzles comes from a game for the GameBoy called Daedalian Opus, though tangrams and the sort go back a long time. Both my housemate Alex and my mother mentioned playing with similar wooden-block puzzles as children.

Here are some photos.

The very first seven pieces.

Puzzle prototyping. Alex found a different solution from the one I’d been designing! He tried to write a program to discover all of the possible solutions but stalled.

Painted puzzle pieces, stacked and ready to go.

My workspace. Very messy!

A puzzle laid out at AVCon and solved by a clever attendee.

Posted in: Crafts | Tagged: avcon, fan art, video games

The Disco Banjo

Posted on August 3, 2012 Leave a Comment

The first of a couple of builds for which I collaborated with my father (ie, palmed off the hard work to).

The Concept

The concept for this comes, of course, from KoL. The epic weapon of the disco bandit is a banjo crafted out of a disco ball. Serendipitously, just as the idea to create the thing came to me, a fellow student at life-drawing classes showed me some photos of instruments made out of food tins. I started googling around and found that banjos made of cookie tins are actually quite widely made by artists and traveling musicians (the can itself is a great storage device) and there are many guides to making them around the place.

Eventually, my internet travels led me to a site explaining how to create a banjo out of a gourd, and this became the basis of the disco banjo.

The Making

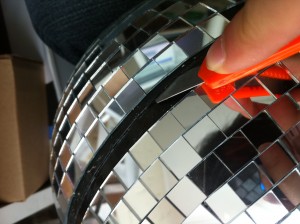
I bought a disco ball from Cheap-as-Chips and peeled off mirror sections until I found the seam along which the hemispheres of the ball were connected. Lots of photos from this stage, cos I had a lot of fun with it! Except when the thing first split open and noxious plasticy fumes filled my lungs.

Lifting off the first piece.

A stanley knife was sufficient to break into the plastic.

Leaving a bisected disco ball on a career-disco bandit’s keyboard is like leaving a severed horse head on someone’s pillow.

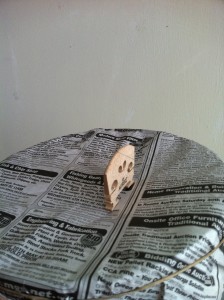
Testing the resonance of the ball using some fishing wire, a spare violin bridge and some newspaper.

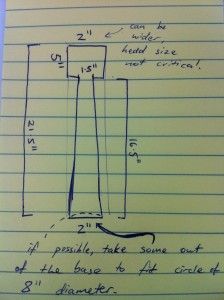
Once the disco ball was dealt with, I purchased a drum head, banjo strings and guitar pegs and drafted some timber guides for my father to do the woodwork.

Disco bongo. An 8″ drum head fits perfectly over the half-disco ball.

The neck.

A piece to go inside the banjo body in order to support the shape of the disco ball and provide a mounting point for the neck.

Preparing a hole for the timber to go through. I used a piece of paper of the same size/shape as the cross-section of the wood as my guide.

Sadly there are no more progress shots from here on as I passed everything over to my dad and he assembled the whole thing with expert craftsmanship.

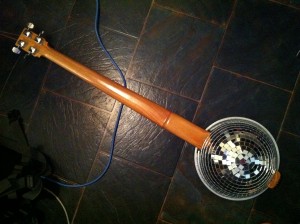
Suddenly, it’s done!

I used the many left over mirror sections to decorate the drum head.

Extra notes

The tailpiece is a separate piece of timber, screwed from the outside of the ball to the bracer piece on the inside. It also sits over the rim of the drum to hold things in place.

The banjo is fretless and tuned in fifths as I played ‘cello way back when.

Posted in: Behind the Art, Crafts, Music | Tagged: fan art, kingdom of loathing, kol, video games

Petite Chou-Fleur Transcription

Posted on January 22, 2012 4 Comments

Not an art update. Oops.

Over the last couple of months I’ve been putting a bit more effort into practising the piano accordion, spurred on by the idea of doing an Accordion Thief cosplay at AVCon next year. I hope to learn some songs that match the in-game “buffs” that the accordion thief casts, as well as a few video game pieces. (Maybe more on that later)

One song that seemed perfect was the track Petite Chou-Fleur from Team Fortress 2’s Meet the Spy video. Unfortunately, I couldn’t find the sheet music easily! So I ended up transcribing (what I’ve dubbed the unscientific process of, “earballing”) the song myself. The results are here.

One of the fun things about using Lilypond to do the transcription is that I get a MIDI file to play with too! Here it is, though I’ve found the grace notes don’t sound correctly. Yay MIDI.

If you play piano you might want to grab this version of the sheet music instead, though you might want to revise the chords. I haven’t put a lot of effort into ensuring they make sense – they’re mostly compromise between getting the chord notation to come up properly for my simplified accordion score and getting some bass notes to sound in the MIDI.

I’ve done my best to transcribe the piece accurately, but there will inevitably be errors. Let me know if you think anything’s wrong. I hope to have a proper accordion recording of this up soon, too!

Posted in: Music | Tagged: accordion, team fortress 2, tf2, video games

Wedding Blogging (Guest Post #3 by Connell Wood)

Posted on August 16, 2011 3 Comments

Oops, didn’t have stuff ready for today. But luckily, Connell has put together an extra-special guest post this week! I feel really excited and privileged to be able to share this with you all.

So, today I thought I’d share with you the creation of the wedding cake for myself and my lovely wife Helena. We’ve been married 3 months already! Time flies when you have an awesome wife~

So, our wedding was very geeky in theme, but not to a degree that it overshadowed the importance of the day. But for the cake, we knew that traditional was not going to cut it. Looking online, we quickly fell in love with the many Mario cakes that people have made over the years. The idea we had was to make a custom wedding topper made to look like us, and place that on top of a cake where each tier had the appearance of a Mario level.

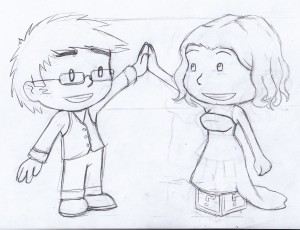
The initial design for the topper was Helena and I high fiving, which we thought would be a very cute idea. To account for our rather amusing height difference, Helena was to be standing on a Mario item box:
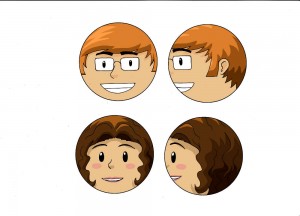
We have a friend who makes his own toys, and had hoped he’d be able to hook us up with someone who could make a specific resin toy of this design. Sadly, for size we wanted, it was going to be expensive and time consuming, and instead, we found a local cake topper designer who uses wooden pegs and makes custom clothing for each topper, which all looked incredibly cute. We sent her descriptions of our clothes (including Helena’s wedding dress, so I didn’t get to see the topper until the night of the wedding), and I designed faces to look closer to my art style than hers:
With this being made, we had to find a cakemaker who would be up to the challenge of making our cake. A local cakemaker Helena found showed some pretty amazing talent, and once we’d met her and tasted her cake (oh my god her cakes) we knew we had the right cake craftsperson.

So, I had to design the thing. I wanted each tier to be unique, and thought it would be cute if each level was as if they were connected via pipes, making the entire cake effectively one Mario level. Firstly came a basic planning stage, the cakemaker and I had to come to an agreement on what was feasible based on the limitations of icing. Here’s the sketch we started with:

Initially it was only two tiers, but the cakemaker recommended a third (who can say no to more cake?). With that, the top tier was also going to be a cliff rather than the sky and trees I settled on. While the top tier could have been made with a darker brown, it really wouldn’t have been as unique as I wanted.  From those decisions, an overall cake plan was determined:

With that worked out, I searched for as many Mario images as I could find. I ended up chosing the look of New Super Mario Brothers, the colours in that game have an almost… sugary feel to them already (for want of a better, more correct phrase). The first step was to create the building blocks that I’d be needing for all the tiers: blocks, goombas, pipes, pirhana plants, and so on:
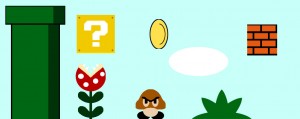
And once that was done, I started building Mario levels, which was actually kind of fun! I made sure to keep in as many nods to classic Mario level design as possible. The final designs are quite large, as I designed to scale, so they’re linked below.

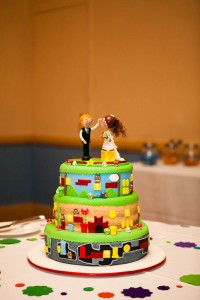
And with that, the planning was complete! And the result was completely and utterly worth it:
Video Link

In the end, the cake designer took some liberties in the design, but that was to be expected. I loved how the colours came out, and of course, the taste… As for the topper, I think it is so damned cute.

Helena and I still have the top tier with the topper on it kept in a case – the actual tier is Styrofoam, and the sugar icing will keep for a very, very long time. Best wedding cake ever? I think so.

Thanks Connell! I hope you’ll provide another post about the other awesome cakes that made an appearance on the night, too! Every table was graced with its own original cake and an accompanying story. Our table especially enjoyed our Pikmin themed cake, but I couldn’t resist sneaking over to the Tetris brownie table and playing some pretend Tetris… I mean, uh, congratulations to you and Helena!

Posted in: Behind the Art, Colour, Crafts | Tagged: cake, connell, connell wood, fan art, geek, mario, process, video games, wedding

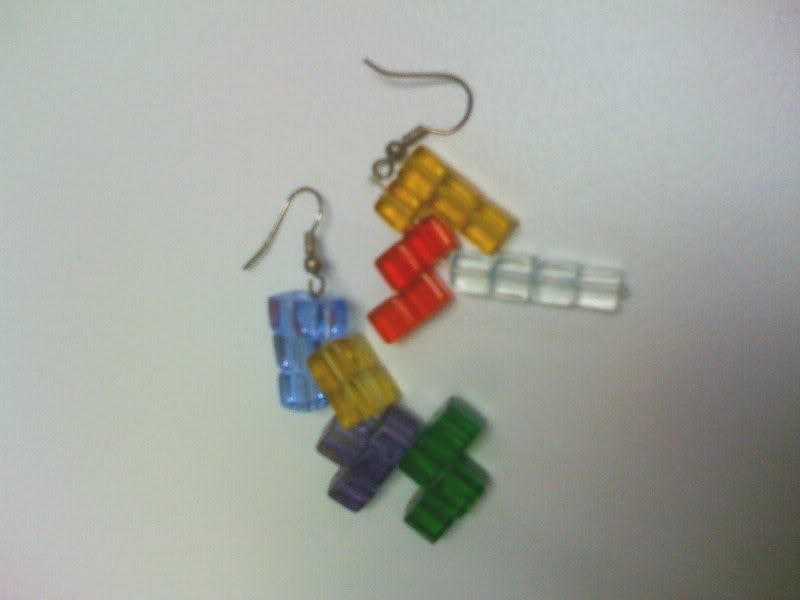
Tetris Earrings

Posted on November 17, 2010 2 Comments

They’re a little heavy – the beads are glass – but I’m pleased with the outcome.

Tetris Earrings

Yay for phone cameras.

Unfortunately the people I bought the beads from didn’t have two shades of blue in the right bead sizes. I made do with clear for the light blue – and put pieces of blue paper between the glass so that from certain angles it refracts the colour. You can see hints of it in the above photo but it’s definitely most effective viewed longways.

I am thinking of making a necklace to match. My housemate suggested putting the blocks on tiers so they look like they’re falling. To go with that I had an idea of making a matching t-shirt design, so it would look like the blocks were falling into the t-shirt… hmmm, ideas!

Posted in: Crafts | Tagged: craft, earrings, geek, jewellery, tetris, video games

Colour Balance

Posted on September 29, 2010 1 Comment

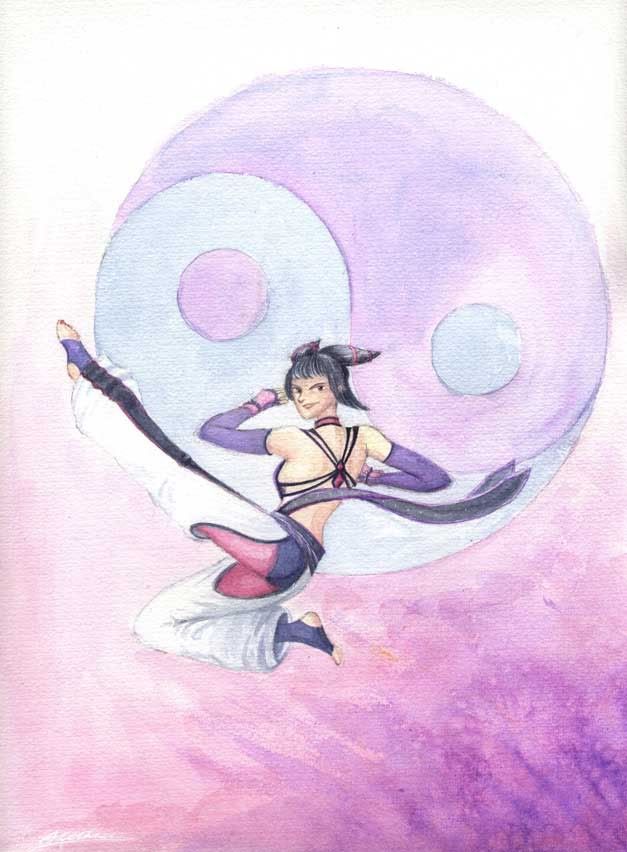
Here’s the finished-for-now Juri:

Juri - complete

Now with added stripe!

Kind of hurried it towards the end, I always have a tendency to do that! I’ll probably have a few more tweaks to make later, but I think I ought to get my ideas moving for my next picture.

On my monitor this looks more subdued and less pink than it does in real life. I will have to play around with the colour balance in Photoshop and check it out on some other monitors… I’ll probably also do some other digital tweaks like clean up the fuzzy edges of the circles. I’ll learn to paint more tidily with practice, I swear!

Posted in: Colour, Watercolours | Tagged: fan art, geek, juri han, street fighter, video games, watercolor

Juri, continued…

Posted on September 20, 2010 2 Comments
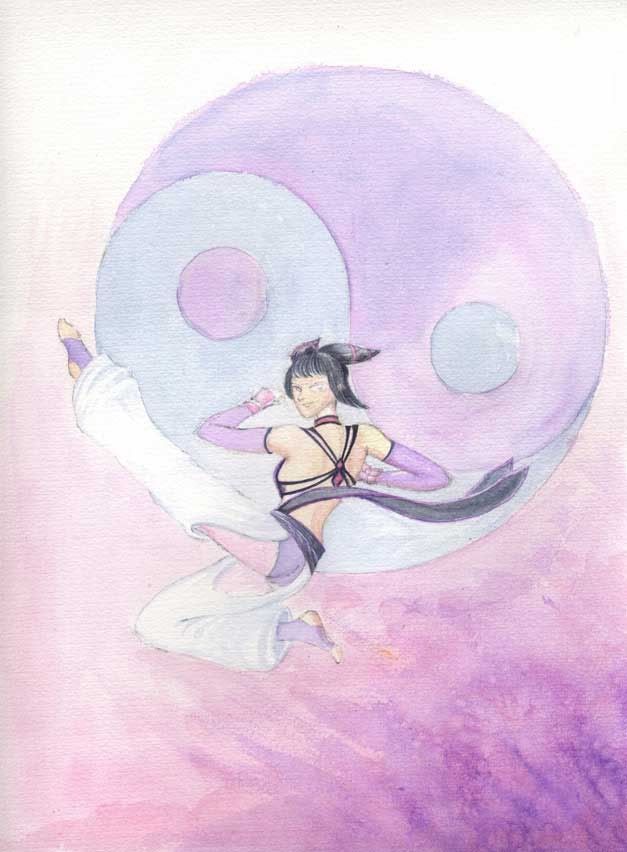
Juri Flies

It's coming together now!

This was why I was redrawing the image with pencils – it’s going to be a watercolour painting. Here’s most of the flat colours down and some areas in a near complete state – I will probably leave those until the image is closer to completion. Uncompleted bits include most of the purples and pinks. These will get deepened with progressive layers of pigment. I’ve also yet to start trying to detail her face.

It’s kind of interesting to note that when I work digitally I feel as though I should start the image with some pencil scratchings to get into the groove. Similarly, when I want to do a painting or drawing I often want to play around digitally to get a feel for the image. Really I think it’s all about finding a happy medium 🙂

Posted in: Watercolours, WIP | Tagged: colour, fan art, juri han, process, street fighter, video games, watercolor

Pencils

Posted on September 19, 2010 Leave a Comment

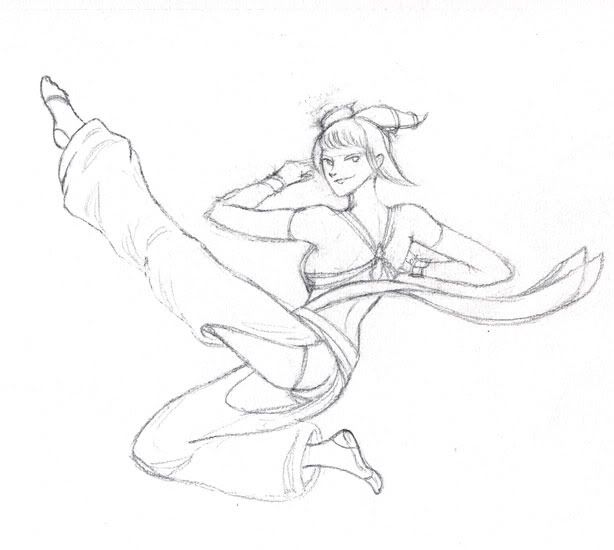
Wait, pencils now? What’s going on here?

Juri Pencils

Sketched out again.

Posted in: Line Drawings, WIP | Tagged: fan art, juri han, process, street fighter, video games

A Compositional Sketch

Posted on September 4, 2010 14 Comments

Maybe this will become a fully fledged picture?

The goal here was to have some interesting action with the character but to not lead the viewer’s eye ‘out’ of the image, rather, have their eye land back in the focal points of the image.

Juri Kicks

Ready to inflict some inJURIes. Hurr Hurr.

To be honest, I like the way that outstretched leg looks… even though it leads the eye out of the picture frame. I had experimented with tipping her toes to bring the flow of the image back towards the middle but that made the foot look a little odd. So, forcing the viewer’s eye back onto the image might not be the right approach. What do you think?

Posted in: Digital, WIP | Tagged: characters, Digital, fan art, juri han, street fighter, video games
« Previous 1 2 3 Next »

Recent Posts

  • Laser-cut Nintendo Switch Webcam Rig
  • Using the USB connection to drive Squid Beakon colours
  • Personalised Splashtag nametags
  • QArt Code Signature Blocks
  • Blogs, Portfolios and Challenges

Archives

  • January 2023
  • December 2022
  • October 2022
  • August 2022
  • May 2022
  • April 2022
  • November 2021
  • September 2021
  • August 2021
  • August 2020
  • September 2019
  • August 2019
  • August 2018
  • May 2018
  • September 2016
  • August 2016
  • October 2015
  • September 2015
  • August 2015
  • April 2015
  • February 2015
  • October 2014
  • August 2014
  • July 2014
  • April 2014
  • March 2014
  • February 2014
  • September 2013
  • August 2013
  • July 2013
  • April 2013
  • March 2013
  • January 2013
  • December 2012
  • October 2012
  • September 2012
  • August 2012
  • July 2012
  • May 2012
  • March 2012
  • January 2012
  • December 2011
  • November 2011
  • September 2011
  • August 2011
  • June 2011
  • May 2011
  • March 2011
  • January 2011
  • December 2010
  • November 2010
  • October 2010
  • September 2010
  • August 2010
  • April 2010
  • March 2010

Copyright © 2023 Proairesis.

Theme by themehall.com.