A bird in hand.
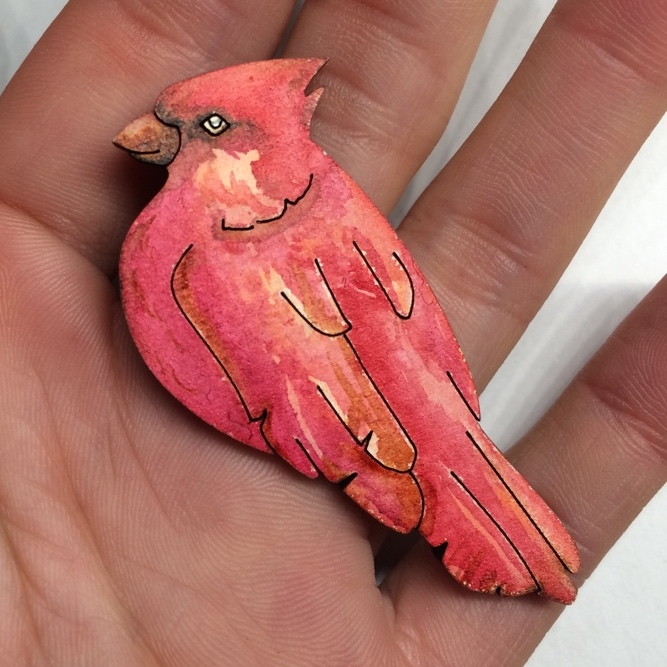
Today’s piece is based on a cardinal. I also experimented with etching some linework for the feathers and other features.

Today’s piece is based on a cardinal. I also experimented with etching some linework for the feathers and other features.

Some practice at dropping yellow/orange mixes of paint into various wet washes of blue. The aim was to preserve the golden colour without creating a green or brown mix.
I think the most successful one is the second down on the right. There’s a nice mix of implied form of the leaves and the defined branches. The sky blue is also a nicely balanced tone.
I really need to get my scanner back up and running at some point, it’s hard to get all the detail from these kinds of paintings across in a photo. Just need to find an old install of the Epson scan software…


More experiments in lasers + watercolours. I’d planned to create something based on the bird sketches I shared the other day, but I’ve been having a lot of trouble doing the vector traceovers for them. This fox design I sketched yesterday has been much easier to work with.
I need to refine my painting work a bit, I think, but I’m very much looking forward to working on a variety of designs like this.
PS. I need a better name for these than badges or charms, any ideas?
Guys, this is very important.
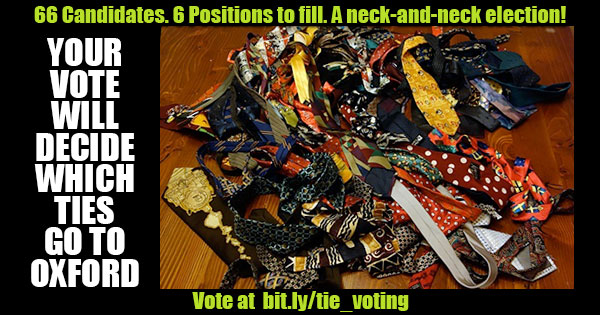
UnwiseOwl/NombreHombre/Dirk Fischmann/Some other name/Thom is moving to England. As many of us know, he has a formidable tie collection.
In true Thomly style, he is holding a ballot to decide which ties will be travelling with him. He talks about it much better than I could on his own blog.
Anyhow, I needed extra content to hit the once-per-day blog target for the month, plus it seemed like an interesting project to learn HTML 5’s fancy new flex boxes so I made a voting form. It kind of bloated out in size from what I’d originally intended so the coding is kind of awful but it seemed a waste to not share it with the world and see what results we can collate.
It’s a preferential voting form where you can either decide on a “party” of ties that you like best and vote party-by-party, or you can decide to number every tie as you like. We know you might want to be a bit lazy though so you can vote “below the line” and have a valid vote as long as you fill in at least six candidates.

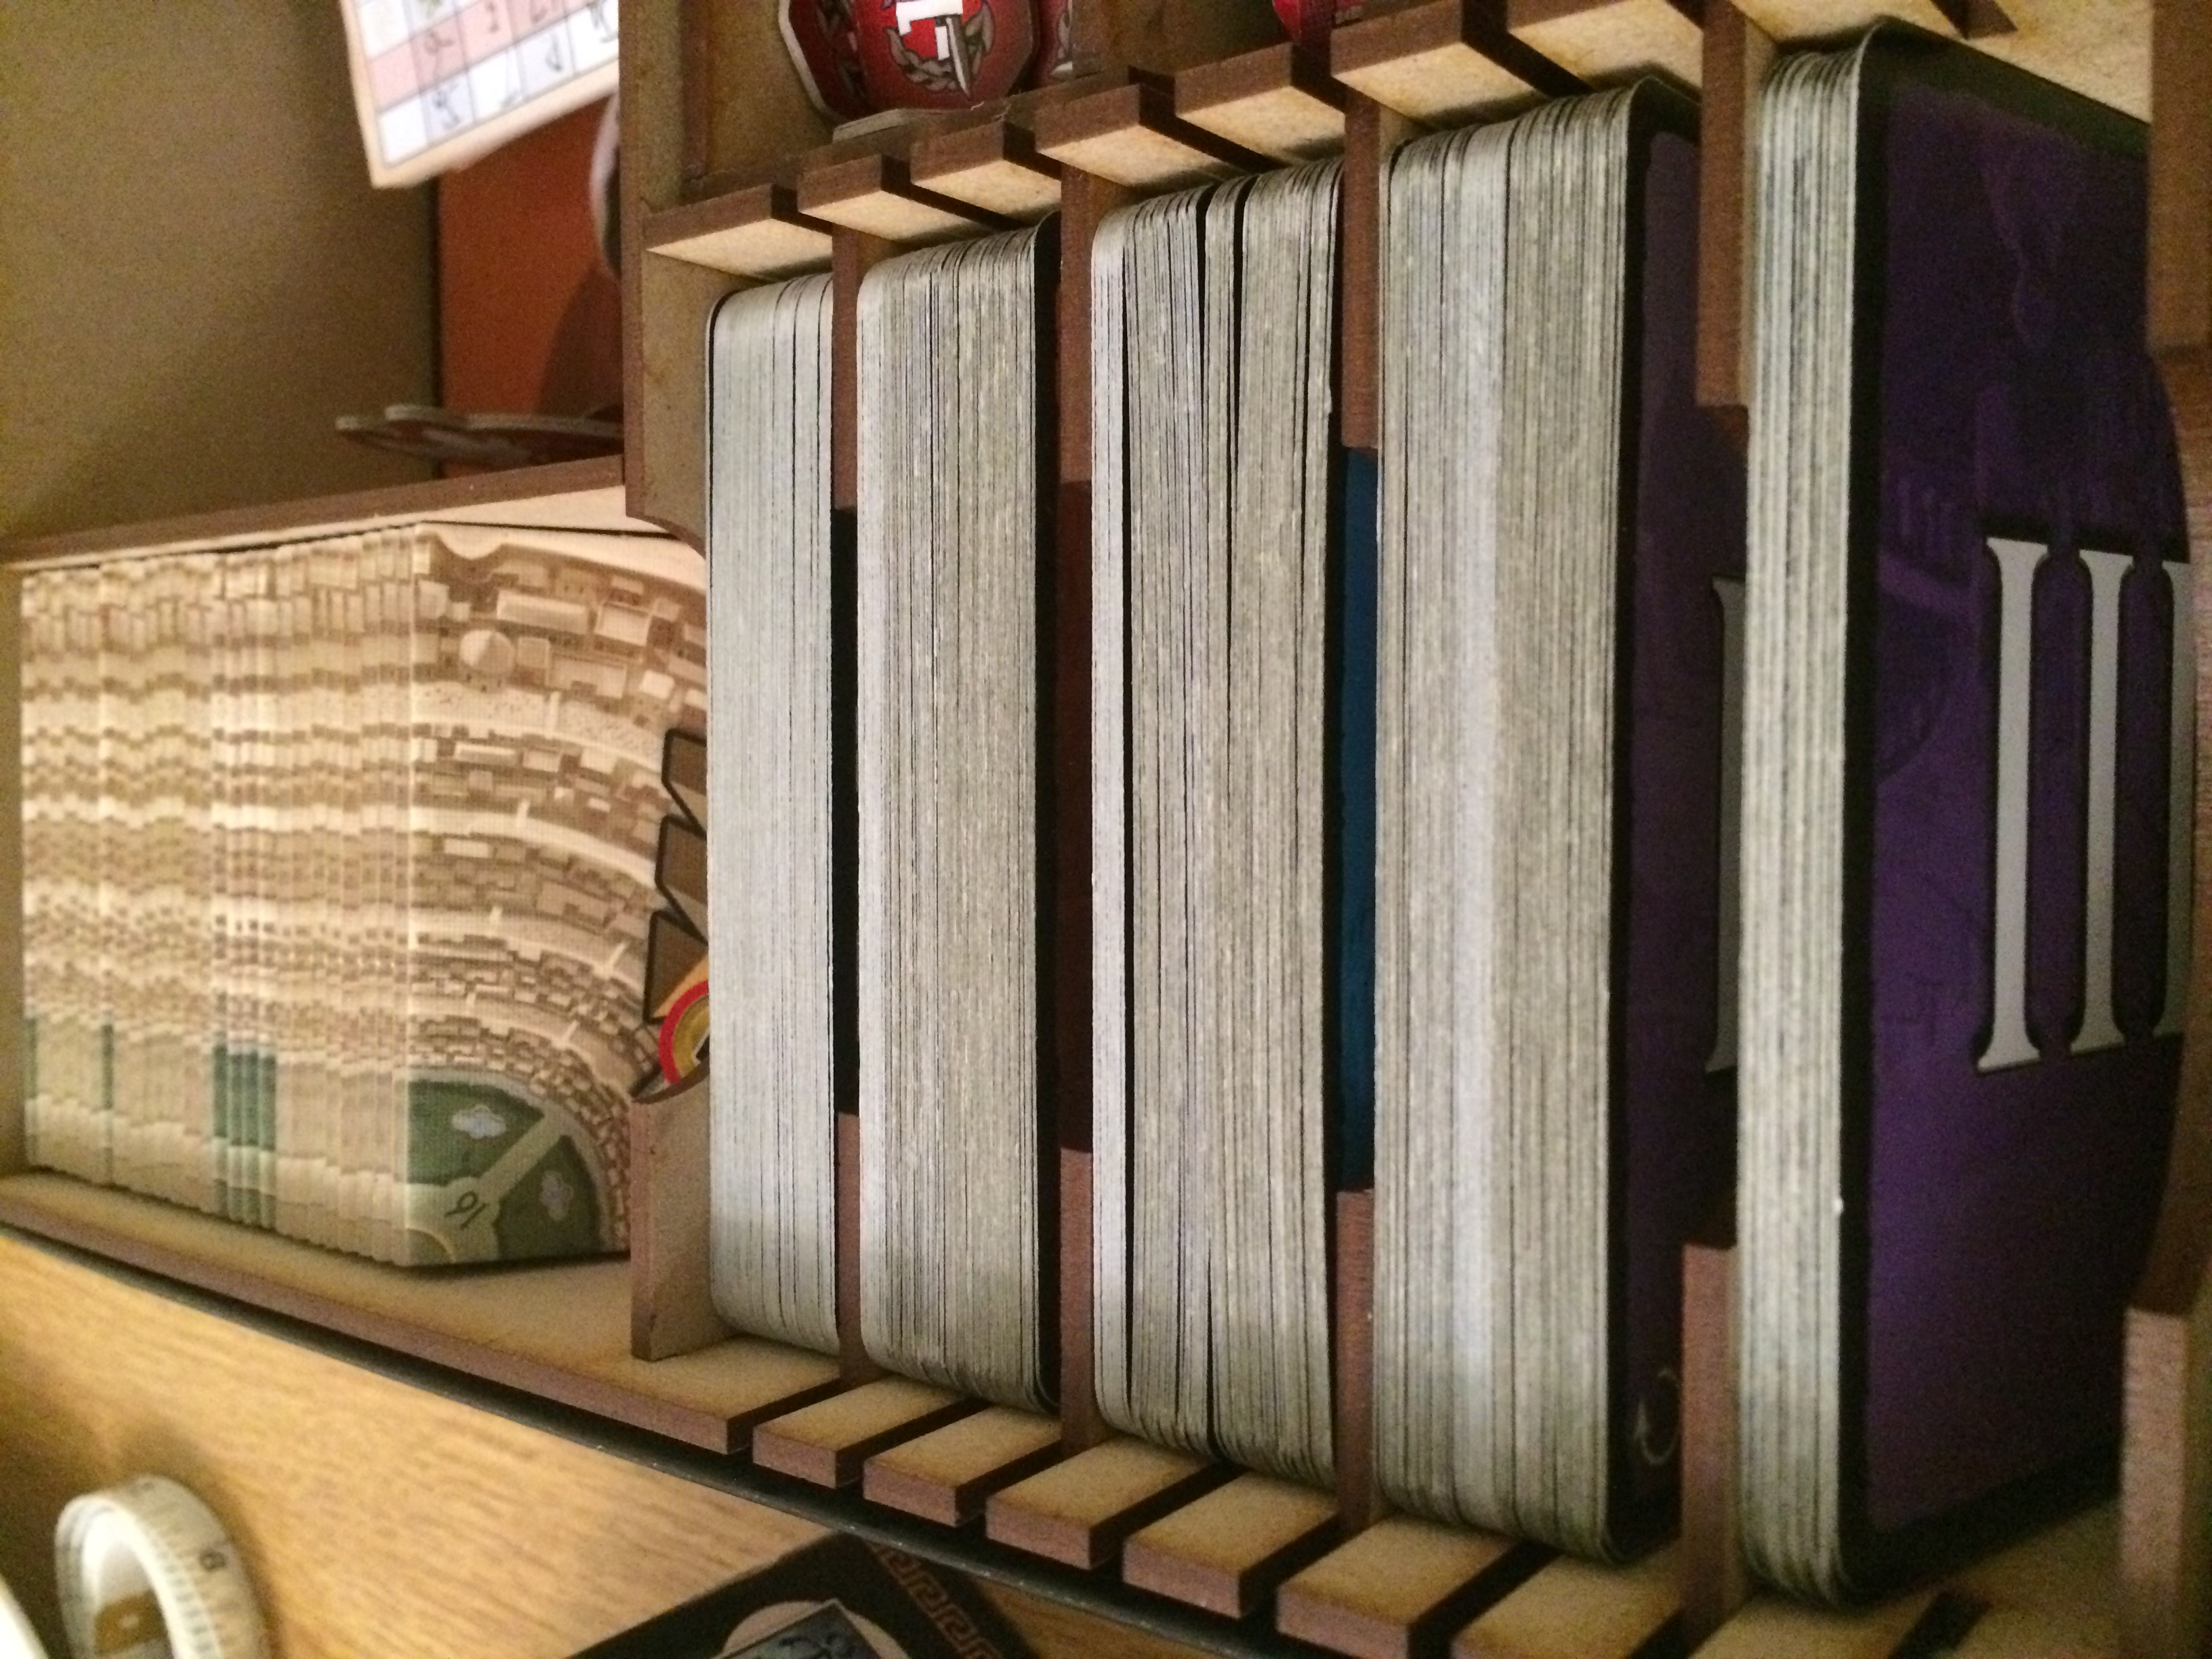
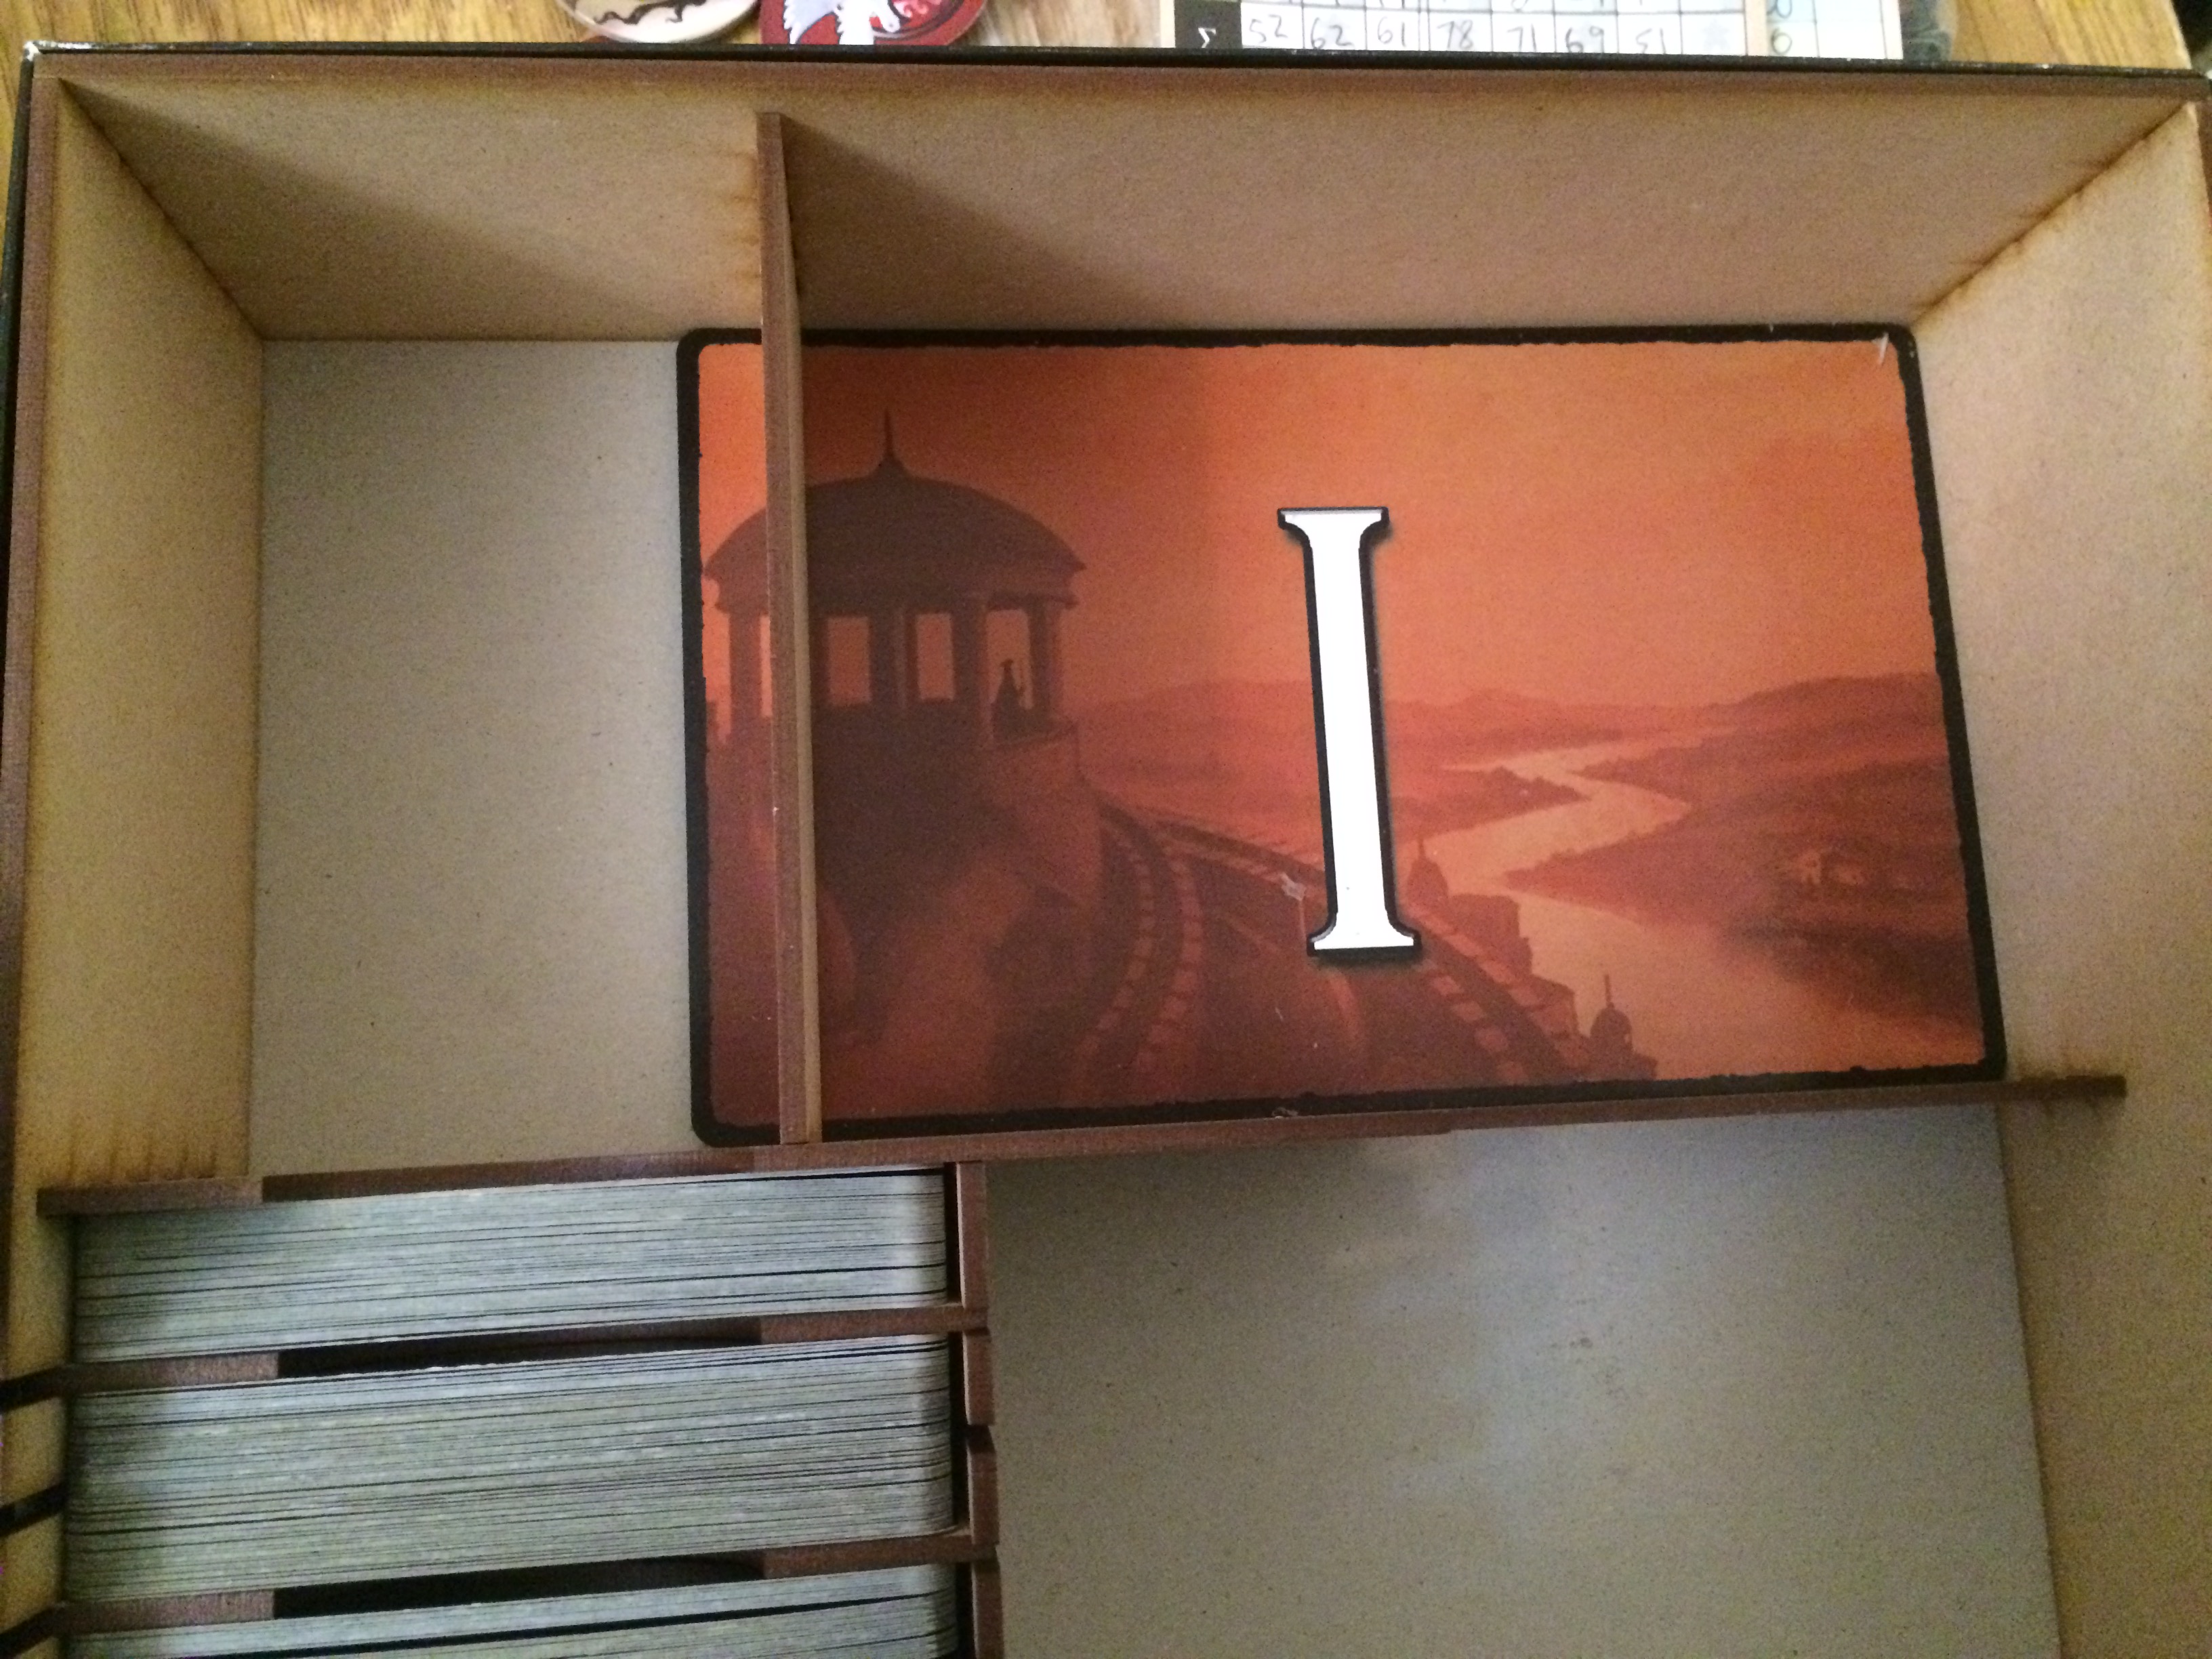
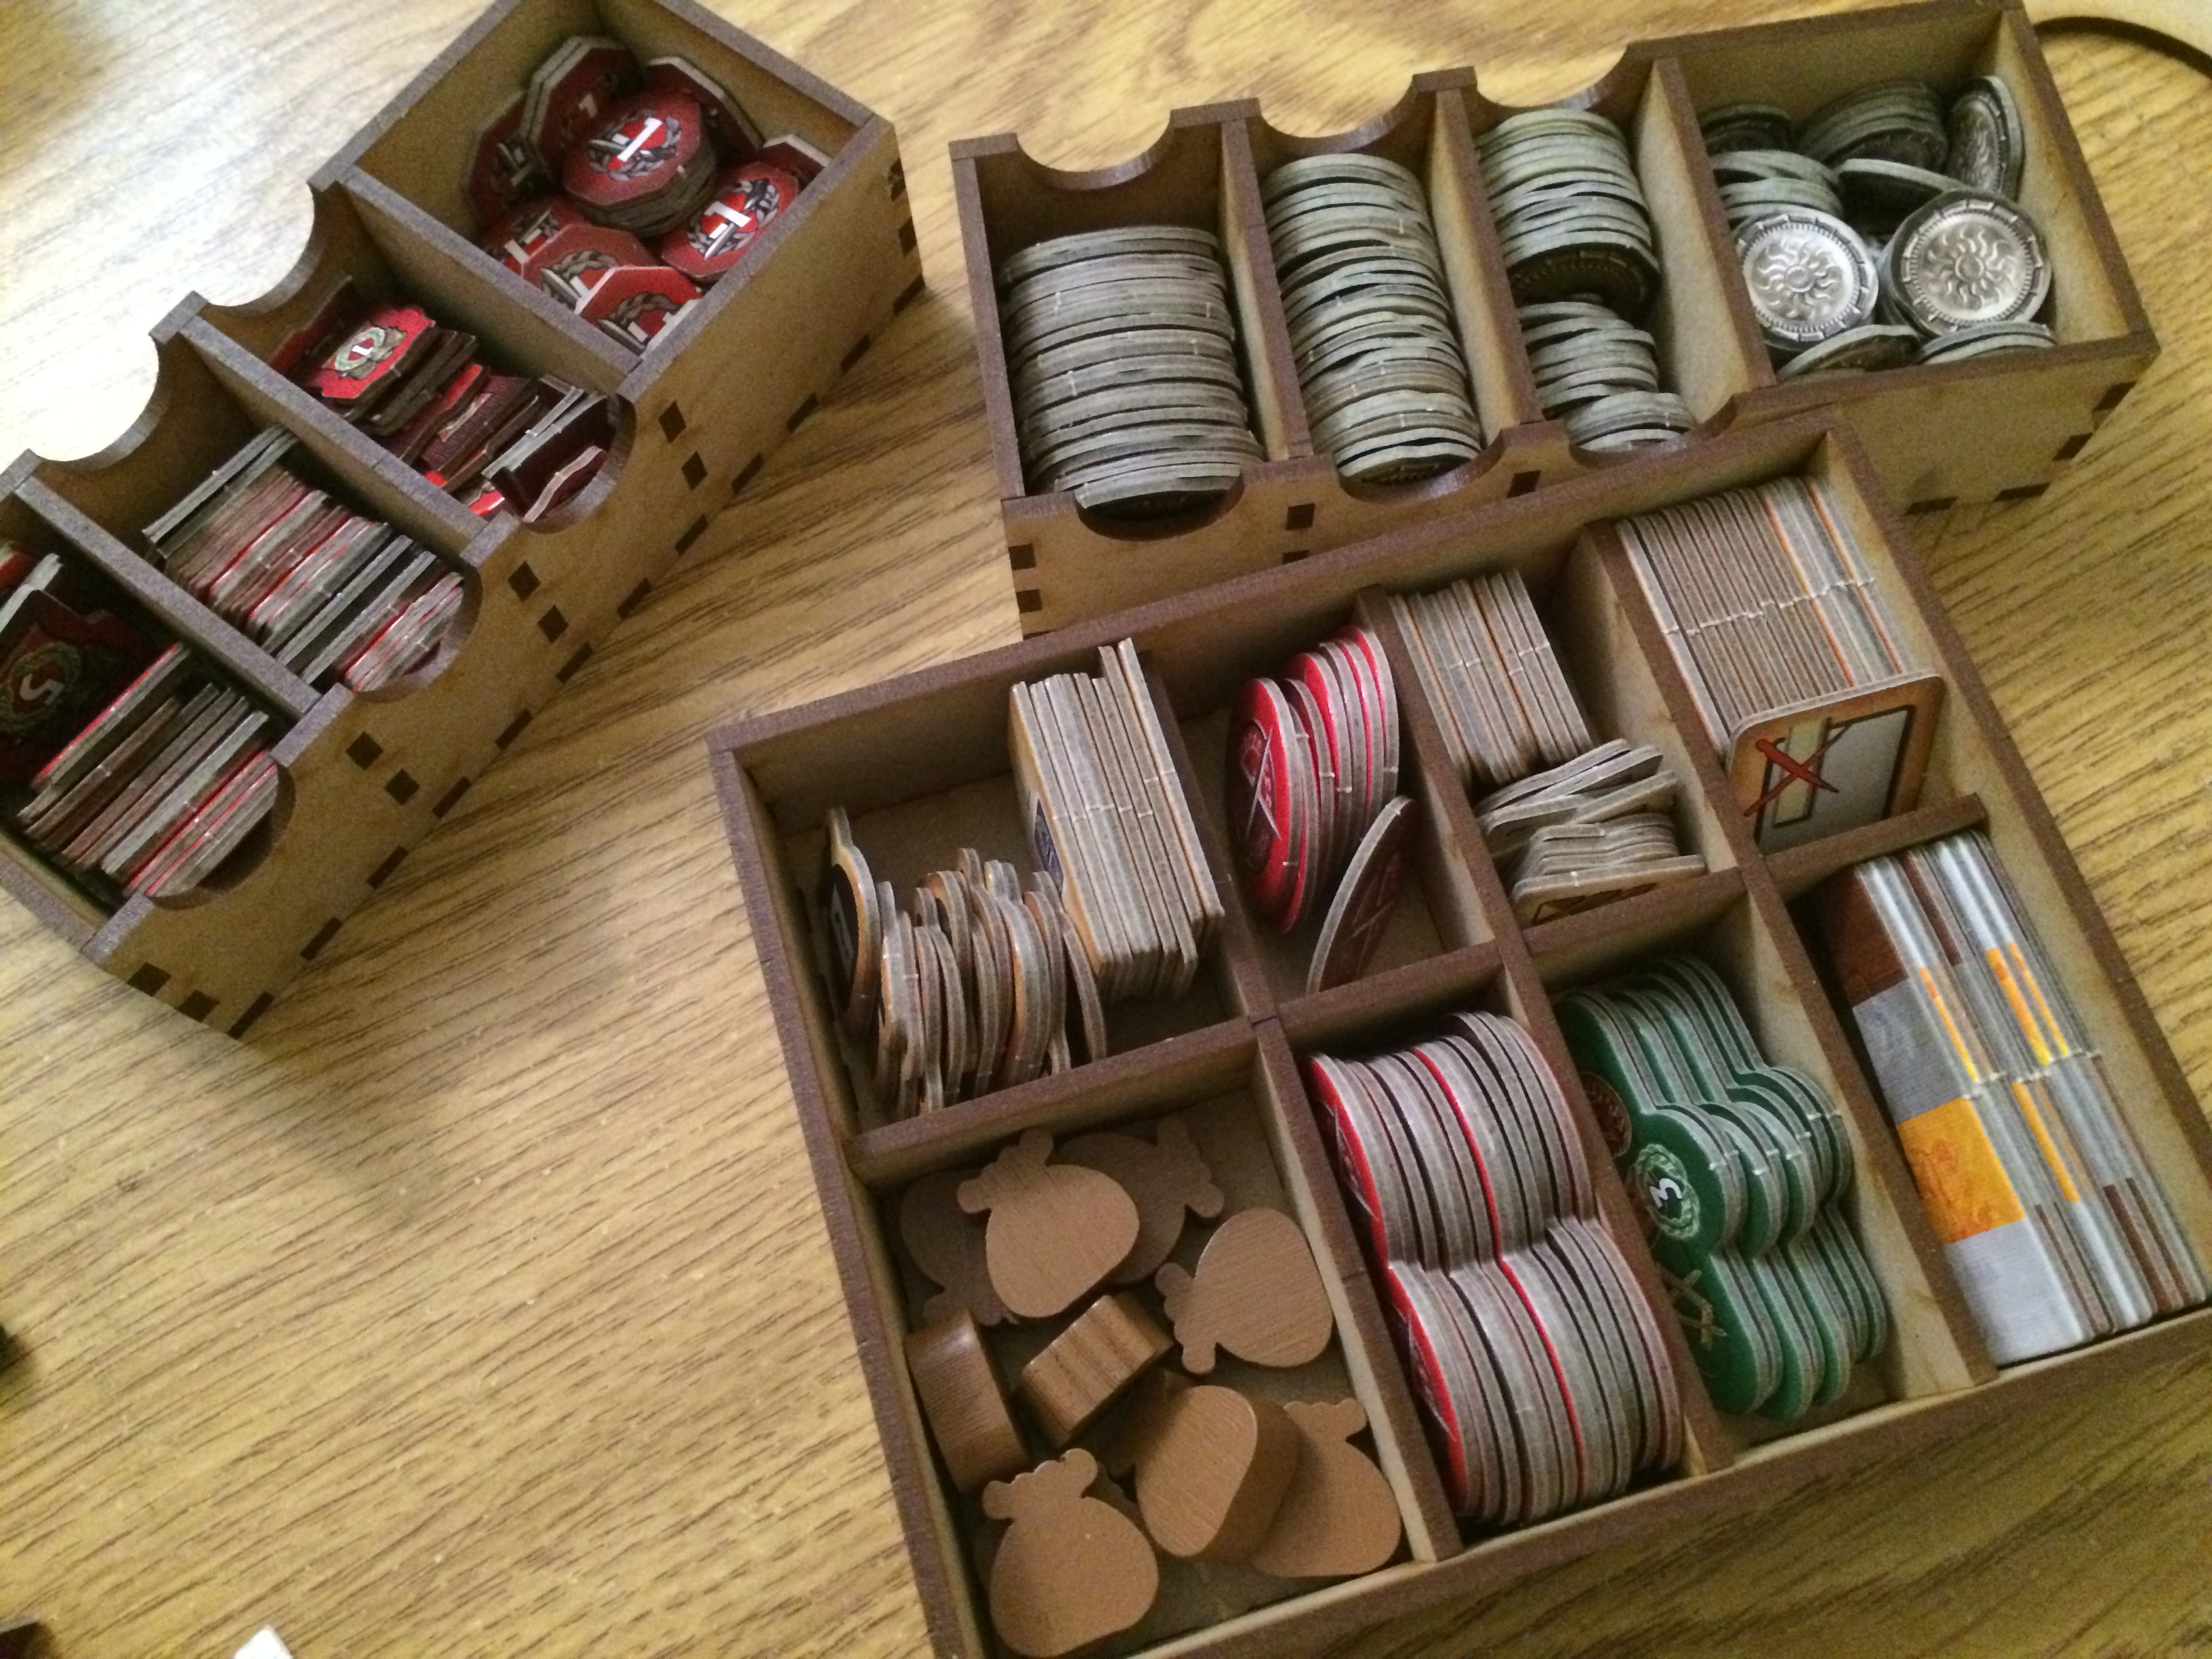
7 Wonders has been one of John’s favourite board games since we were introduced to it at our first PAX. We’ve since bought all expansions to date, and in order to travel around with them I’ve made these box inserts to accommodate the base game and the Leaders, Cities and Babel expansions.
I was initially inspired by a foamcore storage solution that Pichy first showed me. Once I knew that all of the components could fit in the original box I knew I could design something out of 3mm MDF – and I thought I could do it with room to spare!
My main goals for this design were the following:
I first measured all the components and got a feel for the volume they would take up. I experimented a bit with laying out the inserts in illustrator first, but eventually did a bit of 3D modelling to see how it would all go together.
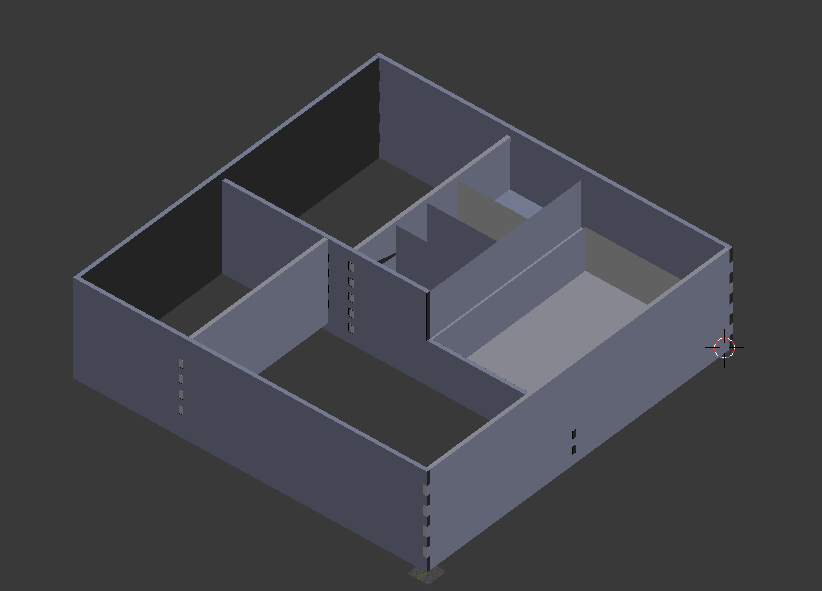
This is just the first draft. I have already thought of some minor improvements to implement but I want to overhaul the layout of the trays so a more significant set of changes need to be made. At some point I will get my act together and work out what those changes will be.
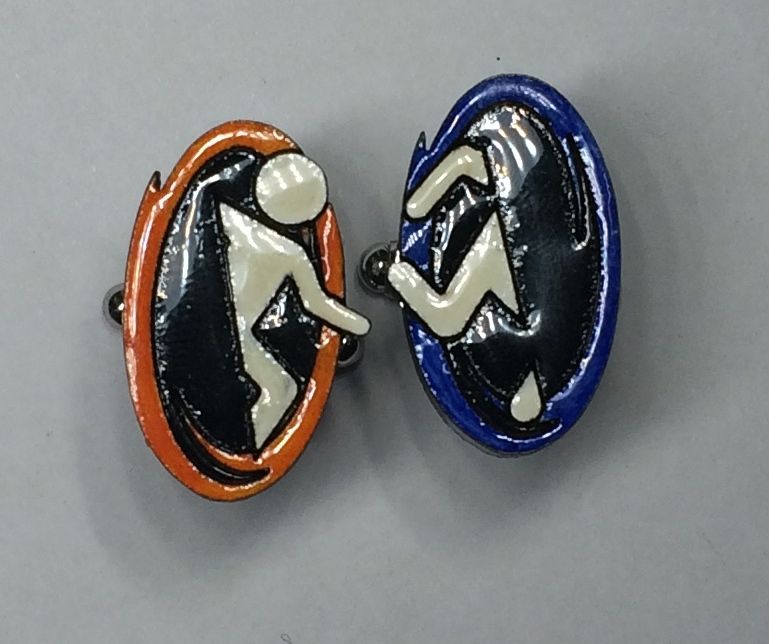
While I was at AVCon an attendee saw my Portal Earrings and Brooches and asked if I could make some cufflinks. Since cufflink designs need to be a lot smaller I opted to create them out of wood instead of trying to fit the tiny cut acrylic pieces together.

Today’s sketches cover some birdy ideas for designs that could be turned into brooches or pendants, similarly to how I painted the Callie and Marie charms. Most of these were painted with a brush pen without any pencil sketch underneath – considering that I’m pretty pleased with a couple of them.

I’m playing around with a few birds and animals, I should probably pick a design to finalise before moving onto the next animal but if you have a creature that you’d like me to sketch up let me know and I’ll see what I come up with.
We recently acquired a set of Sushi Go. It’s an excellent game that caught my eye when I was on a print-and-play kick. It appeared in many PnP lists due to a trial version of the cards being made available while they were trying to raise funding for the game.
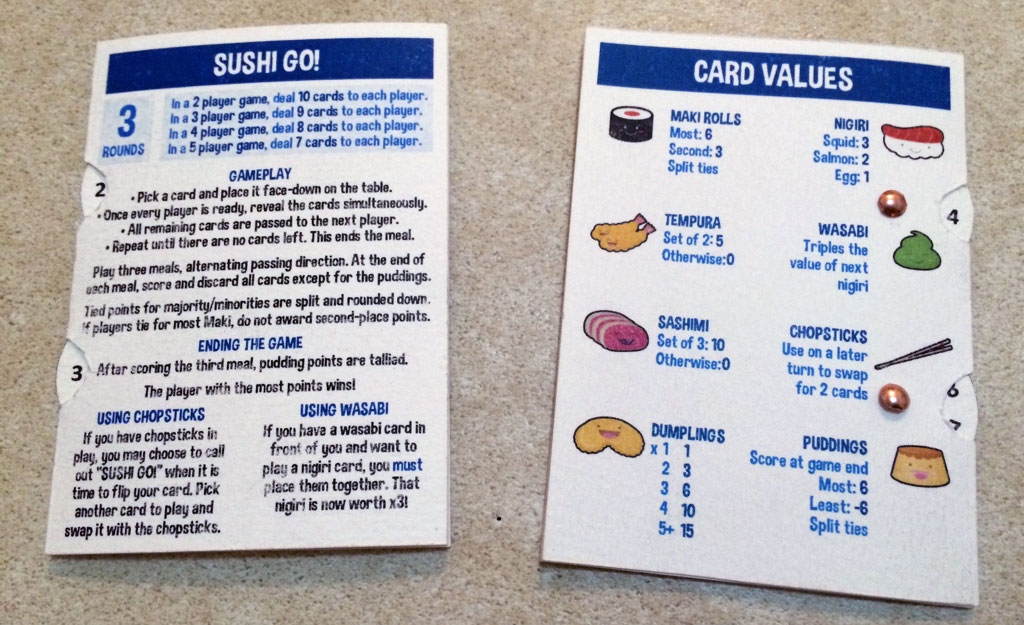
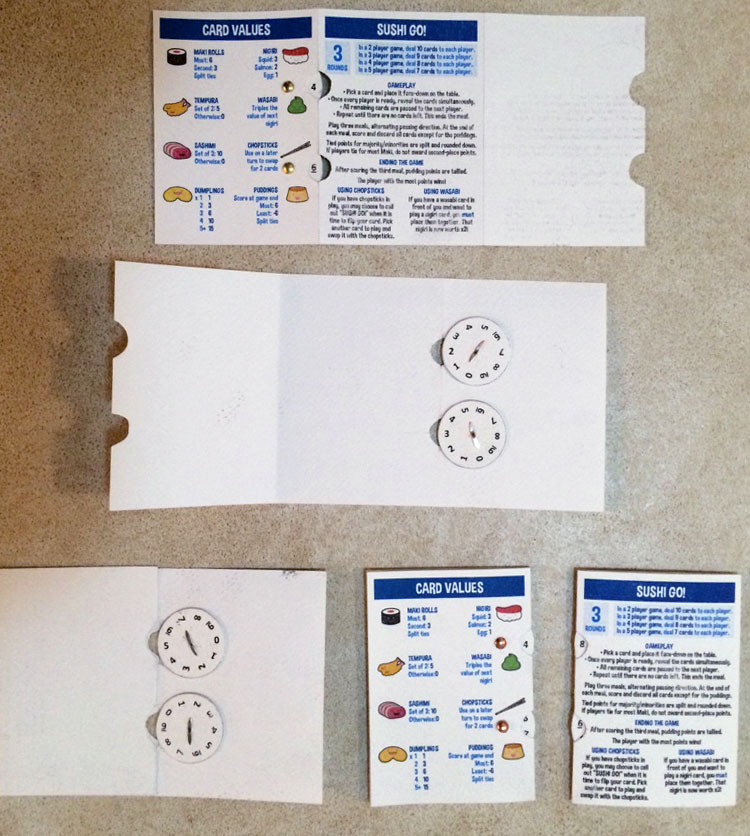
One difference between the PnP game and published one is a lack of scoring mechanism included with the game. The PnP game tried to use a pair of cards to represent the player’s food tray moving along the score track. I understand why it wasn’t included in the final game – it was a somewhat clunky way to keep track of points. But Sushi Go is a game that needs to have points kept track of between rounds, so I decided to make scorecards so that we don’t always have to scramble for pen and paper whenever we play a game!
These are inspired by a similar set of score cards that I saw on Board Game Geek. The art is grabbed from this player aid card. The important part is the scoring wheels that can be rotated to reflect the player’s current score. The rules and scoring details are all just window dressing really.
If you would like to make your own, you can download my file here.
Print out two copies of the first page and one copy of the second page onto stiffish paper.
Cut the scoring wheel page between the second and third row of circles. Fold the paper along the lines and glue together to create the double-sided scoring wheels.
The paper folds into a sturdy card once folded over itself. I used watercolour paper so I didn’t even need to glue them. If you’re using lighter paper you may want to apply glue across all faces (watch out for the ‘glue-free zones’, my nod to the Midnight Quiz) so that everything holds together.
You can get small split pins (brads) from the scrapbooking section of an art supplies store.
Okay, I think I’m now up to date for Blaugust! Just need to work out what I’ll be posting about tomorrow…
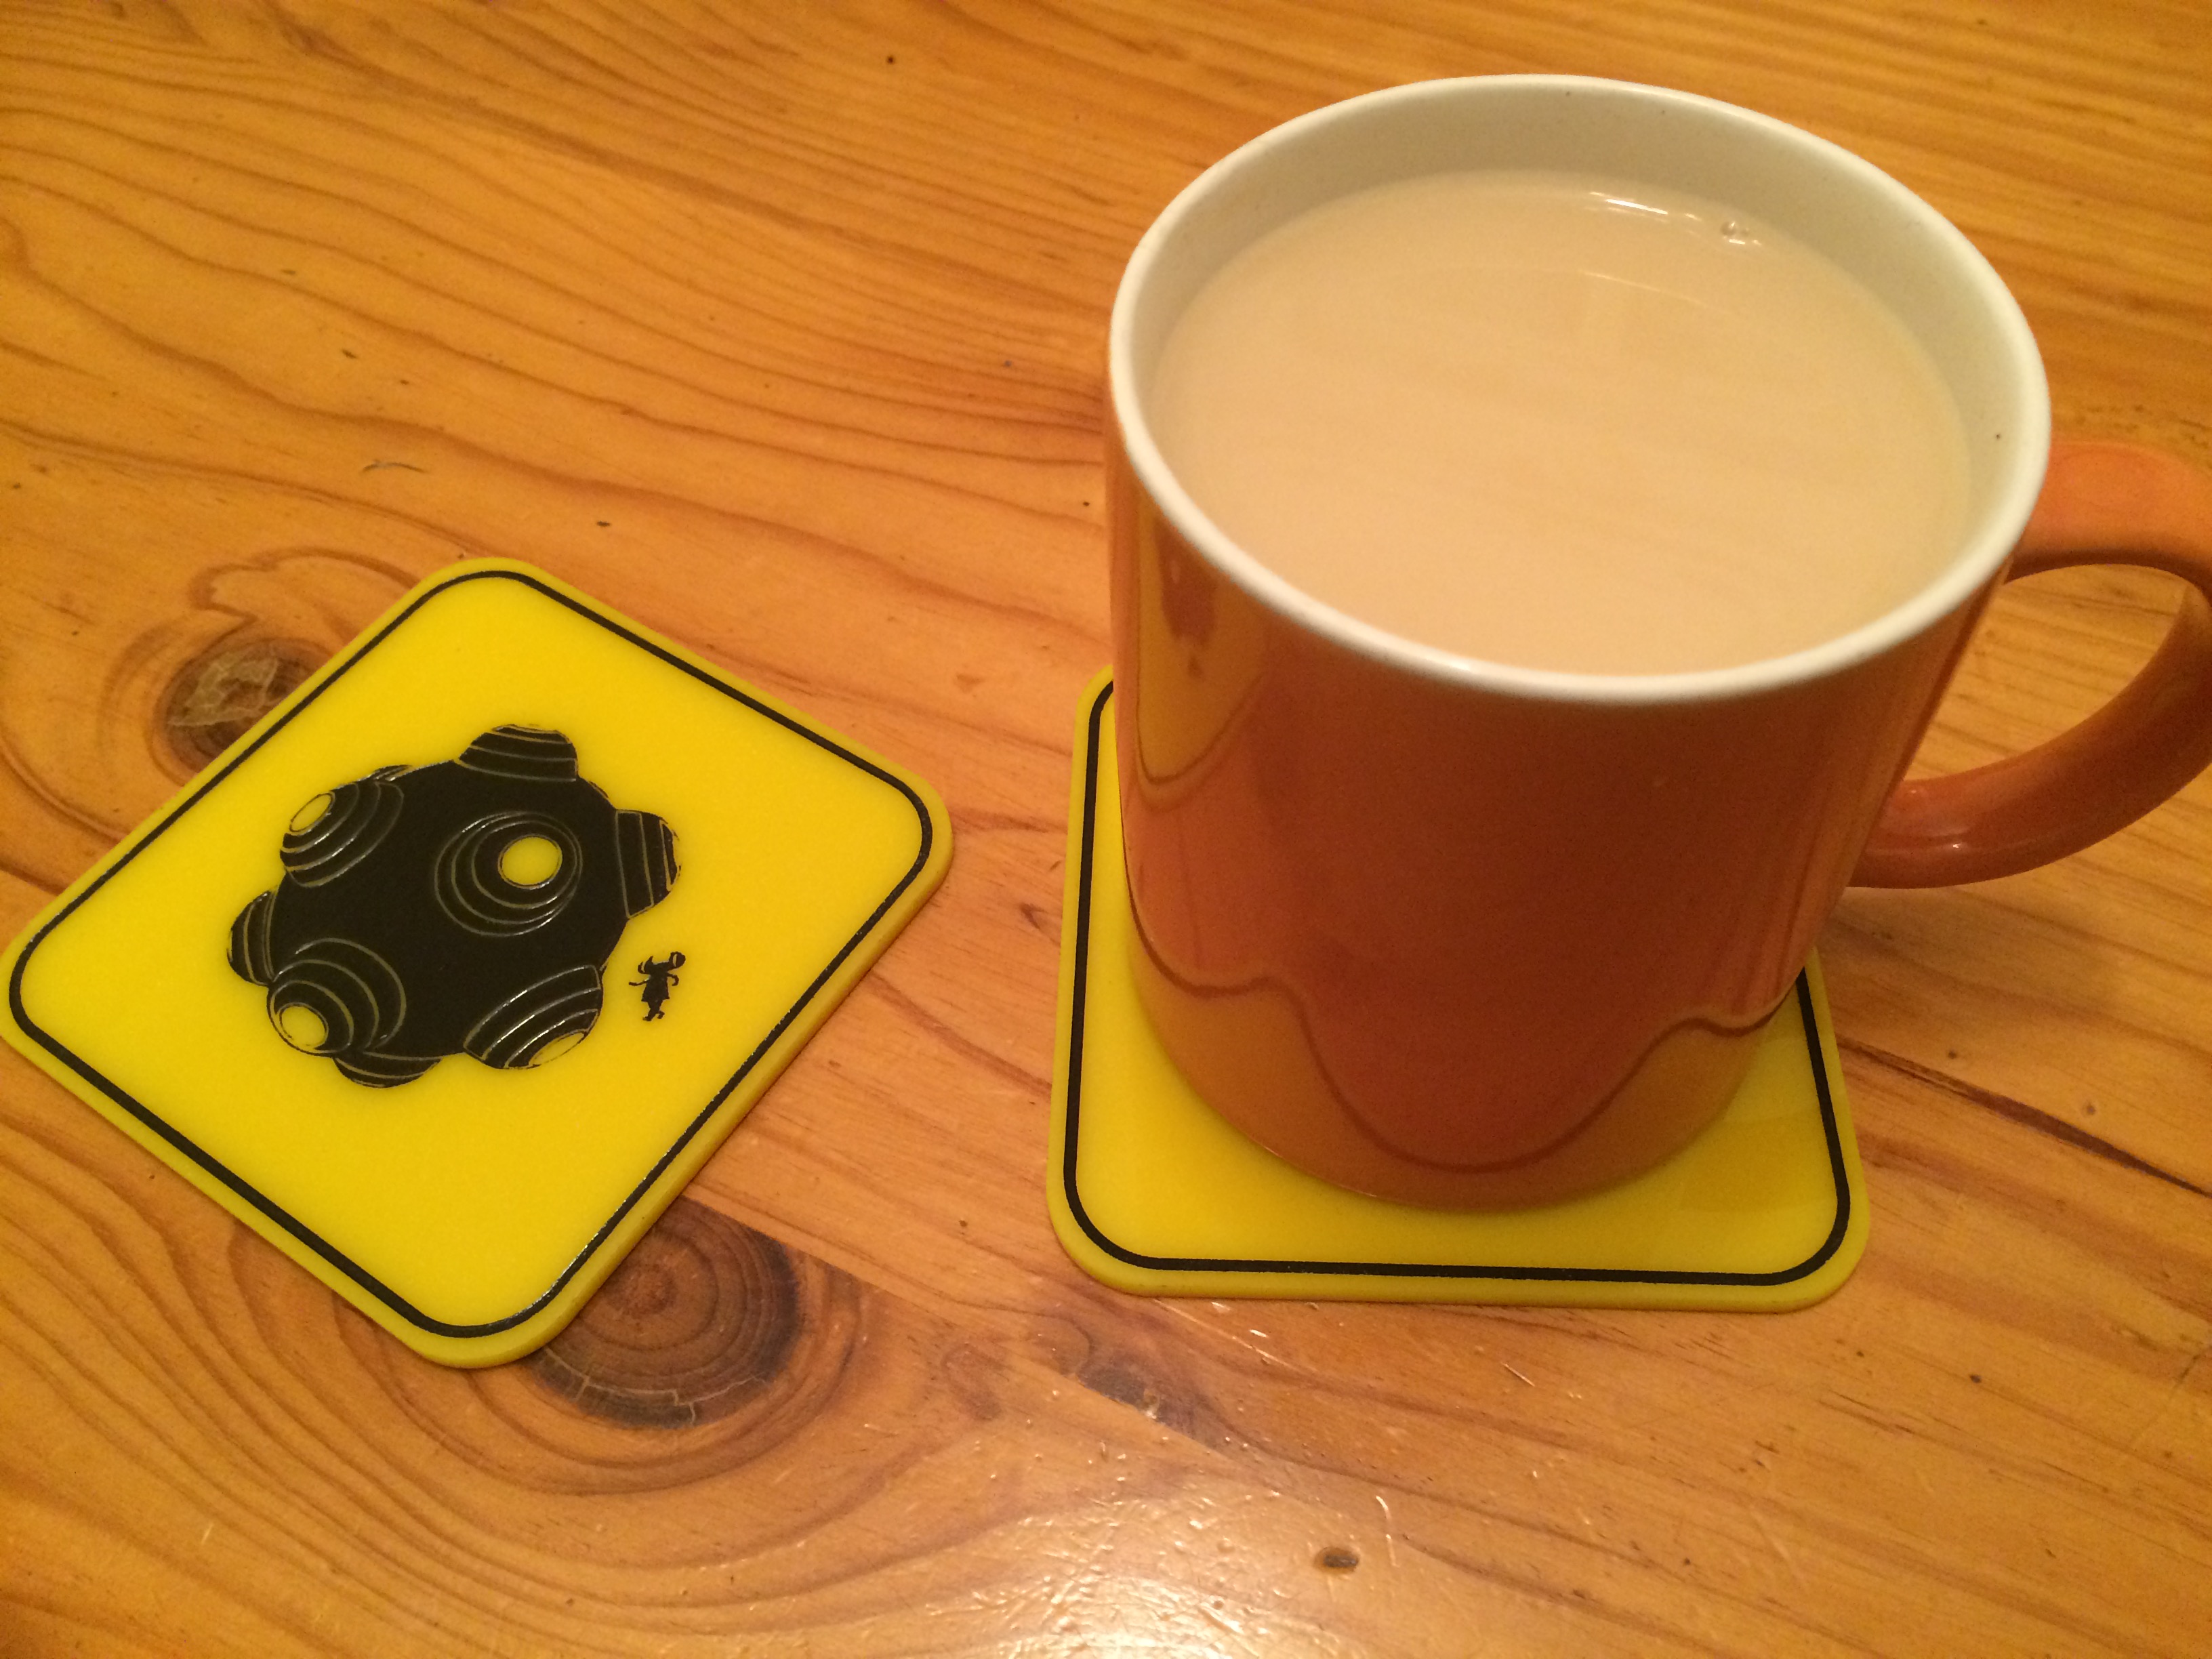
I have had this design complete for… *checks files* FOUR YEARS and somehow I never uploaded it online in any form.
I’ve played with it for a couple of product ideas, first as printed posters on yellow paper and then I toyed with making it as a shirt design.
I think these coasters are the perfect incarnation however. The black design on the yellow acrylic really evokes a street sign feel.
I make these by etching the design on my laser engraving machine. I leave the paper on the acrylic while the design is etched. After the etching is complete, I use black acrylic paint to fill in the etched areas, then lift the paper masking.

Pre-orders available in my store now!


I’ve made a few badges from Pokémon before. My Hoenn badges were 3D printed on Shapeways out of full-colour sandstone.
My Unova badges were also printed on Shapeways, but that was only the bases. The colouring and finishing touches were done by hand. I used acrylic and watercolour paints as well as liquid sculpey to create the glassy look in those badges.
Now that I have a laser cutter I can make the flat badges (Johto, Sinnoh and Unova) from laser-etched wood. I paint them and fill them with a gloss varnish to create the glossy effect. The watercolour paint bleeds into the varnish slightly, which can add to that enameled look in some cases and can be a hindrance in others. In addition to the paints bleeding, I also found that the burnt wood residues seep colour into the varnish! Compare the top set of badges with the set below. The varnish has done an excellent job of deepening the colours and making them stand out… but you can also see a yellowing that comes from the MDF. It’s most noticable in the Zephyr badge but the blue badges also suffer pretty badly.
I’ll be working to fix these issues but I think that overall these badges are working out nicely. One day I’ll finish the 3D models I’ve made of the Kalos badges…
P.S. you’ve probably noticed that I’ve been playing around with the look of the Hive badge. While the rest of the Johto badges had that uniform look, Bugsy for some reason decided to have a black-rimmed badge. Perhaps in a limited palette the concept of the ladybird didn’t translate well with a silver rim. Regardless, I decided I’d have no such inconsistency in my set. The Rising badge gets a little bit of red in its borders but I guess that’s the privileges you get when you train dragons. No way am I letting a kid bug trainer get away with nonsense like a differently coloured badge!