QArt Code Signature Blocks
Oh boy, let me take you down the rabbit hole that keeps sneakily stealing hours of my life from me.
We’ll start with a topic I’ve covered a few times before:
Seals
I’ve written before about my mock sinograph signature – a pseudo Chinese-character sequence that I use to sign my artwork with.

I have also signed my work in the past with a signature stamp that I picked up at a dollar store in Japan, that simply contained the character of my surname.
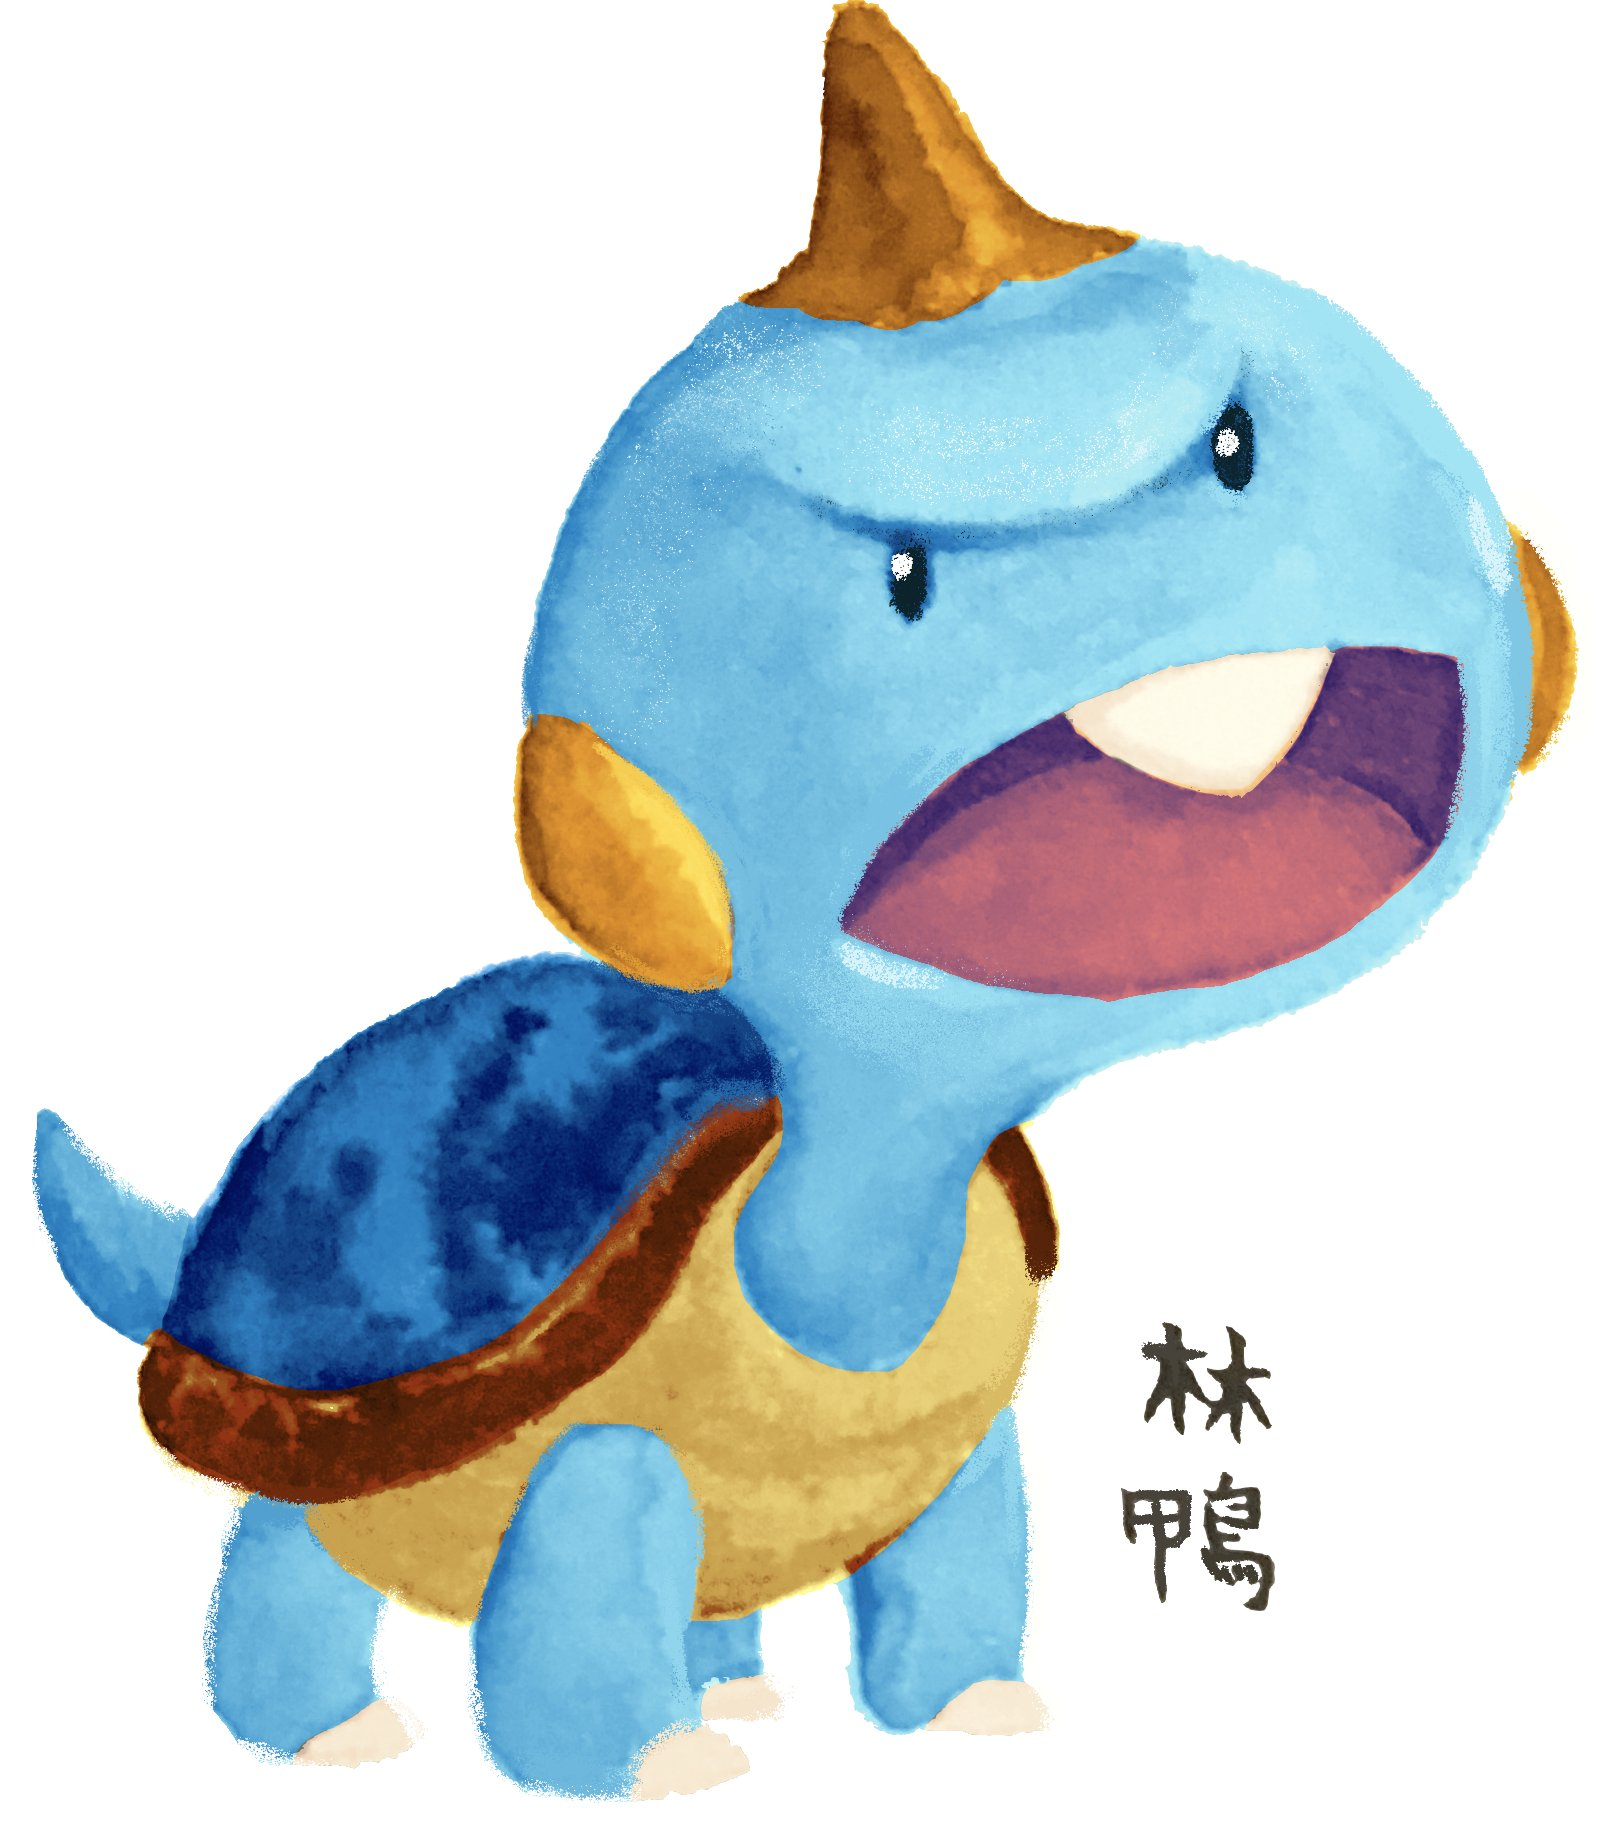
In the intervening times, I’ve experimented with laser engraving seals of my sinograph, and modifying its design. I briefly hit on a design I absolutely adored that incorporated “Alethea” into the character 鴨 (duck), which when put together with my surname 林 would have correspondingly given me “forest duck” as my signature. This would allude to the name of the chenonetta jubata in Chinese, nicely tying all of my identities together.
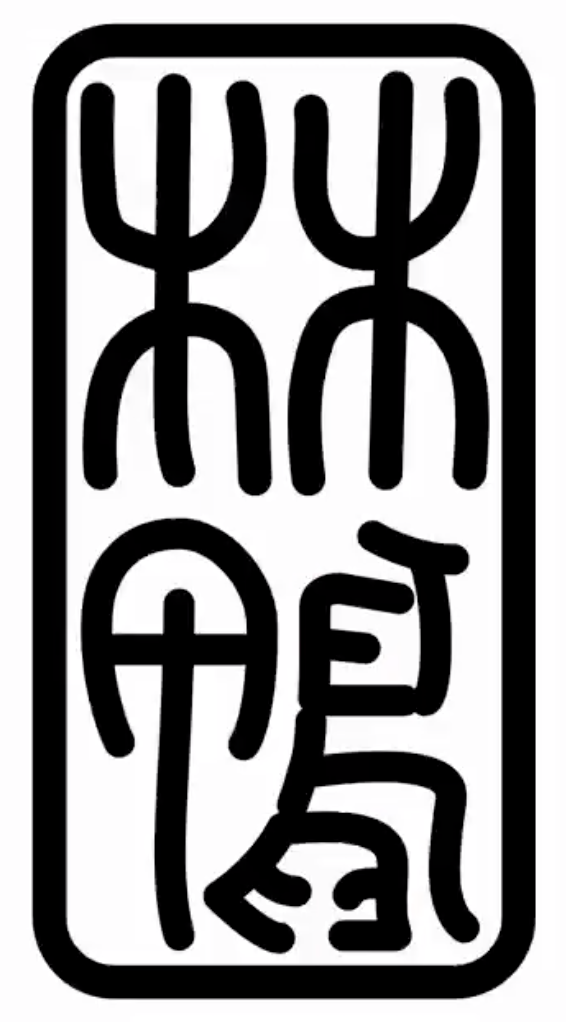
Unfortunately, a Mandarin-speaking coworker cautioned me against using 鴨 as a pseudonym. They informed me that when referring to people, “duck” is sometimes used as a euphemism for a male prostitute. So with that knowledge, I decided to fall back to my made-up characters.
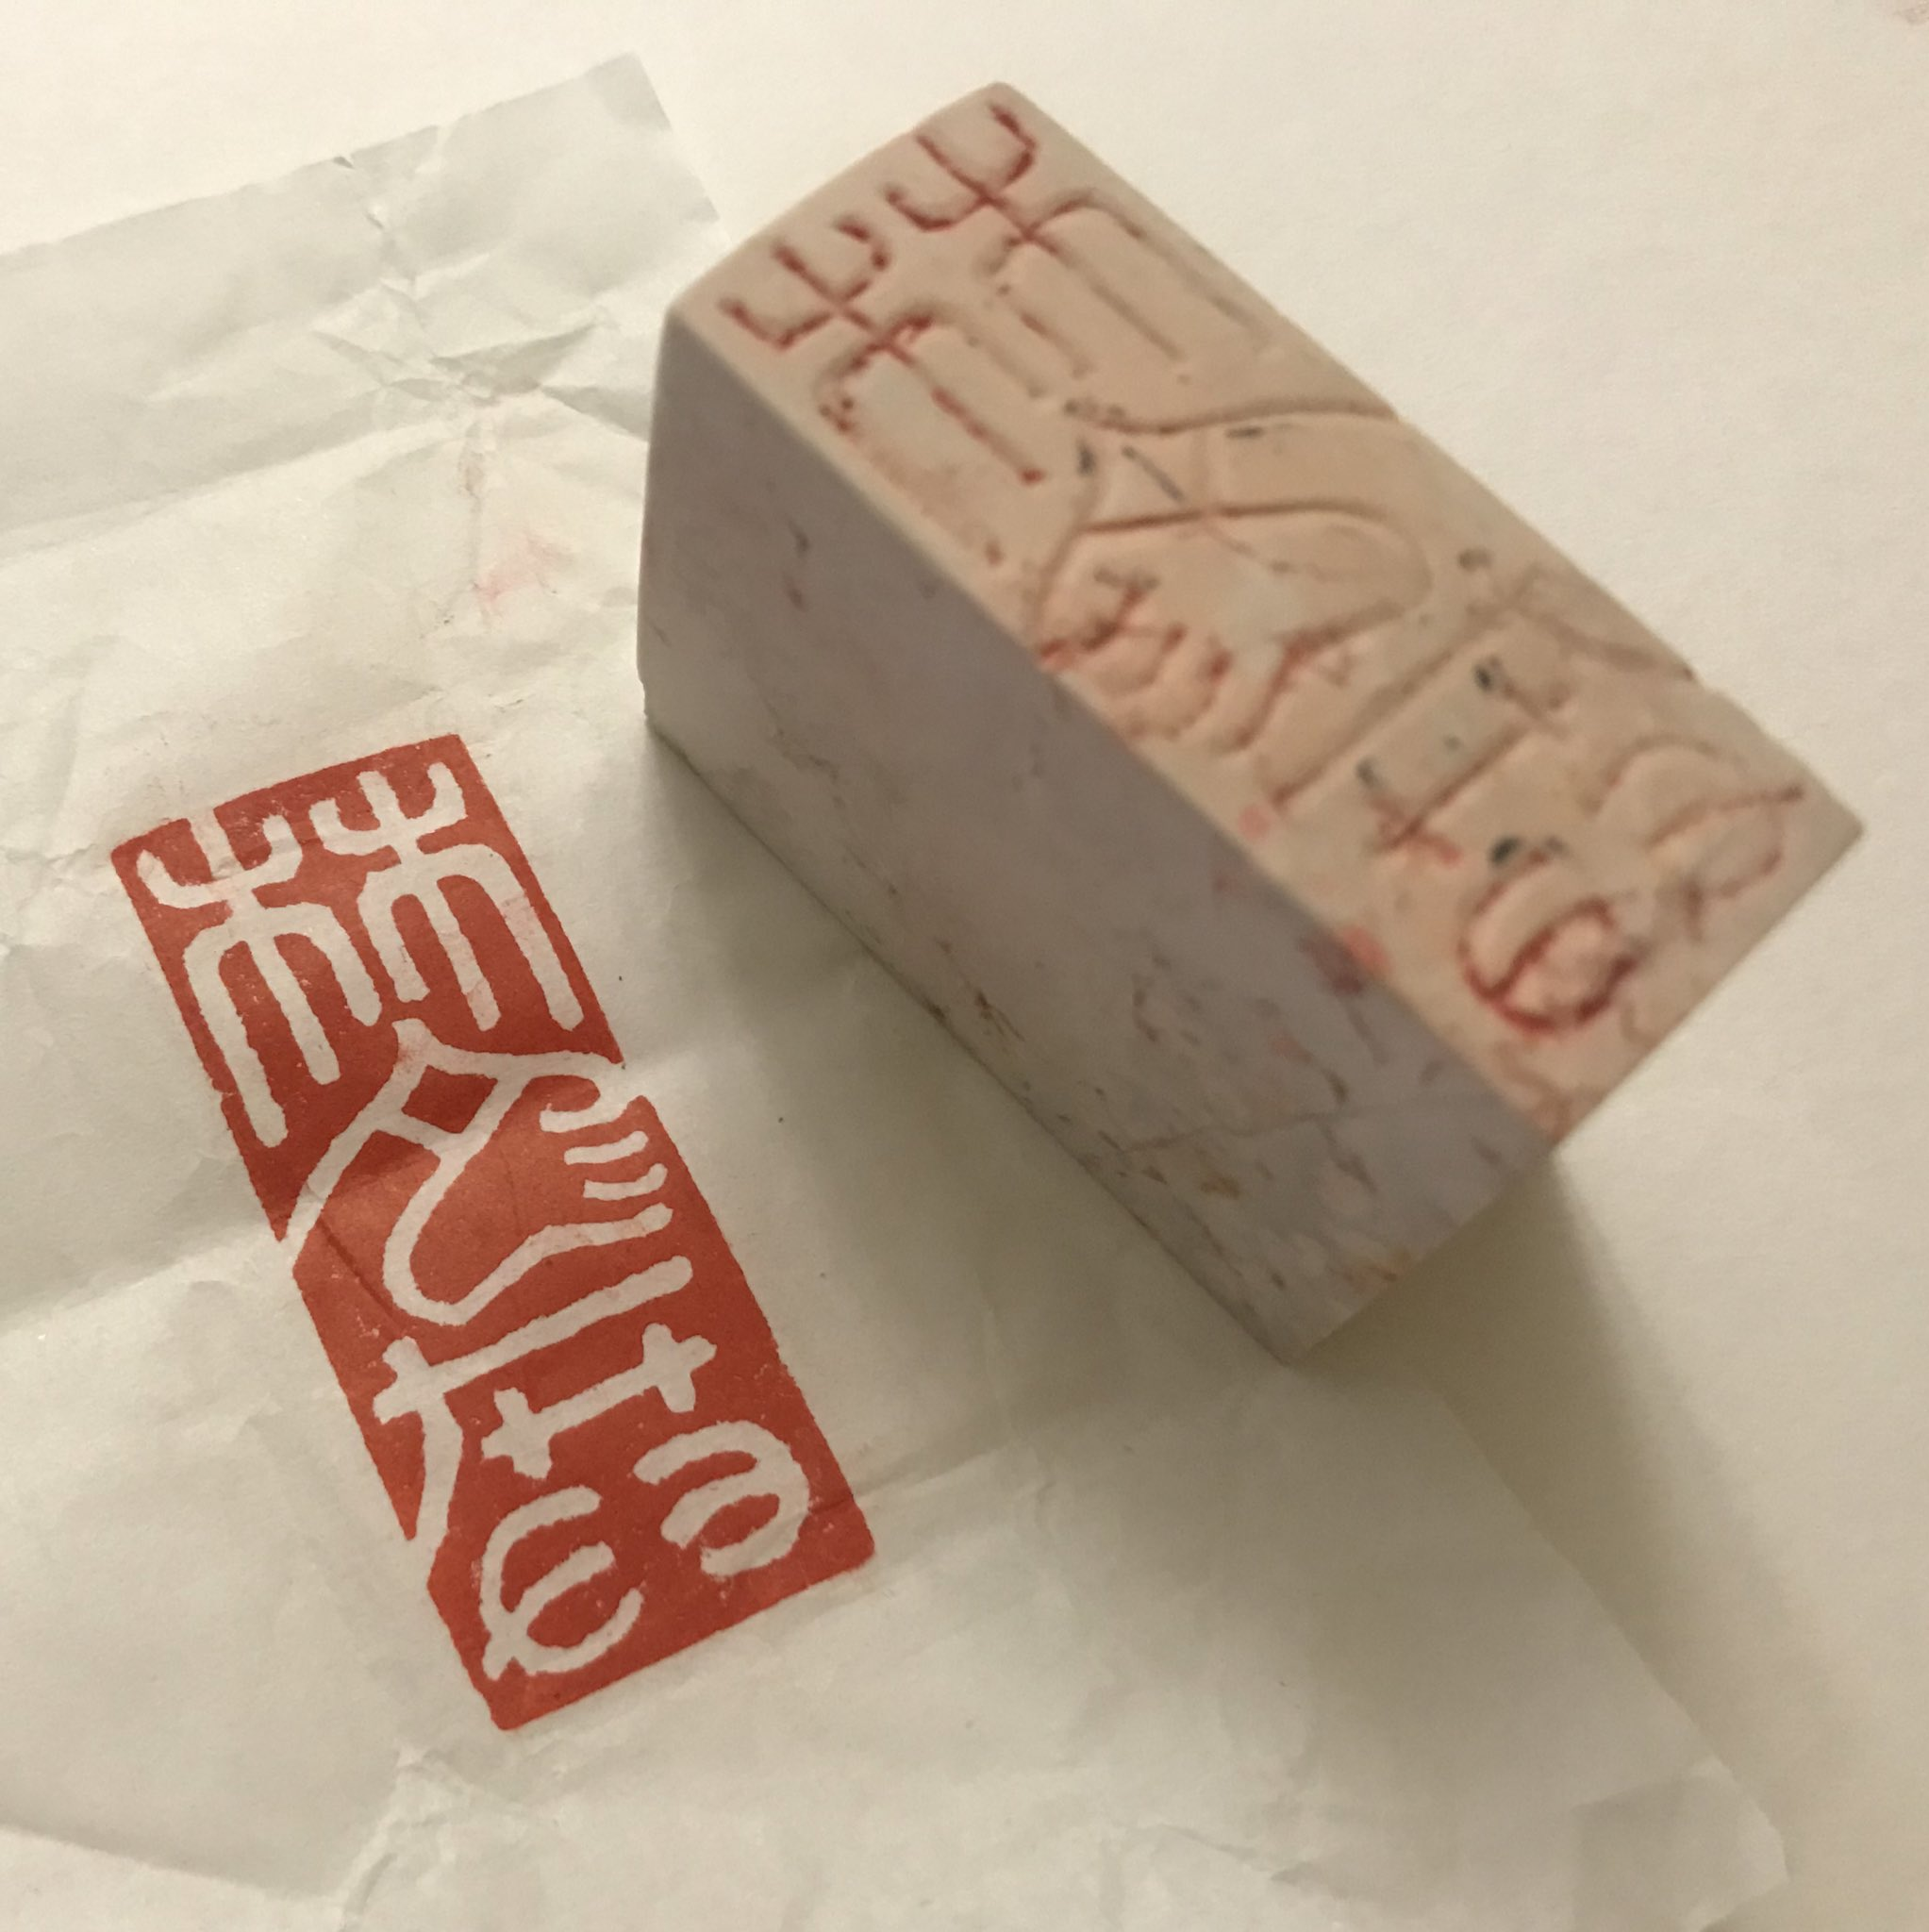
When I made the most recent revision to my signature, I decided to get it professionally carved into soapstone, and had the company confirm that I wasn’t going to run into any similar embarrassing misunderstandings with the design. The actual seal carving ended up being very expensive (considering I could have just laser engraved it myself), but I valued the peace of mind that came with having someone knowledgable vetting it. Experiencing how the seal design transferred so cleanly with good quality seal paste (the ink used to stamp the blocks with) also unlocked the next step in my journey.
QArt Codes
Some time ago, I read this blog post about embedding images into QR codes. As a tl;dr, QR codes are made to be tolerant to damage. Most QR codes that contain logos in them just cover the data contained in the code and take advantage of the error-correcting algorithm to ensure the right values are read out. “QArt Codes”, on the other hand, use a provided image to generate a URL that naturally encodes to something that resembles the source image.
I can’t remember what led me to the article initially, it was a looooong time ago. I may have been working on a puzzle hunt for AVCon that used QR codes to log people’s progress and I wanted to embed the AVCon Invader logo into it (so some time around 2014). But the puzzle hunt, and QR codes in Aus generally didn’t catch on so the idea just got relegated to the back of my mind.
Still, QArt codes are super neat and I’m surprised I haven’t seen them in the wild more. Actually, I think the page that generated the codes was down during the rise of QR codes in the pandemic, so there was a bit of a missed window. But the page is back now, and you can play with making your own! Or if you want to play with the code there’s a standalone version you can run locally.
(Side note, when I was researching game-parsing screen readers to work on Ikalog stuff, I ran into this blog post by Up Banking. That’s the only QArt code that I’ve recognised in the wild to date)
Adding 2+2…
This is the post that lit the lightbulb in my head.
I mean, having hit this point in my post it’s pretty obvious what we’re gonna do, right?
QArt Chopping and Changing
“So how did you lose hours of your life to this? There’s a page that generates them, you just put your picture in there and you’re done, right?”
Well, to start off with, as I mentioned above the page that generates them was actually not available for some time, so I had to mess around with the original QArt source code (with a few headaches) and then later had the fortune of running into the standalone version.
After that… I lost time to the search of perfection.
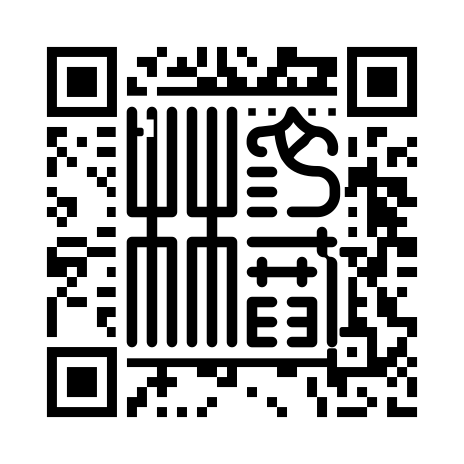
Here’s my first draft of a painterly QArt signature. The output of the QArt generator still had a lot of noise, so I used painterly brushstrokes to make the noise look more appealing. At this point I still only superficially appreciated the stuff in the article and while I knew about some areas that were more important to preserve than others I was mostly just drawing willy-nilly with the understanding that “QR codes can repair damaged data”.
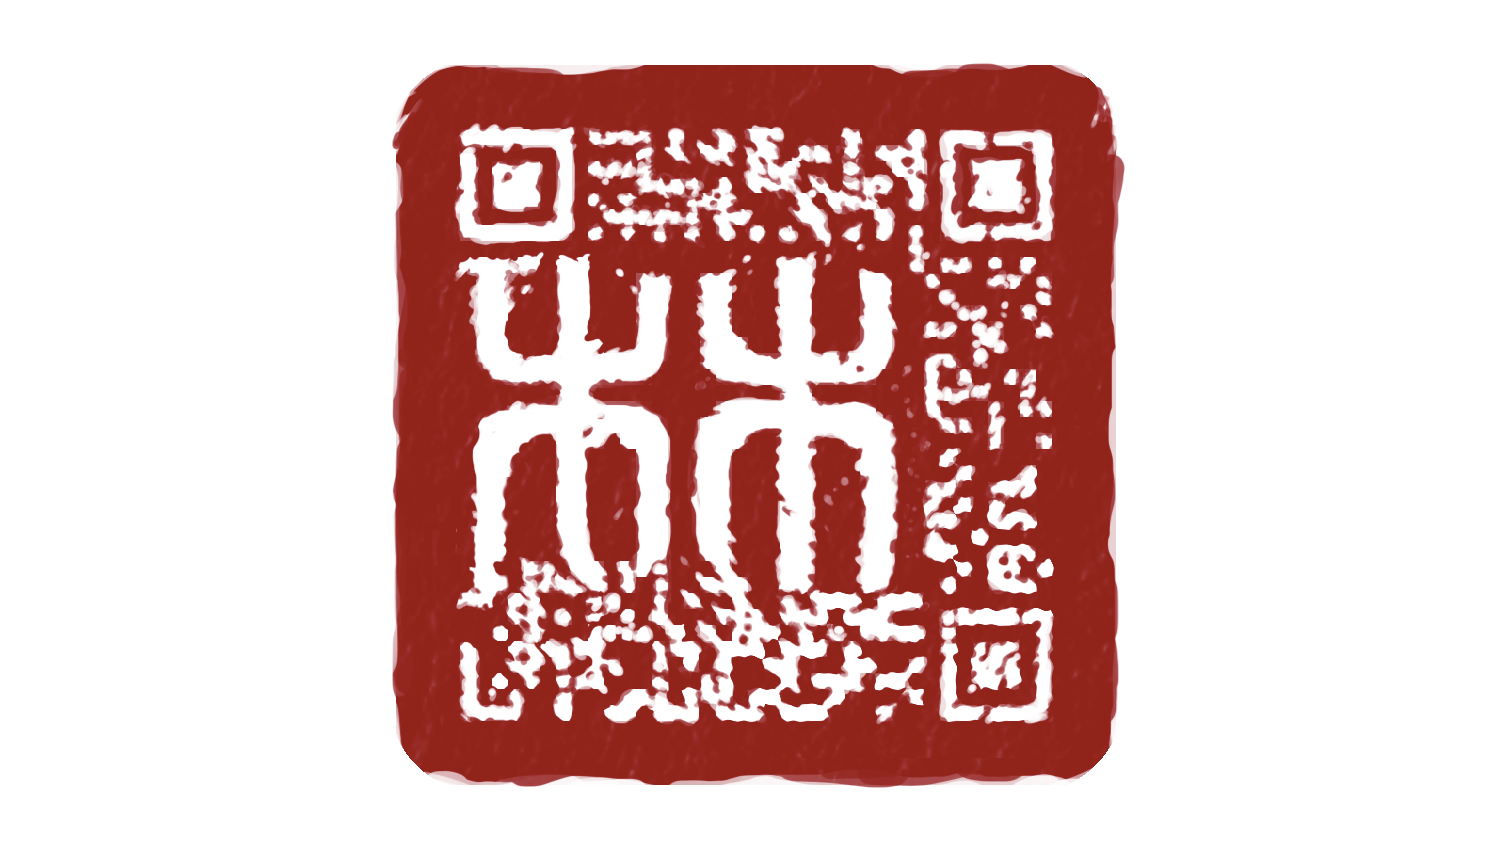
It’s neat but it’s off-centre, it contains only my surname and it probably won’t scan properly when scaled down for overlaying on art.
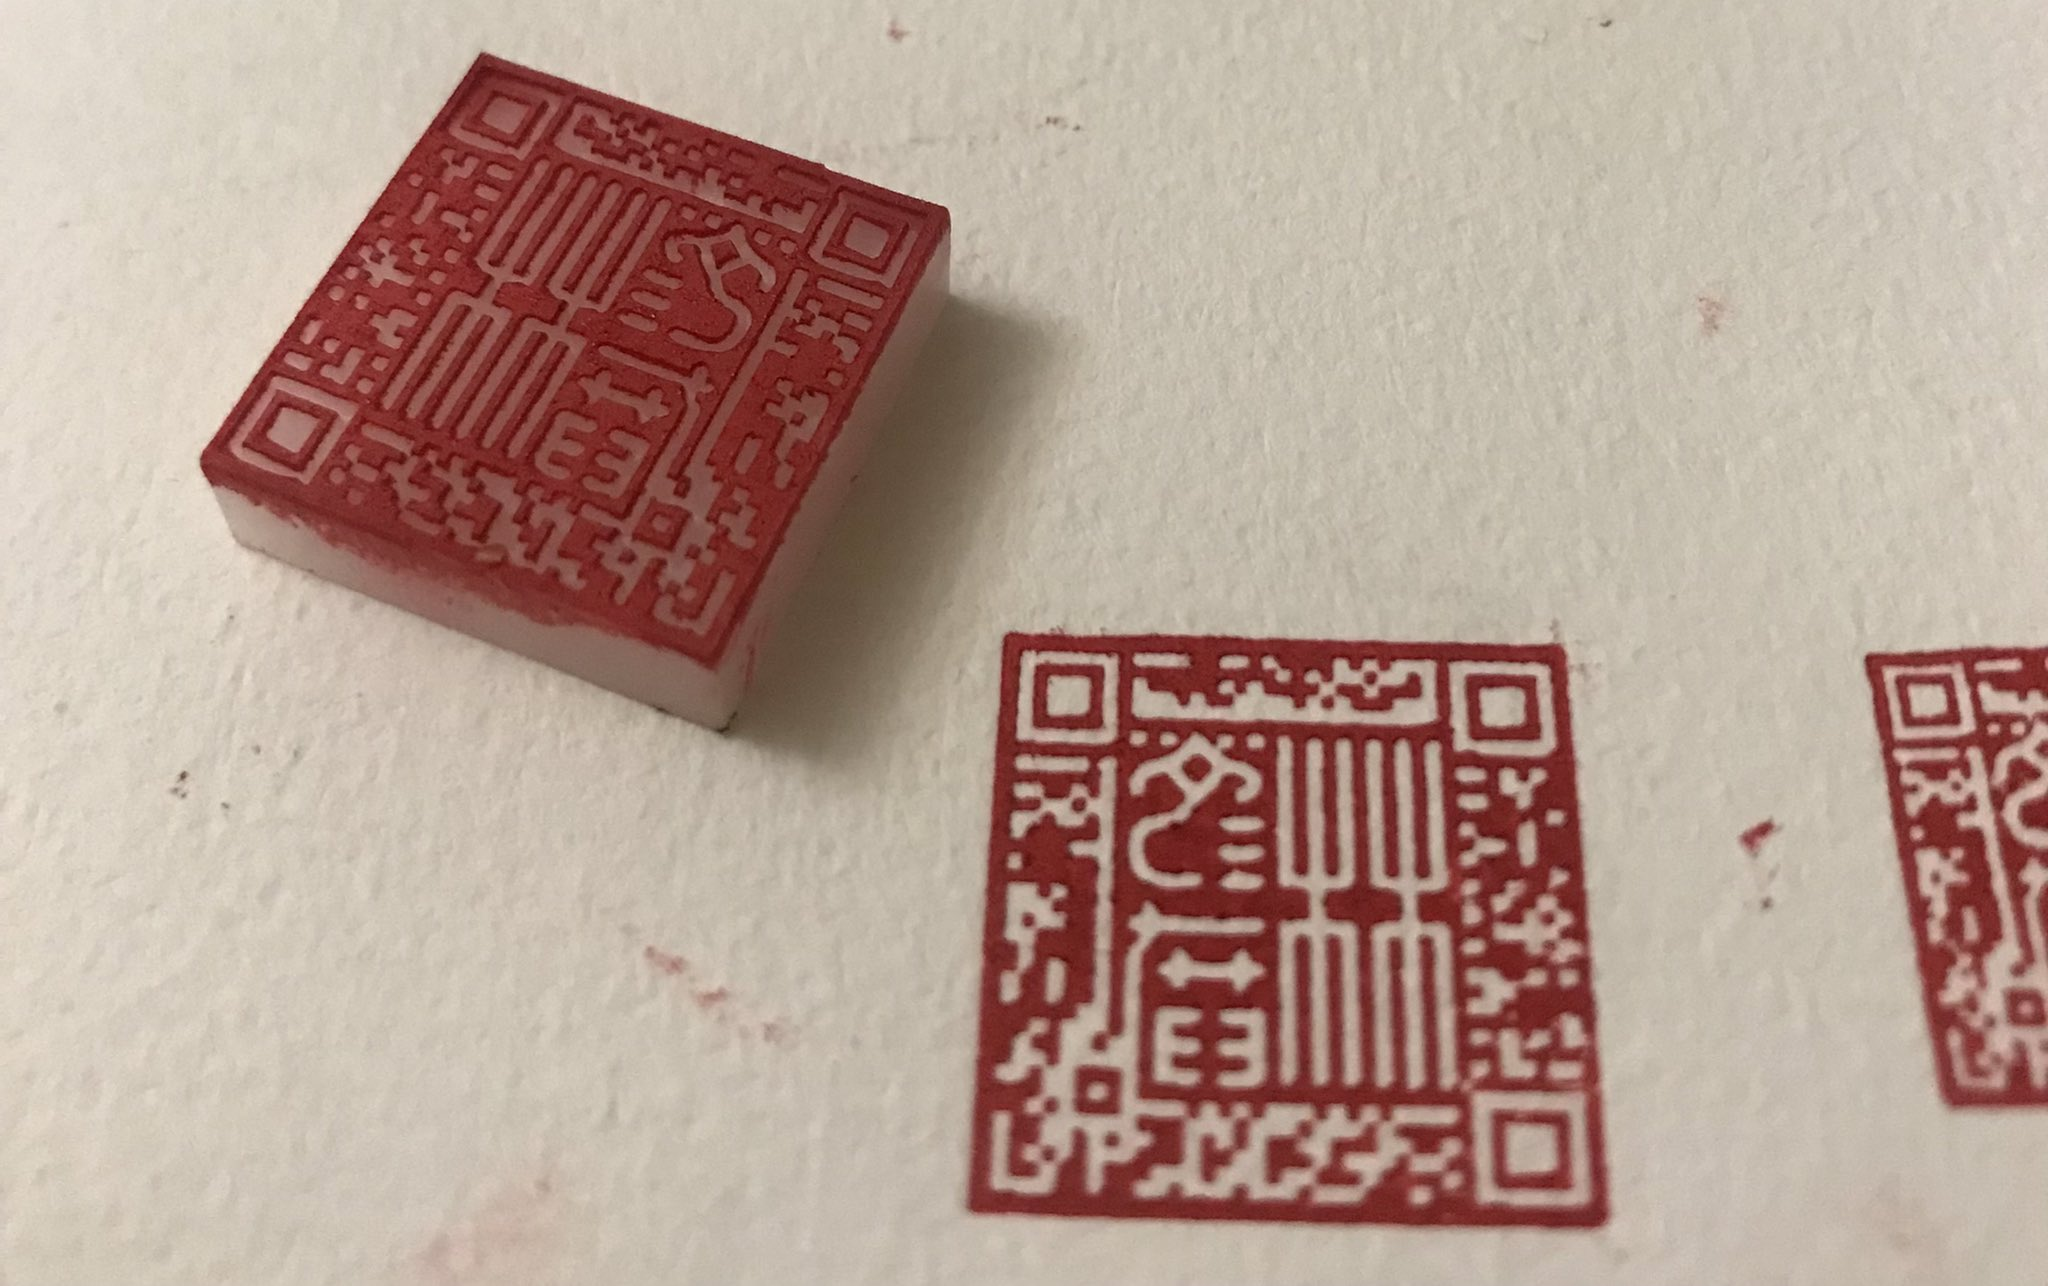
I was satisfied for a while with the proof of concept, but later I started thinking about laser cutting myself a new signature chop anyway, as the soapstone one I’d purchased was too large to use on A4 and smaller art (the majority of my pieces!)
So I looked at the QR codes and realised that I should provide a source image that wouldn’t need to scale. I want to control the pixels of the code so I should provide a pixel art version of my signature.
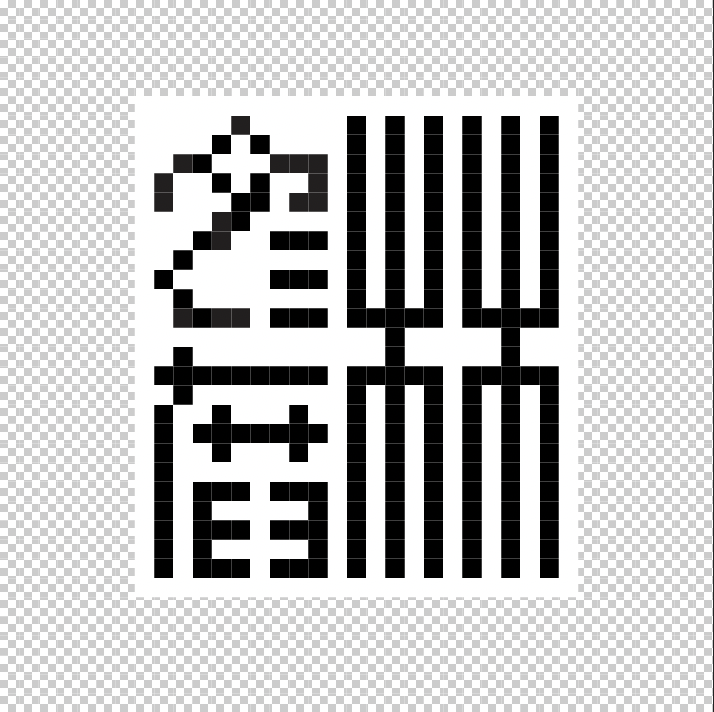
This provides an okayish output – it’s a good basis on which to paint over parts to arrive at a more aesthetically pleasing version.
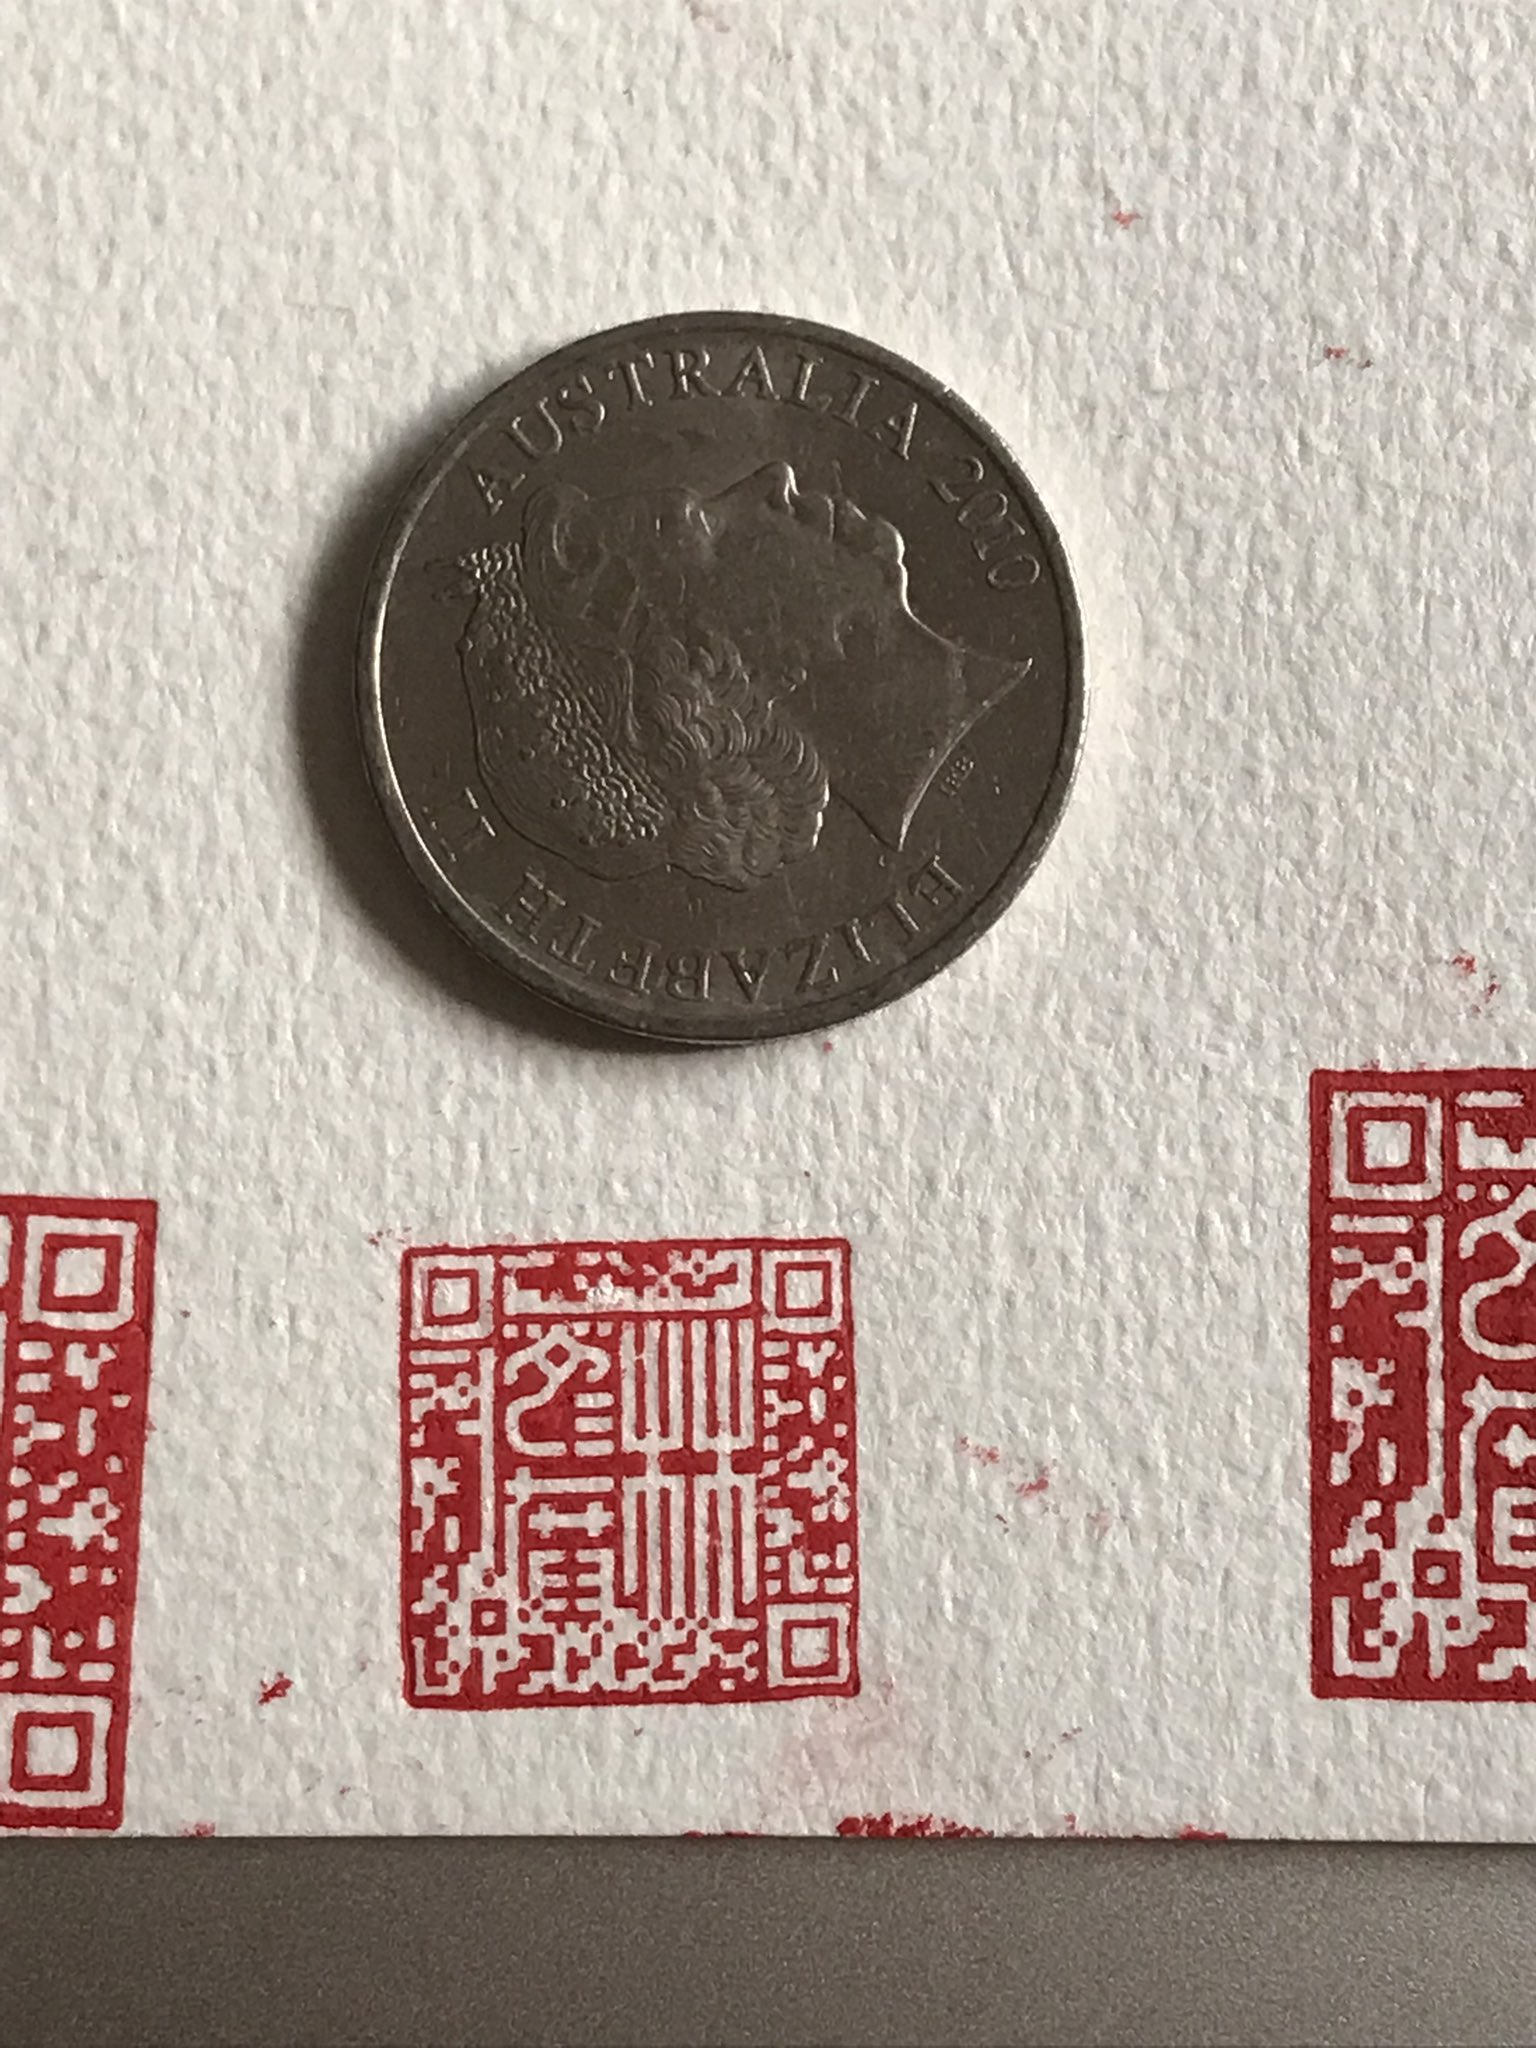
I did do some test runs with this kind of “corrected” design and to my delight they did scan when stamped.
However, I anticipate that the stamping process can be error prone and therefore it will be impossible to perfectly transfer the design. So I keep returning to these QArt codes to try to minimise the errors. First by lowering the amount of modifications that I make to the generated code…
Then, by changing the generation of the code itself.
One strategy was to reduce the area of the QR code that must be dedicated to my URL. I chose not to use a URL shortener. I intend to keep the chenonetta.com domain into the forseeable future but I can’t control what happens with any URL forwarding services.
I also opted to include the full http:// prefix in the URL. I did some playing around with readers and some automatically open pages if the URL starts with www. or ends with a .com but I didn’t want to rely on that behaviour. I kept the ale subdomain but that’s the least defensible decision and I might change my mind on it in the future.
So how to save space if I’m not shortening the input data? The original QArt coder uses byte encoding for the main part of the URL. This uses 8 bits per character. I modified the generator to create the URL in two parts – an alphanum encoded section for the main URL and then byte encoding just for the # that joins the URL and its throwaway anchor. Alphanumeric encoding uses 11 bits for every two characters. Overall I did still save a little space, even with the extra stuff needed to define the single-character byte encoded section.
I also played with manually specifying the masking strategy (the mask is a pattern that gets XOR’d over the generated QR code – read the original QArt code article for details).
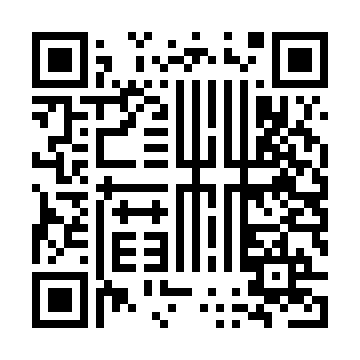
After a lot of iterating, this is probably the closest I’ll get for now. I think this is technically still a damaged code but the areas that I drew through are part of the instructions about how to read the code, not the data. Like the data itself, there are some redundancies for the instructions so the codes still scan ok. Most of the time I’ve spent on these codes has been spent in the cleanup and tweaking stages – what can I get away with without introducing errors?
This is supposedly an error free code according this debugging website – though the scale of the source image definitely affects its assessment of whether the code is error free or not. The site also doesn’t recognise flipped QR codes (even though other readers seem to be fine with them)
Being forced to make compromises on the final outcome always keeps me coming back to tweak things again and again – can I change the orientation so that I don’t have to use a flipped code? Can I rebalance the density of noise around the main design so that it doesn’t distract from the centre as much? Can I smooth the curves in the image more? I’ll just keep searching and searching for the ideal version of this design…
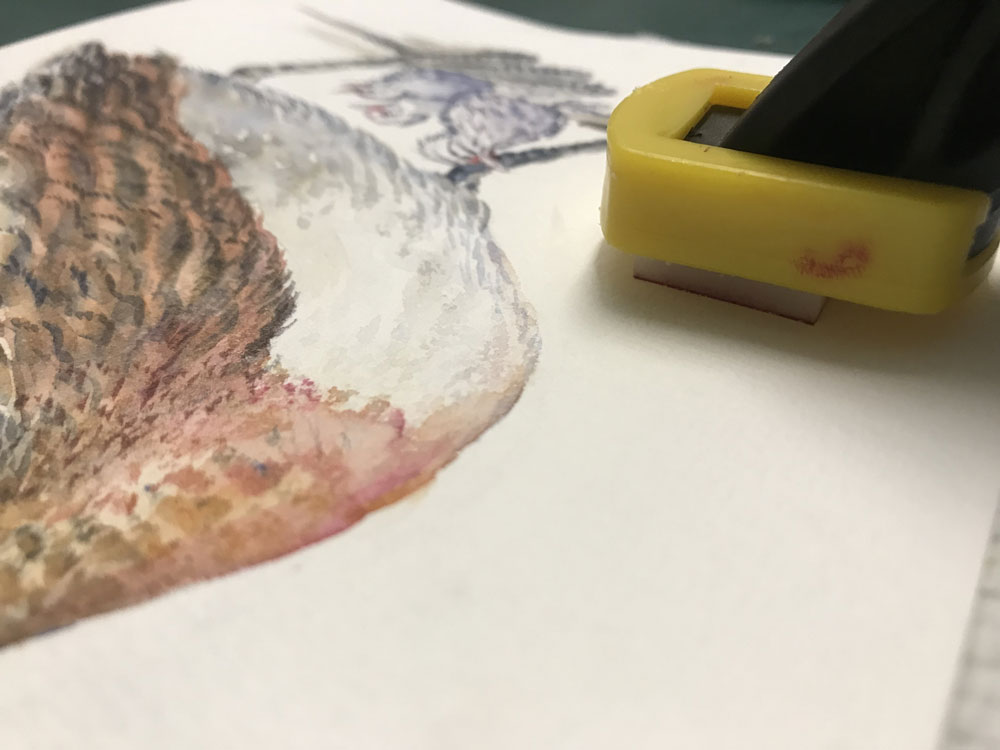
To wrap up, here’s the current setup I use for transferring the print to paper. I’ve been experimenting with moving to block printing ink instead of seal paste, because the latter is oil based and takes days to dry. So far I haven’t had a high success rate with the new ink but I think I’m learning. Sometimes a dodgy print can be recovered with a little bit of hand editing, though it requires some deft brushwork!