I’ve made a few badges from Pokémon before. My Hoenn badges were 3D printed on Shapeways out of full-colour sandstone.
My Unova badges were also printed on Shapeways, but that was only the bases. The colouring and finishing touches were done by hand. I used acrylic and watercolour paints as well as liquid sculpey to create the glassy look in those badges.
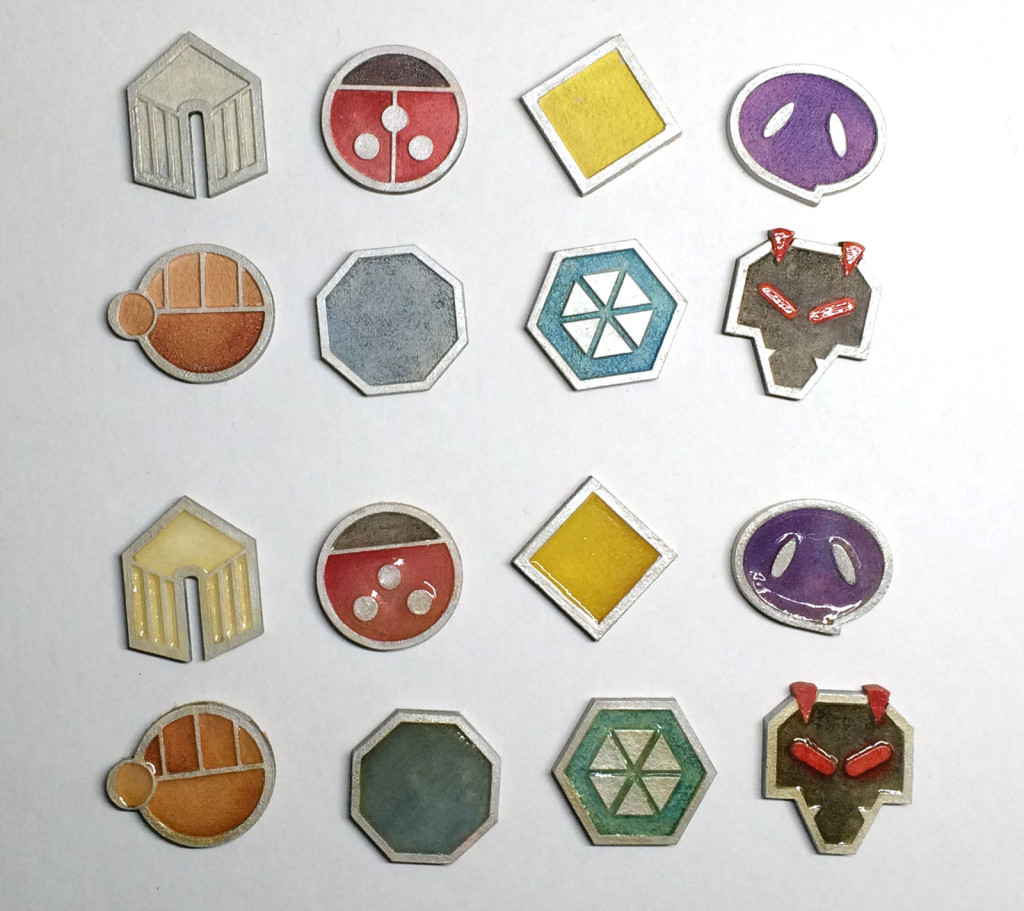
Now that I have a laser cutter I can make the flat badges (Johto, Sinnoh and Unova) from laser-etched wood. I paint them and fill them with a gloss varnish to create the glossy effect. The watercolour paint bleeds into the varnish slightly, which can add to that enameled look in some cases and can be a hindrance in others. In addition to the paints bleeding, I also found that the burnt wood residues seep colour into the varnish! Compare the top set of badges with the set below. The varnish has done an excellent job of deepening the colours and making them stand out… but you can also see a yellowing that comes from the MDF. It’s most noticable in the Zephyr badge but the blue badges also suffer pretty badly.
I’ll be working to fix these issues but I think that overall these badges are working out nicely. One day I’ll finish the 3D models I’ve made of the Kalos badges…
P.S. you’ve probably noticed that I’ve been playing around with the look of the Hive badge. While the rest of the Johto badges had that uniform look, Bugsy for some reason decided to have a black-rimmed badge. Perhaps in a limited palette the concept of the ladybird didn’t translate well with a silver rim. Regardless, I decided I’d have no such inconsistency in my set. The Rising badge gets a little bit of red in its borders but I guess that’s the privileges you get when you train dragons. No way am I letting a kid bug trainer get away with nonsense like a differently coloured badge!

