Month: August 2012
Copics
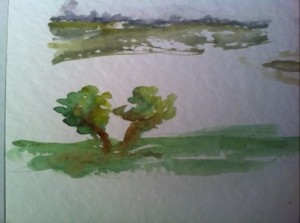
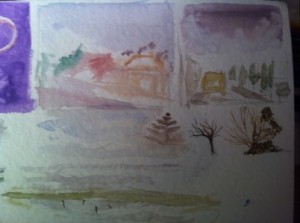
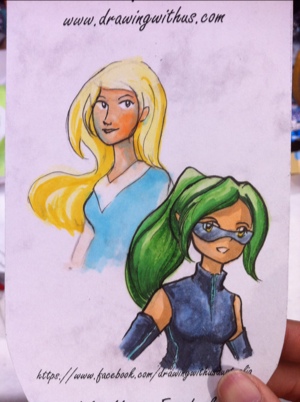
This past weekend I’ve been at Manifest, the Melbourne anime convention. At one of the stalls selling art supplies I had a chance to do some scribbling and try out some Copic markers.
At some point in my art history I’m sure I would have snapped up a set but now that I’m enjoying using watercolours it seems superfluous to invest in the Copics. Still, I had some good fun trying them out.
Garlic Chicken
This recipe originally comes from here but since it’s so simple I just wing it these days. Here’s an approximate transcription of the version I cooked up last Sunday.
Ingredients
1kg chicken breast fillets
Lotsa breadcrumbs. I crumbed 8 slices of bread this time, though that’s more than I usually do.
I like to toast my bread before crumbing it. To get them sufficiently dried out, I stick two pieces into each slot of the toaster and toast them on the minimum setting. Then I flip them inside out so the dry crusty sides face each other and toast them again.
Grated parmesan cheese. 1/2 cup to 1 cup. I eyeballed the amount I wanted out of the shaker.
Herbs. I like using thyme and oregano.
GARLIC. Lots of chopped garlic. I probably chopped up the equivalent of a small bushel worth of garlic.
Olive oil. 1/2 cup to 1 cup.
Method
In a separate bowl, combine the garlic and oil. I usually add a bit of salt to the oil if I remember. Zap these in the microwave for about 30 seconds.
Prepare the crumbing by mixing together the breadcrumbs, herbs and parmesan. Add pepper to taste.
Dip each chicken fillet into the garlic/oil mixture then cover with the breadcrumbs.
Lay pieces in a baking tray.
If you are as generous with the crumbing as I am, you’ll probably have lots of crumbs left over. Layer these over the chicken and drizzle remaining/additional oil over the top.
Serves 6. Works great served with mash potatoes!
I totally forgot to take photos throughout the cooking and preparation. Here’s the pieces that remained after we’d extracted dinner and lunch serves 🙂
Balance
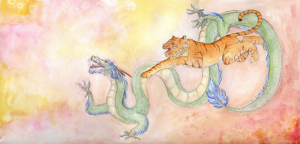
I painted this picture as a Christmas present for John back in 2010. When I uploaded it to deviantArt, I promised, “I’ll upload concept and progress sketches to my blog after Christmas.”
Wel’p Christmas came and went and another one too, and it’s finally time for me to fulfil that promise.
The Idea
I wanted to paint a picture that could be quite personal but would also be quite ‘accessible’ to the casual viewer as just a pretty illustration. Based on this I discarded the possibilities of doing portraits and looked instead to find suitable avatars of myself and John. The answer was quite simple – Zodiac animals. What fortune that I had such a great pair of animals to work with, too!
Conflict
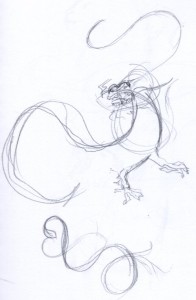
Do a google search for ‘dragon tiger’ and you’ll immediately find images of the two locked in combat. Frequently poised over a Yin-Yang symbol, the two animals represent balance.
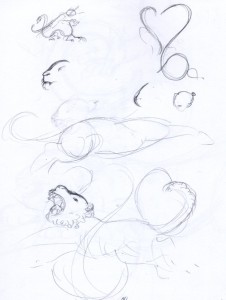
My first concept sketches attempt to riff on this idea.
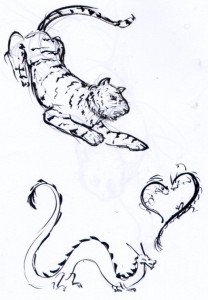
Finding nice flowing lines is easy when working in ink.
Purpose
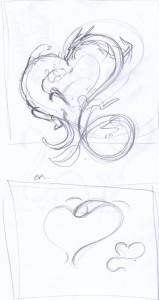
The hearts felt hackneyed and the composition uncomfortable. I decided that I wanted to portray the dragon and tiger as an exuberant and harmonised pair. For this I decided to move them in the same direction, as though they were running toward a common goal.

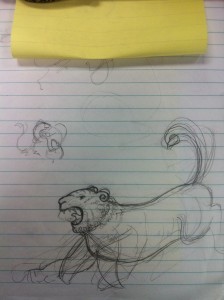
A very tiny thumbnail with the new composition scribbled out. I think I’d intended originally to have the animals in some kind of setting, possibly clouds or a mix of cliffs and flames to go with the elemental years we were born in.
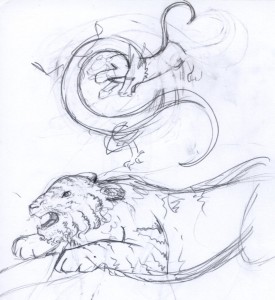
I wanted to present a quite stylised tiger. I had been inspired by a piece of art that had recently been printed on the back cover of ImagineFX.
Unfortunately my laptop was stolen around March 2011 so I’m missing all the Photoshop sketches and any progress scans I took. But for a quick run-down of my process I think it went something like this…
- Sketches were scanned into Photoshop and composed into a rough arrangement.
- The sketch was worked on in Photoshop, correcting awkward anatomy and finalising details.
- The final lines were traced to the watercolour paper (probably straight from my computer screen, as I can’t find a paper-trail (hur hur) to indicate I printed the lines).
- I laid down washes and underpainting, sprinkling in rubbing alcohol to create texture (it’s most effective in the little bubbles at the top left). I don’t think I used any salt for this painting, and if I did it wasn’t very effective!
- Lastly I worked up the Dragon and Tiger in a series of layers. The dragon’s scales and the tiger’s stripes were probably added last. I also used a white gel pen to add texture (along the dragon’s hair and in the tiger’s mane).
Like many of my paintings, this one doesn’t have a lot of tonal depth as I was timid about laying down too much paint and being unable to correct mistakes. When choosing a frame and mounting board for the painting I kept this in mind and went for a light mount and a dark, rich frame to bring the viewer’s eye to the painting and complement the tiger’s stripes.
Invader Stamps
The prototype for these stamps was created at the AVCon Ball in June. We needed a way for people leaving the venue to be identified on their return and the German House also wanted to have a way of verifying people eligible for the discount schnitzel offer.
As the idea of making an invader stamp was something that had been bouncing about in my head for a while, I figured I’d give it a shot. I borrowed a Stanley knife from the Streetgeek folks and rustled up a regular ol’ eraser and knocked up the stamp in five minutes or so.
Without a stamp pad this first stamp didn’t get us very far (we were using a Sharpie to ink it which eventually dried enough that the transfer stopped working) but it did prove that the idea could work.
For the Indie Games Room component of the Ultimate Gamer qualifiers we had to provide the developers with a way of verifying that attendees had passed the challenges associated with their game. It was time to make some stamps en masse…
Theme and Variations
As a homework exercise for life drawing last year we were tasked with drawing a particular image in as many media and styles as we could (aiming for about 20 total). Here’s what I came up with…

Top left: Lead pencil.
Top Right: Felt-tip pen outlines.
Bottom Left: Brush pen.
Bottom Right: Highlighters.
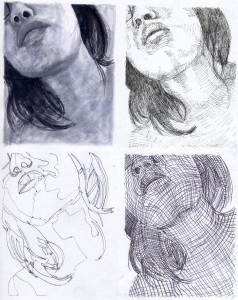
Top left: Grey markers.
Top Right: Fine-liner pen, taking inspiration from Freud.
Bottom Left: Biro, trying to define the image using a continuous line across the contours of the face.
Bottom Right: An attempt to draw a net across the contours of the face.
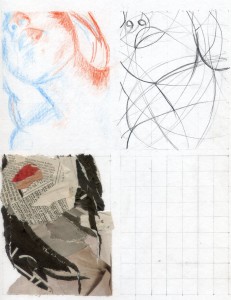
Top left: Warm and cool planes of the face.
Top Right: Extended lines – every line enters and exits the image at the edges and the line width is modified where needed.
Bottom Left: Newspaper collage.
You can also see the grid I was using to reproduce the image in the blank bottom right area.

Top left: Watercolour.
Top Right: Charcoal and white gauche.
Bottom Left: Wet-in-wet ink.
Bottom Right: Charcoal – the entire area was covered in black and then erased back to produce the image.

Some experiments with using a black background.
Top left: White conté.
Top Right: White acrylic, using only horizontal strokes.
Bottom Left: White acrylic, I tried to paint out ‘pixels’ of colour however the black base I used kept bleeding into the paint I was laying down.
Ayvee sketches
A bunch of sketches and scribbles of AVCon mascot Ayvee.
From t-shirt design brainstorming:
From trying to define some kind of style for the booklet comic:
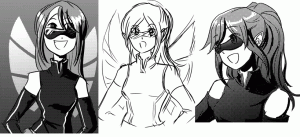
The one on the right was the first drawn up, and was copied from a panel from this comic. Once I’d gotten a feel for the style I was aiming for, I drew the others.
And some fun scribbling:
Butterfly Cupcakes
Not quite as speccy as these butterfly cupcakes, but delicious nonetheless!
I found this recipe here and although it feels redundant, I’m transcribing the recipe in case that site disappears or something. I was pretty sad when the original blog post with my bacon and choc-chip cookies recipe disappeared…!
Ingredients
Cupcakes
115g butter or margarine
112g (1/2 cup) caster sugar
1/2 teaspoon vanilla extract (1 teaspoon natural vanilla essence)
2 large eggs, lightly beaten
225g (1 1/2 cups) self-raising flour, sifted (I never bother with sifting)
145ml (1/2 cup + 1 tablespoon) milk
Filling
188ml (3/4 cup) thickened cream
1 teaspoon icing sugar
About 2 to 2 1/2 tablespoons jam (about 60g)
Extra icing sugar, for dusting
Method
- Preheat oven to 200 degrees Celsius (180 degrees Celsius fan forced).
- Beat butter, sugar and vanilla in an electric mixer until light and creamy.
- Gradually beat in eggs.
- Add half the flour and stir in by hand. Stir in half the milk. Repeat with remaining flour and milk. Beat with an electric mixer for just a few seconds, to thoroughly combine the ingredients.
- Spoon the mixture into patty pans.
- Bake for about 13-15 minutes. The cupcakes are ready when a knife or skewer inserted into the centre of a cake comes out clean. Also, the cakes will bounce back when lightly pressed in the middle.
- Allow cakes to cool completely before cutting and filling.
- Hold a sharp, pointed knife at a downward angle and cut a shallow cone from the top of each cupcake.
- Cut the cone in half to create the ‘wings’.
- Whip cream with icing sugar until thick.
- Place about 1/2 teaspoon of jam in each cake.
- Top with a heaped teaspoon of whipped cream. Position the ‘wings’ in the cream. Place a small dollop of jam between the wings and dust with icing sugar.
Makes 15 cupcakes.

