Template – Box with tearaway strip
If you enjoy these box templates, please considering leaving me a tip! I have set up a tip jar on my Patreon which you can access here.
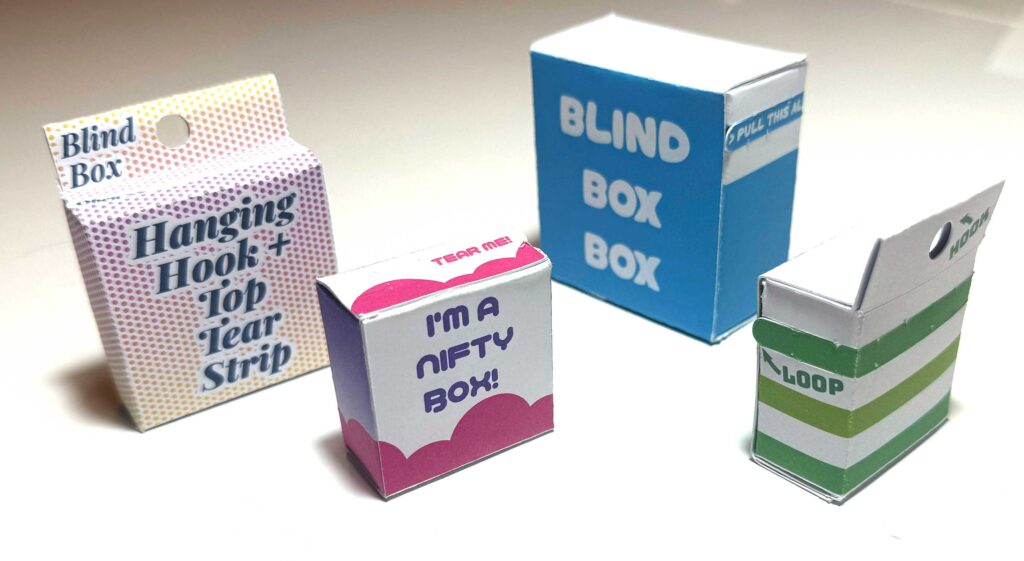
Today’s post is a sort of follow up to the previous double-walled box template. I wanted to design a box to replace the packaging for the bags that I’d previously sold at events.

These were really great as a last-minute packaging – they can be quickly and easily folded from an A4 piece of paper and fit my little squids and octos perfectly. However, for series 2 of the blind boxes I wanted to create packaging that could be stacked for transit and have a bit less of (the perfectly truthful) “last-minute” appearance.
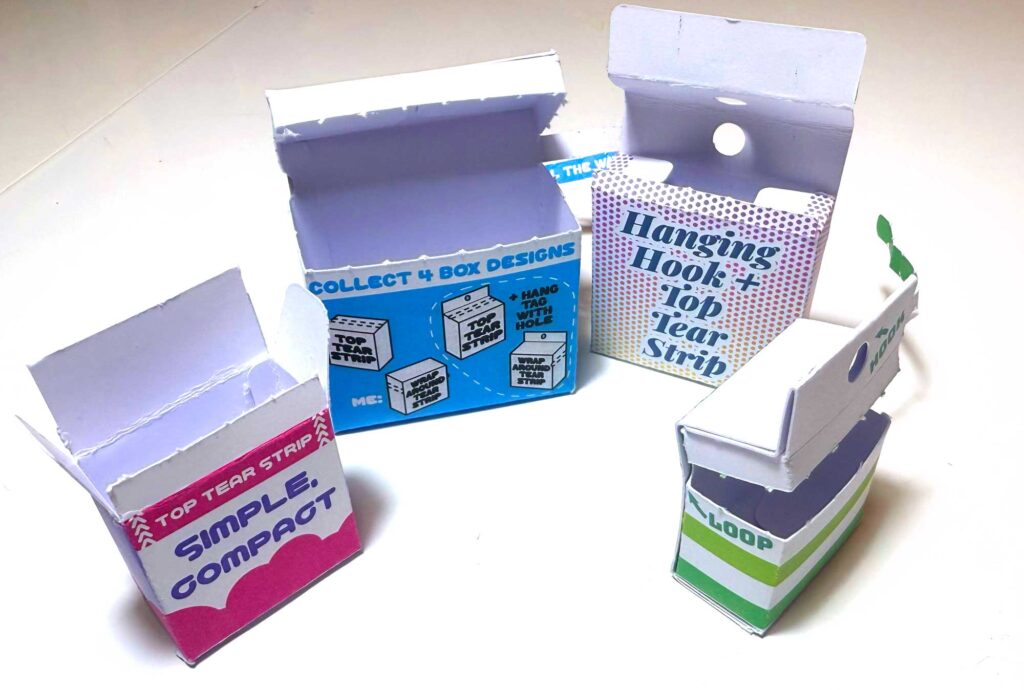
I settled on the idea of a box with a fun tear strip!
Template File
The templates are available via OnShape – you don’t need an OnShape account to view or export the files, but creating an account will allow you to modify my files and update the parameters to your liking.
OnShape is a parametric design tool, and the files are designed so that almost all of the features can be controlled via “variables”.
If you don’t want to use OnShape, you can support me with a one-off purchase on Patreon to get pre-prepared template files. I’ll continue adding files to that page as I receive requests for various sizes.
Navigating OnShape
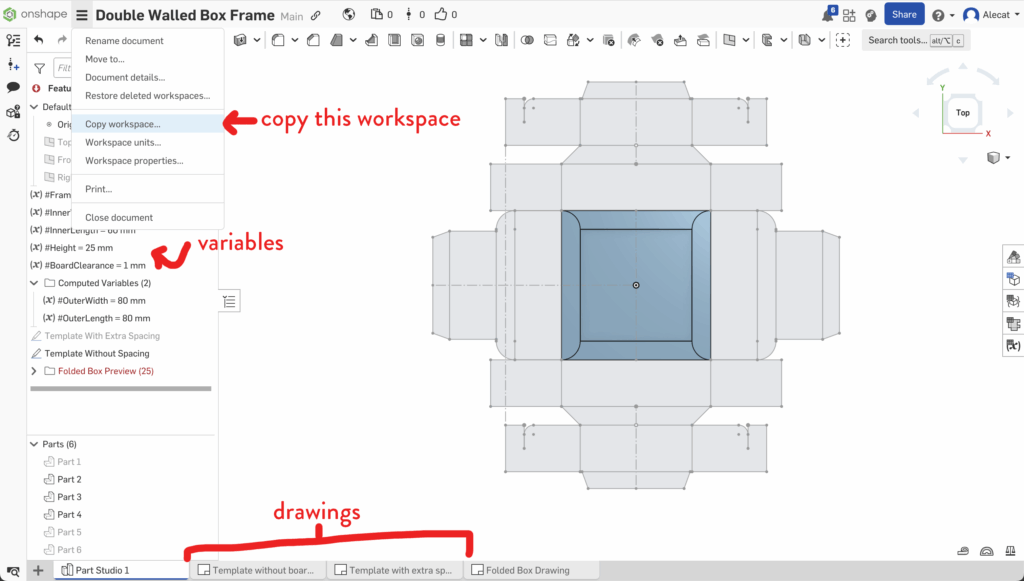
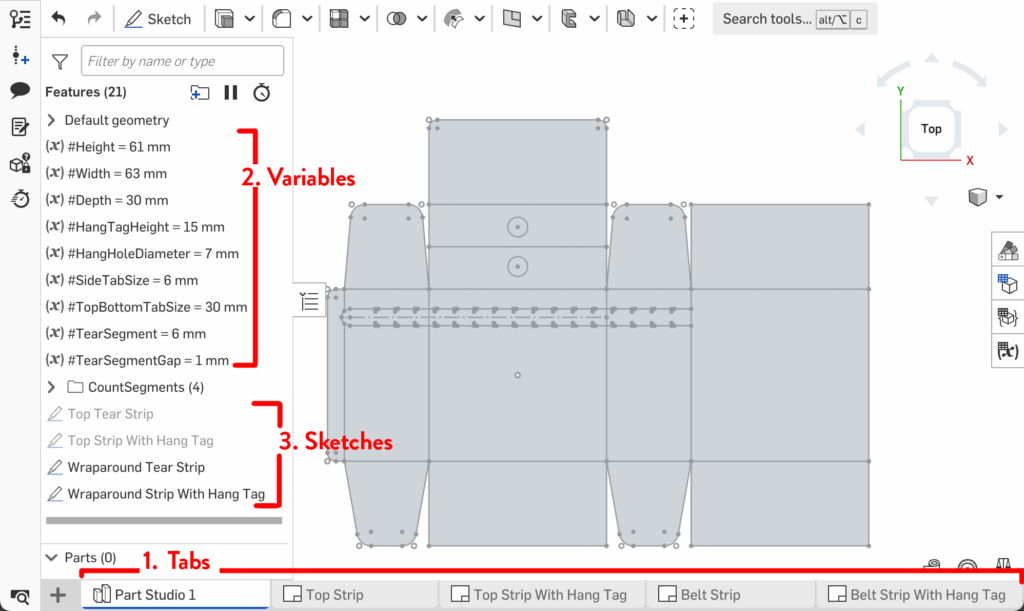
- Tabs – these allow you to change views between the design area and the exportable drawings. There are four drawings with variations of the tear strip location and whether or not the box includes an extra flap that can be used for hanging from a display hook.
- Variables – visible in the “Part Studio” tab. These control the dimensions of the box and its features.
- Sketches – these are the “working” versions of the drawings.
How to Export
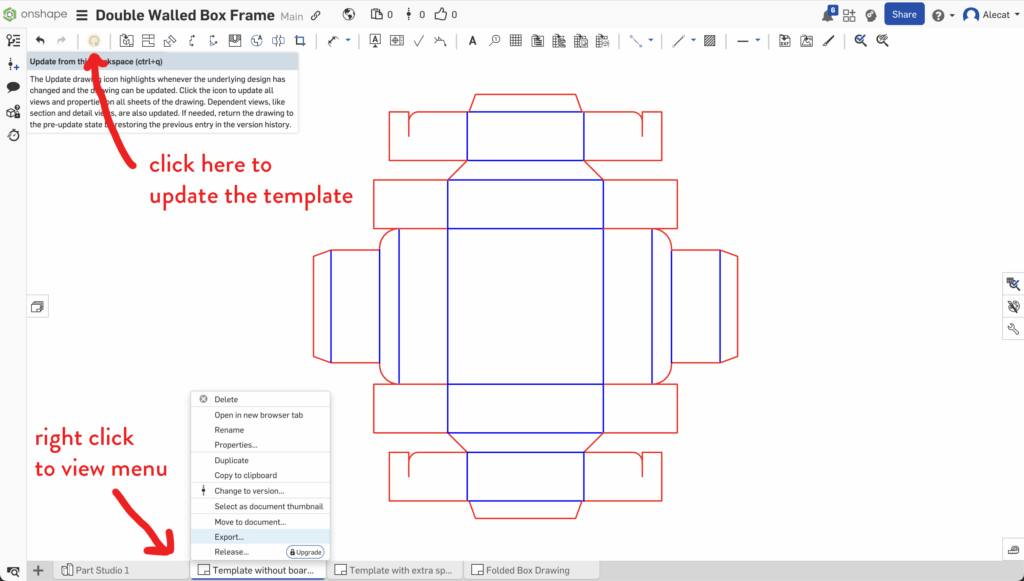
To export a template, select the tab corresponding to the box that you want to make. Right click on the tab and select “Export…”

An option dialog will pop up. Select the file type you want. I’ve tested SVG exports for use with my Cricut. This export option preserves the line colours that I’ve denoted – red for cuts and blue for scoring.
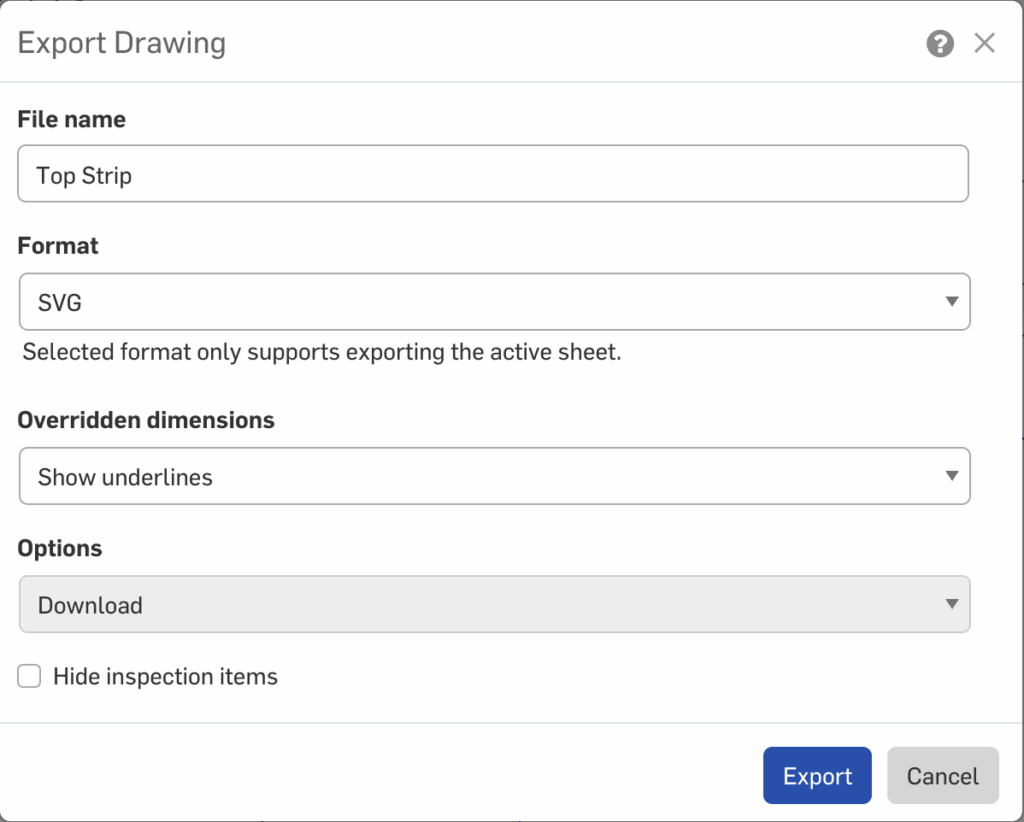
Clicking the Export option will trigger a download – it may take a little while for the file to be ready so be a bit patient if it doesn’t appear in your download folder immediately.
Post-Export Tips
I like to do some minor modifications to the SVG after it’s exported to better adapt it for cutting. These steps are optional but you may find the notes here useful.
Firstly, I like to join the red cutlines. OnShape exports every edge as a separate path, and for many of the paths it’s desirable to connect them.
I start by selecting all the red lines and running the very useful “Join Reasonably” script by Hiroyuki Sato.
You may prefer to do some strategic cuts to the lines again at the sharpest angles – these are areas where the dragging of the cutting machine blade could tear the paper. Breaking the cutline will allow the machine to lift the blade between cuts.
Additionally, I find that the file may need to be grouped to make handling easier. I select all the red lines and add them to a group and all the blue lines and put them in their own group. Then I group the groups together so that the relative positions are maintained; without this step Design Space sometimes misaligns the elements.
When imported into Cricut Design Space, I can then easily select the group for the score lines and mark the machine operation as Score.
Assembly
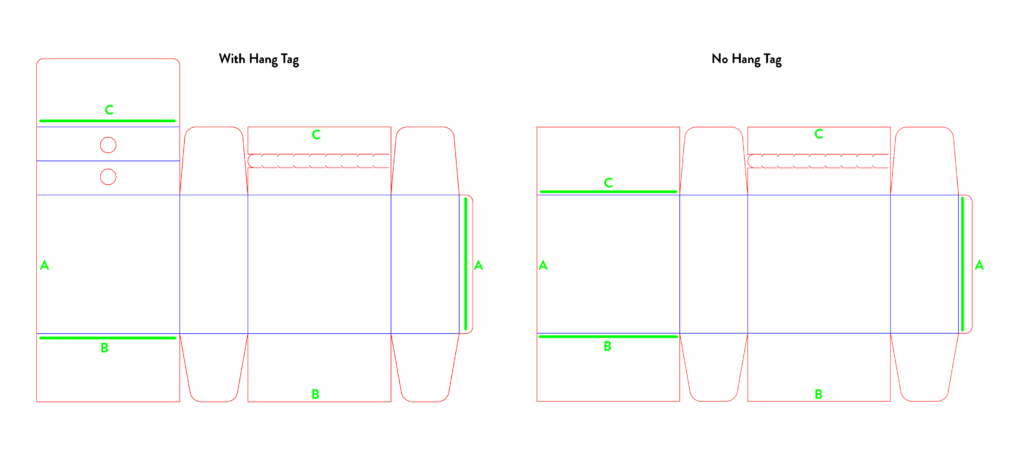
All of the fold marks are marked in blue. All of the folds are done in the same direction except for the C line on the “With Hang Tag” template.
You will need to use glue or double sided tape in three spots to hold the box together. I like to start with gluing on the side tab before the top and bottom.
Customising the template
You will need an OnShape account to copy the file and make your own modifications
Once you have done so, you can modify the variable values to automatically update the box.
Double click the variable to open a dialog. Change the “value” to your desired value and then the green tick button. All the sketches will automatically update.

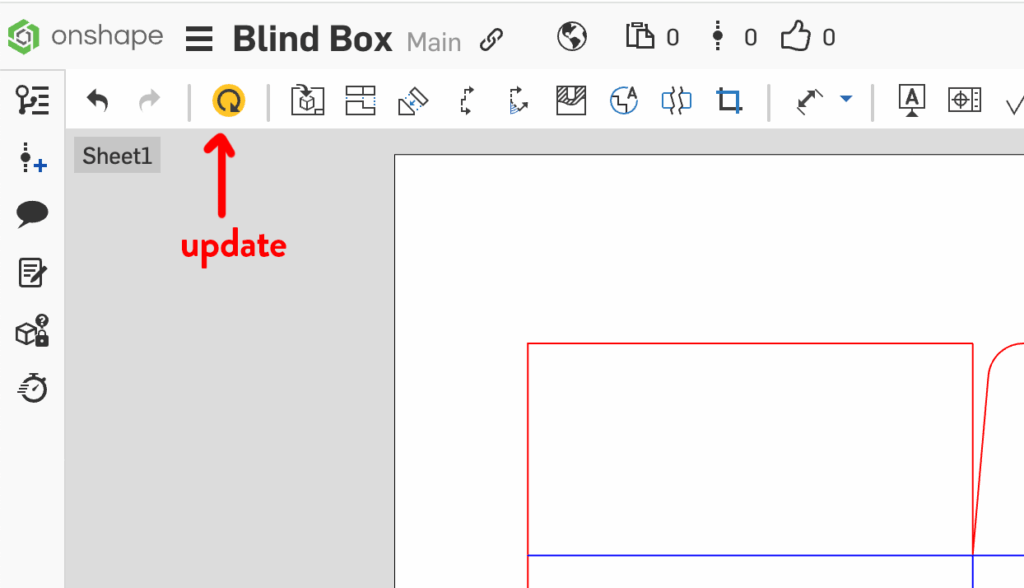
Although the sketches have updated, the drawings do not update immediately.
You need to open the tab for the template that you want to use and click the yellow update button. Then you can export the file and your updated template.
Variables
Box dimensions:
- Height
- Width
- Depth
Flaps (the side flaps are the “wings” at the top and bottom of the box):
- FlapSize – by default this automatically calculates to be about half of the box width, plus a little gap
- FlapAngle
Hang tag: (optional, used only for the “With Hang Tag” templates)
- HangTagHeight
- HangHoleSpacing – the gap between the top of the hang tag and the hole
- HangHoleDiameter
Assembly tabs:
- SideTabSize – the width of the tab that runs vertically up the box
- TopBottomTabSize – the depth of the flaps that fold on the top and bottom of the box to support the outermost flap. This has been set to use #Depth, but it doesn’t need the full depth (make it smaller if you need to save space when fitting multiple boxes on a page)
Tear strip:
- TearStripWidth – width of the tear strip
- TearSegment – length of the perforation
- TearSegmentGap – gap size between perforations
- TearStripBeltGap – distance from the top of the box to the top of the tear strip (belt style tear strips only)
If you enjoyed this post and found it useful, please consider leaving me a tip. Thank you!


